
Make an easy cup cake stand
Here's a quick and easy cup cake stand that you can make in an hour or two. The design allows you to easily assemble and pack away when not needed. Nice idea for children's parties!

You will need:
[2] quarter or one half sheet of hardboard (or supawood, cardboard, foam core)
[10] small blocks of pine (or supawood)
[1] length of pvc pipe or cardboard core
Wood glue
Hacksaw, jigsaw or cut-off saw
Jigsaw and clean-cut blade (or scroll saw)
180-grit sandpaper
Rust-Oleum 2X Painter's Touch
Decorative trim
Here's how:
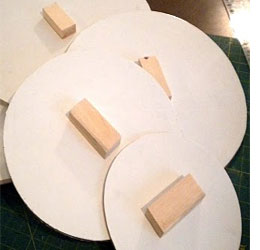
1. Cut out the trays
Use a jigsaw or scroll saw to cut circles from 3mm hardboard - you can buy small sheets at your local Builders Warehouse. You can also use cardboard or even foam core if you want. If you do chose cardboard, I would double the layers for sturdiness.
Planning to use a 150mm diameter cake on the top, I made the first plate 160mm, the next 180mm, 200mm and the last one 220mm.

2. Cut the columns
For the columns, you can use plastic pipe, cardboard cores, or anything else wide enough and strong enough. Cut the pipes with a hacksaw, jigsaw or cut-off saw. A height of between 120mm to 150mm should be enough. Sand the trays and pipes with 180-grit sandpaper.
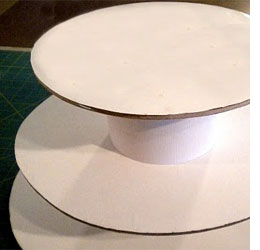
3. Attach the blocks
Glue blocks to the top and base of each tray - the size of the block should be cut to give a snug fit in the top of each column and just tall enough that if the stand is bumped the plates won't easily fall off.
4. Decorate the cake stand
Paint the entire stand with two coats of Rust-Oleum 2X - white, allowing drying time between each coat. It's a good idea to do this outdoors and cover the surrounding area with newspaper. Don't spray too close or you will have runny paint. Have the spray can at a distance of 30cm away from the project and give a light spray for the first coat. To trim around the edge of each tray you can use lace, cut up doilies, ribbon or create your own trim.