
Make Christmas Gift Boxes with Coloured or Printed Card
Making your own Christmas gift boxes is easy if you have a template, and we provide a template and instructions for making them below.
12/12/2020
Poinsettia plants have had a long association with the festive season and that's why you see so many of them in the shops come this time of the year. Given this tradition, we thought it might be nice for you to make interesting gift boxes for your Christmas gifts, ones that you can make using coloured card, decorative card, or stick wrapping paper onto blank card.
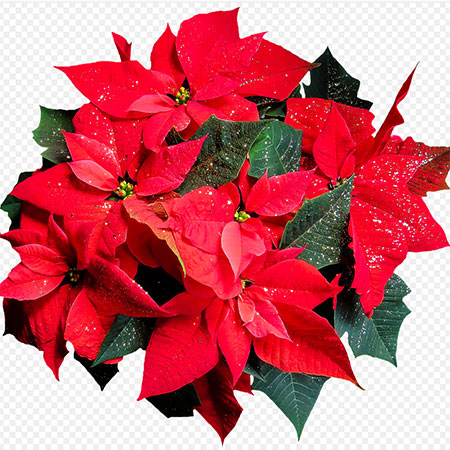
DID YOU KNOW?: It is the shape of the poinsettia flower and leaves that inspires the popularity of this plant over the festive season. Many believe that the shape is a symbol of the Star of Bethlehem. Of course, there are many other traditions associated with poinsettias and their popularity as Christmas plants, but they do add a Christmassy feel to the dining table or on a table or mantlepiece.
If you purchase a poinsettia plant for the festive season, you can take it outdoors for re-planting. There is a special process involved in forcing these plants to flower at a specific time - for Christmas - but you can still enjoy them in the garden. The plants enjoy a sunny spot and occasional watering.
YOU WILL NEED:
Plain, coloured or patterned card, or make your own by sticking wrapping paper onto card
Template
Tracing paper and pencil
Sharp craft scissors
Double-sided tape
Hot glue gun
Blunt knife or pen
HERE'S HOW:
1. Before you can begin to make the gift boxes, you need to print out the template for the box. The most common size for these gift boxes is around 15cm, but you can make them larger or smaller if you wish. Click on the image below to view a larger version of the template for printing on your PC printer.
CLICK ON TEMPLATE BELOW FOR LARGER IMAGE

2. Trace the box shape onto your card and use a blunt knife or pen to outline the shape on the card. This will help when it comes to cutting out the shape and assembling each gift box.
3. Use either double-sided tape or a hot glue gun to assemble each box. From a personal point of view, using the double-sided tape is less messy and easier to work with and gives a neater finish to the gift boxes.
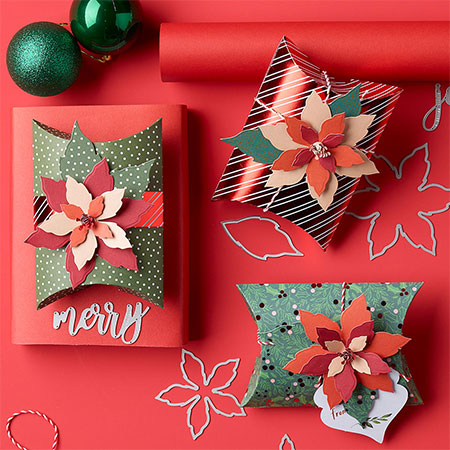
4. Cut out the poinsettia shapes to embellish the top of the boxes using the top image as a guide. Do a variety of sizes and designs so that these can be layered on top of each other for a 3D effect. Secure the flower layers together with a hot glue gun.
5. Once the poinsettia flowers are assembled, hot glue these onto the gift boxes. At this stage, you can also add your choice of additional embellishments such as gift tags, straps, etc.
Now all that's left to do is to fill your boxes with gifts and place them under or within the Christmas tree.
spotlight stores