
Easy steps to carving flowers
If you're wanting to add detail to architraves or plinths, wood carving allows you to create your own unique designs.
27/05/2018
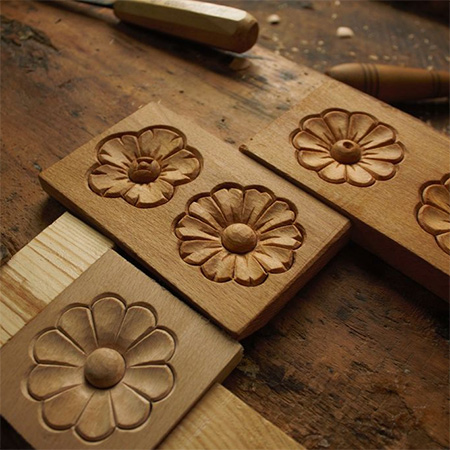
If you are restoring an older home or wanting to add architectural detail with architraves and plinths, carving your own rosettes and floral blocks allows you to add unique details. If you're starting out in wood carving, using a medium-hardwood like Meranti allows you to practice your skill, while the more advanced wood carver can move on to more exotic hardwoods.
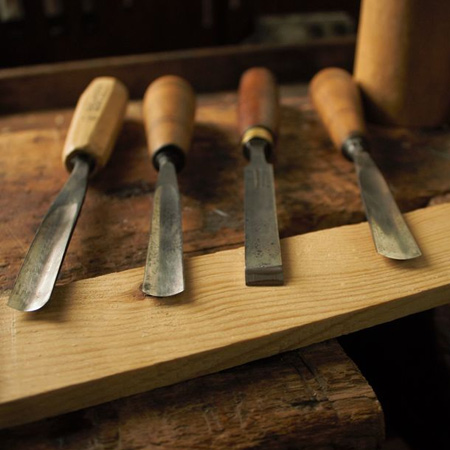
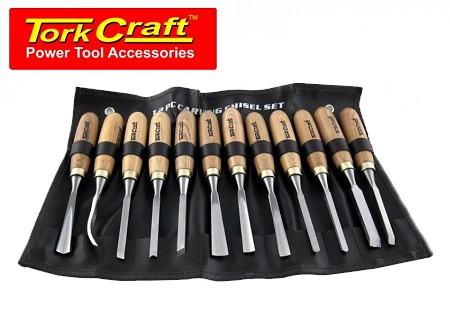
You're going to need to invest in a set of wood carving chisels and a wood mallet. Start out with an affordable set of Tork Craft Wood Carving Chisels priced at R869.00 from Tools4Wood. The set includes 12 chisels that are ideal for the wood carving enthusiast with Ash handles and carbon steel chisels.
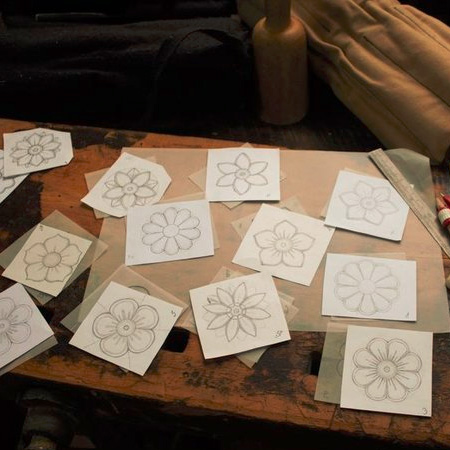
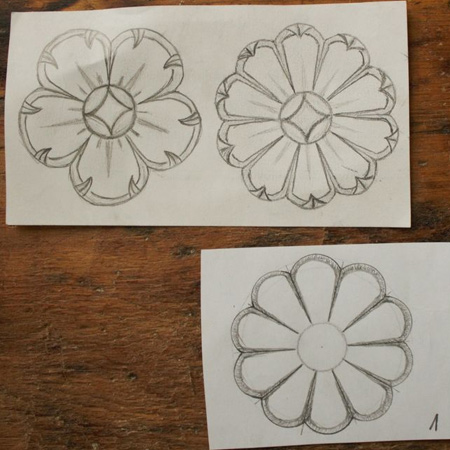
You will also need to find a nice design to work with for your wood carving project. The Internet has almost limitless designs to choose from and you can select an easy design that works for you.
GOOD TO KNOW
When starting out with wood carving, keep it simple is the best motto to follow. Once you have mastered a simple design it will be easier to move up to more complicated shapes and designs.
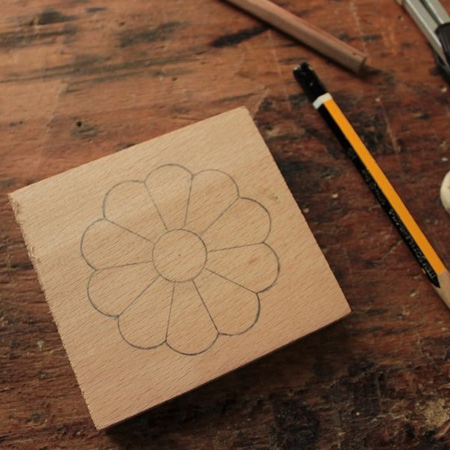
Transfer your chosen design onto a square block of wood. For practice it doesn't matter what the size of the block is, as long as it is large enough for your shape. If you are going to be making architraves or plinths, the size of the block will be determined by the size of the timber you are using to make the architrave or plinth.
GOOD TO KNOW
For starting out it's better to use a timber species that isn't too hard and that doesn't have a lot of grain. Meranti is a good choice, but avoid using pine.
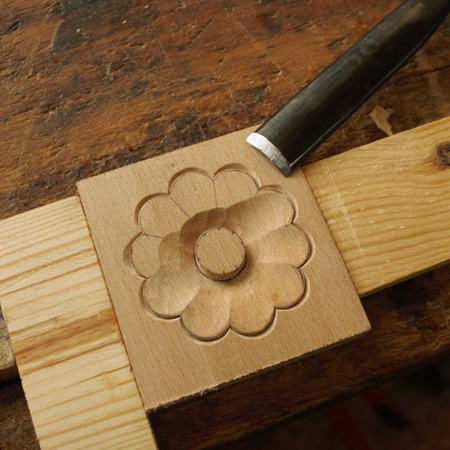
Now you're ready to begin wood carving. Choose a suitable shape, in this case a curved chisel, and place this in the centre where you want to start. Hold the chisel at an 80 to 85-degree angle and hit lightly with you wood mallet. It is far better to hit gently until you achieve the desired depth than run the risk of splitting the wood by hitting too hard.
As you remove material shift the angle of the chisel as you work.
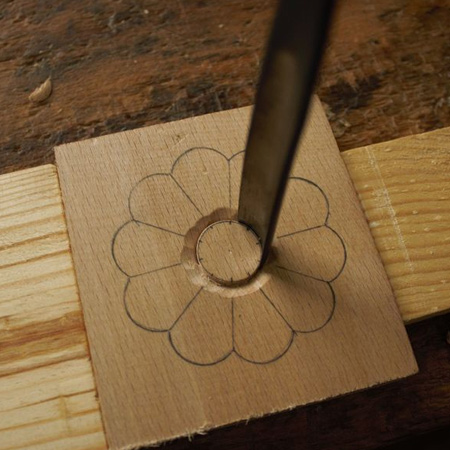
For the flower shape we start in the centre and then outline the outer edge of the flower shape.
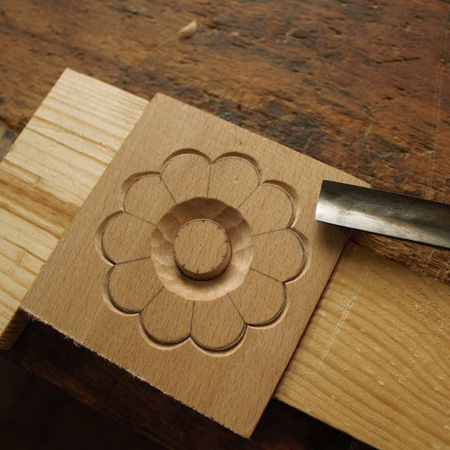
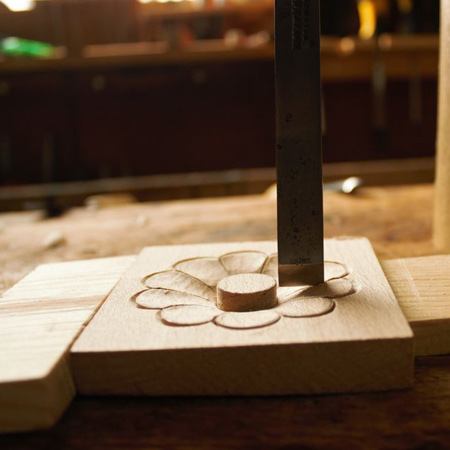
The next step is to gouge out the petals to give the 3-dimensional effect. You want the centre of the flower to stand out, so remove only enough material to achieve this, angling the chisel for a gently slope from the outer edge to the centre. Take the time to smooth any rough areas with the chisel and gentle taps with your wood mallet.
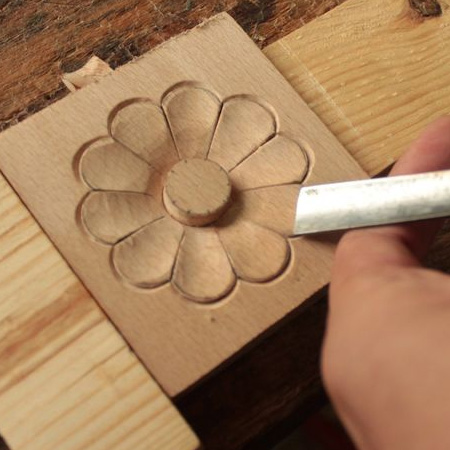
Use a straight, cutting chisel to mark the petal segments.
Continue to lightly chip away until your flower shape starts to take form.
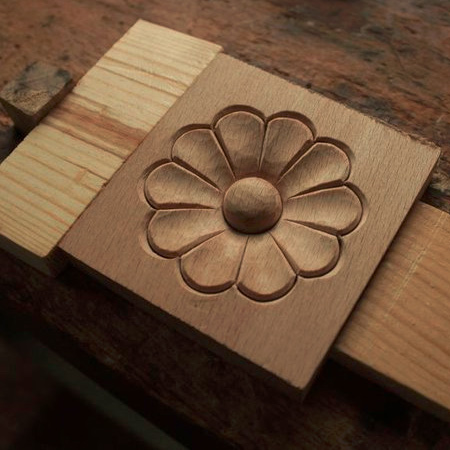
To finish off your design, round off the edges of the centre and smooth any remaining details. It pays to have a few blocks that you can work with to hone your skills and create your own unique wood carved designs.
instructables.com