

Kitchen retro renovation
Steel cabinets - no way! Painted aqua - you must be joking! I have decided that this is my next kitchen - I just love the colours and the way it feel so fresh and vibrant.
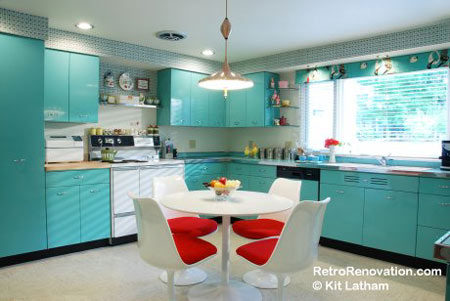
I stumbled across retro renovation purely by accident and immediately fell in love with the kitchen makeover featured on the site. It's not just because this happens to be my favourite colour of all time - but more the look and feel of the room. It's happy and bright, it feels spacious and even though there is only one window, the room feels light and airy.
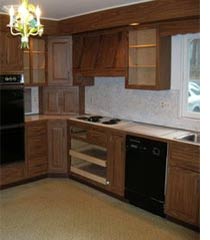
Before
A circa 1975 kitchen.
Some of the defining features of the ‘inherited’ kitchen: Dark wood-melamine cabinets. Falling apart after years of hard use. A long wall of pantry cabinets, while useful, made the room feel smaller. And a small window.
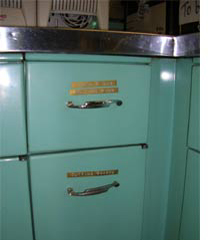
Essential retro
The original steel kitchen cabinets had been installed in 1963 and filled two rooms used to teach cooking to women in need. Note the dymo labels they put on to keep track of the cabinets’ contents.
If you have an older home that has steel cabinets - and I'm sure that there are still plenty of kitchens like this out there - this is an affordable way to transform the look without the expense of replacing existing cabinets.
Be prepared:
Preparation is the key to successful painting of steel cabinets.
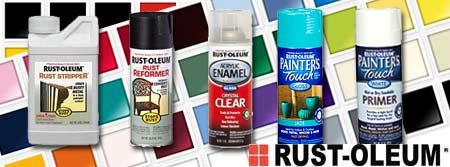
1. Remove any rust with Rust-Oleum Stops Rust. Rust-Oleum Stops Rust Rusty Metal Primer Spray stops rust and prevents corrosion. Apply to heavily rusted metal (use Rust-Oleum Stops Rust Clean Metal Primer on clean or lightly rusted metal). Bonds tightly to rust to form a surface top coats can adhere to.
2. If the original paintwork is still in good condition you may only need to give it a good scrubbing to remove old grease and grime before applying your new paint finish. Where the coating is chipped or scratched you can give a sanding down with 180-grit sanding paper to smooth down the finish before painting. For badly damaged surfaces it is best to remove all the old paint, either with paint stripper or a heat gun, before repainting.
3. When using spray paints always work in a well-ventilated area. If you can't take the project outside be sure to open all windows and doors, and plug in a fan to disperse the fumes.
4. Use masking tape and newspaper to cover those areas not to be painted, and remove any hardware, handles, etc.
5. Shake the can well for at least a minute to ensure that the contents are thoroughly mixed. Spray from a distance of 20cm away, starting at the top and working from left to right with an even, light application. You will probably need to apply 2 coats, perhaps 3 coats, for the finish that you require.
retro renovation copyright Kit Latham - janice anderssen