

How to remove and replace grout
Over time, grout can become grubby or stained despite regular cleaning.
In the past, removing and replacing grout was a labour intensive and time-consuming task, but the introduction of specialist tools and attachments make the process far easier and simpler.
For this project we used a Dremel MultiTool with Grout Removal attachment. There are a wide variety of small, yet powerful tools on the market, and they are definitely worth the investment for various projects in and around the home.
YOU WILL NEED:
Ready mixed or grout powder
Mixing bowl
Spatula or paint scraper
Sponge
Soft cloth
Newspaper or drop cloth
TOOLS:
Dremel MultiTool
Grout removal accessory
HERE'S HOW:
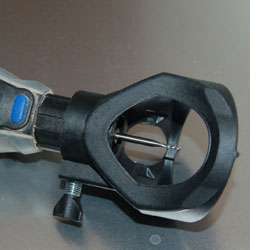
1. Attach the grout removal accessory to the end of the MultiTool. Instructions should be provided with the grout removal accessory and be sure to purchase the correct fitting for your particular MultiTool.
GOOD TO KNOW
Lay down newspaper or a drop cloth below the area where you will be working to help contain any mess.
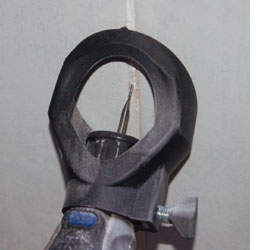
2. Switch on the MultiTool and gently lower into the grout. The attachment makes it easy to control the movement of the bit, so that you will not damage the edges of the tiles.
3. If the existing grout is not damaged and you only want to re-apply a new layer of grout, it is only necessary to remove the top 2 to 3 mm of grout. If the grout is cracking or falling out, it is better to remove to a depth of 5 to 6mm before re-applying new grout.
GOOD TO KNOW
Have your ready-mixed grout handy, or mix powdered grout to the consistency of thick cream.
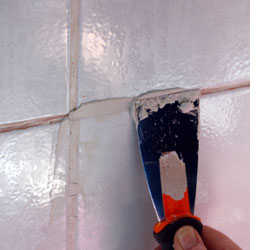
4. Apply a small amount of grout to the edge of the spatula or paint scraper and press this into the gaps between the tiles.
GOOD TO KNOW
Don’t worry about excess grout at this stage. Once you have finished applying grout, go back to the starting point and use a lightly damp sponge to gently wipe away any grout that is left on the tiles.
5. Let the grout dry before wiping with a soft cloth to remove any traces of grout and shine the tiles and then apply Grout Sealer to block moisture and prevent stains.