

Reface kitchen cabinets
Whether you want to give your kitchen a new look, tone down the wood look in a kitchen, or spruce up your kitchen cabinets, there are two very easy techniques to consider for giving a kitchen a face lift. The two most affordable options to give your kitchen a makeover is to paint or reface kitchen cabinets.
Before you start you should know is that this is definitely not a weekend project, no matter how small your kitchen! Proper preparation is essential and that means taking the time to remove all doors and hardware.
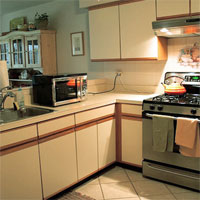
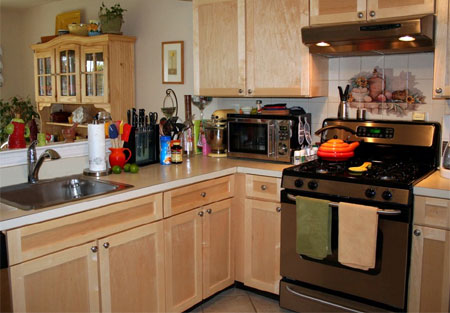
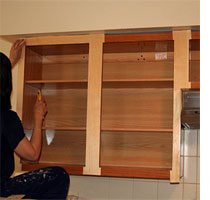
Give dated or damaged kitchen cabinets a new, more modern look by refacing the surface.
Cabinet refacing is achieved by applying a thin veneer or laminate to the carcass, frame, sides and doors of kitchen cabinets. Not only can you save a considerable amount of money, but if done properly, you get a brand new look for your kitchen!
YOU WILL NEED:
Multi sander and
Orbital Sander, plus 80-, 120- and 240-grit sanding pads
OR Plascon RemovAll for varnish or painted surfaces
Clean cloths
Formica laminate - choose from a wide selection of styles
Contact adhesive
Pressure roller
Stanley knife or quality craft knife
HERE'S HOW:
1. Remove all hardware (handles, hinges and knobs) from cabinet doors and carcass. Put these aside in a safe place so as not to lose any pieces, or shop around for more modern fittings.
2. Sanding is an essential step to prepare laminate cabinets. Painted, vanished or sealed cabinets will need to be sanded to remove the coating. Depending upon the thickness of the existing coating, start with a 80-grit sandpaper to remove heavily layered paint or varnish, followed by 120-grit and finish up with 240-grit sanding. This process will prepare the surface for easy and long-lasting veneer or laminate application.
OR Apply Plascon RemovAll as recommended.
3. Completely wipe down the cabinets, doors and any other sanded parts to remove all traces of dust, particularly in corners, as this will affect the adhesion of new veneer or laminate and could result in the new surface peeling off.
4. Once you have decided on whether to apply veneer or laminate, you will need to ask your hardware store or timber merchant to trim down to a manageable size. Both veneer and laminate are supplied in large sheets. Determine the sizes you will need by measuring up all the areas to be covered. To do this measure the upright (stiles) and horizontal (rails) of each carcass, the sides of the carcass (if visible) and the front, top, bottom and sides of doors.
5. For both veneer or wood grain laminate, cut the material so that the wood grain always runs lengthwise. Apply contact adhesive to the back of the laminate strip and onto the stile or rail. Let this sit until the surface is no longer tacky to touch. Stick from the top or bottom and press hard as you move up or down.

6. Once the strip is firmly stuck to the surface and before it cures, use a wood block or pressure roller to firmly press down on the full length of the strip. This action will force out air bubbles and ensure complete adhesion.
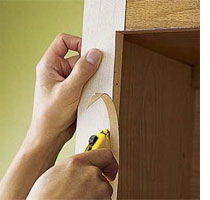
7. Use a Stanley knife or sharp craft knife to trim the excess material overlapping the cabinet opening.
Run the knife along the inner edge of the frame as a guide. Go slow and apply pressure against the back edge as you cut to prevent slipping and damaging the strip.
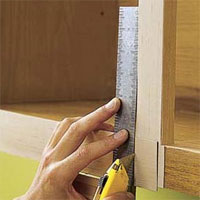
8. Trim the top, bottom, and outer edges. When trimming at the joint between two cabinets, use a straightedge as a guide.
For easier trimming, you can purchase a Tork Craft Edge Trimmer at your local Builders Warehouse.
DIY Tip
Change your knife blade often to keep your cuts clean.
Before tackling door fronts consider your options. You can purchase a wide selection of ready-made door styles that offer you an easy way to update a kitchen.
Rejuvenating the look of your kitchen can be done on the cheap or planned to use up some set aside savings. Play around with your options and use your imagination to create a new look for your kitchen!
images: this old house and flikr