

How to make raised panel cabinet or cupboard doors
Adding raised panel doors allows you to be more creative with the style of door that you choose to replace existing kitchen doors. Simply by building up and adding pine profiles, moulding or trim, there are a variety of door styles that you can put together.
Research the type of style that would work best for your kitchen design and then shop around for mouldings and trim.
YOU WILL NEED:
20mm pine, 18mm plywood or PG Bison SupaWood - cut to size
6mm plywood or PG Bison SupaWood - cut to size
Assorted pine profiles, moulding and trim
Pockethole screws
Wood glue
Wood filler
Table saw, mitre saw or mitre box and backsaw
Router or Dremel Trio
Biscuit joiner or pockethole jig
Clamps
Drill/Driver plus assorted drill and screw bits
Orbital sander and 240-grit sanding pads
HERE'S HOW:
Analyse your options
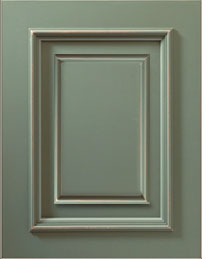
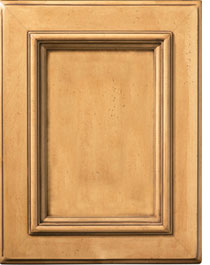
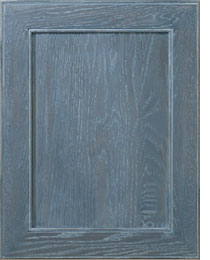
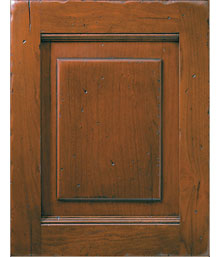
The door in this project consists of a veneered plywood panel surrounded by a solid frame. The panel "raises" when we apply a second plywood panel framed with moulding. If you want to paint your doors, substitute PG Bison SupaWood (MDF) for the solid stock and birch-veneer plywood for a glass-smooth finish.
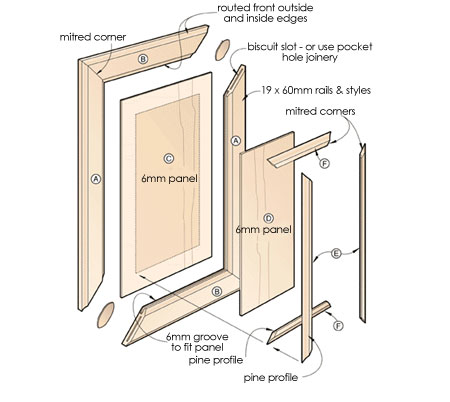
After choosing your materials, pick a profile for the frame and raised panel. Create your own, or get ideas from doors at your localBuilders Warehouse.
Base your door dimensions on the size of the cabinet opening. Because our overlay door overlaps the opening on all four sides, we'll make it 25mm longer and 10mm wider than the opening.
GOOD TO KNOW
Sand all the sections before assembly for a smooth finish on all sections.
Sections A & B
Cut the frame section, or have these cut, to the exact outer size required for each door - the actual size of the door once it has been finished.
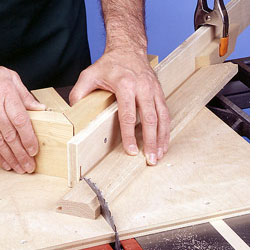
Use a table saw, mitre saw or mitre box and backsaw to cut the frame ends at a 45° angle.
Cut biscuit slots, or drill pocket holes to join the frame together, but don't join just yet.
Section C & D
The back centre panel needs to be the width and length of the door minus the size of the frame and plus 6mm in order to fit into the grooves set in the frame.
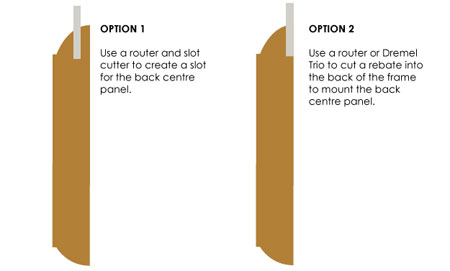
If you have a router you can use a slot cutter to create the groove in the frame to fit the back centre panel. However, another way to mount to centre panel onto the frame is to rout a rebate on the back of the frame
If you want a raised panel in the centre of the door, cut Section D to size, allowing extra space for a pine profile around the outside of the panel. Once cut, glue this to Section C. Use pine profile, moulding or trim - Sections E & F - to create a frame around the front centre panel and glue this in place.
Assembly
Assemble the frame around the centre back panel by inserting biscuits and then glue together. If you are using a pockethole jig, arrange the frame around the back centre panel, apply wood glue and screw together tightly.
Note: The one disadvantage of joining by the pockethole method is that holes will be visible at the back of the door. To solve this problem there are two options:
1. Cut a piece of 3mm SupaWood to the exact size of the door; glue and clamp this onto the back of the door.
2. Combine wood glue and sawdust to create a filler for the pocket holes. Once dry, sand smooth.
GOOD TO KNOW
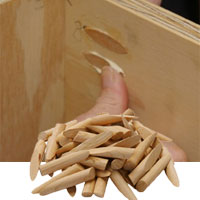
A quick and easy way to fill pocket holes is to cut some pine dowels to a 45° angle at one end.
Glue these into the holes, use a hacksaw, Dremel MultiTool or Dremel MultiMax to cut off and then sand smooth.
Using clamps, carefully clamp the assembly. Tighten each clamp a little at a time, keeping each joint perfectly aligned. If a joint slips out of alignment, loosen the clamps on that joint, adjust the joint, and reclamp it. Leave until dry.