
Make a Laundry Station or Cupboard for your Ironing Board
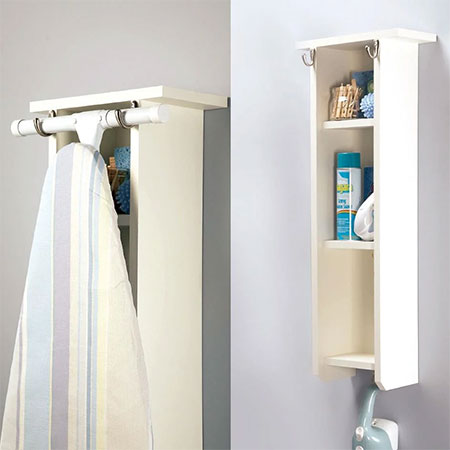
Mounting your ironing board on a laundry station makes it easy to start ironing without having to set everything up, and you can store all your ironing essentials in the laundry station.
26/06/2020
LAUNDRY STATION
My ironing board is kept in a small storage space under the stairs and it's a mission to get the thing out of there every time I need to do some ironing. Making yourself a laundry station, one that has storage for an iron and a place to mount your ironing board, is a fantastic solution if your home is short on space. You can even mount this laundry station on the back of the door if your home is already choc-a-block.
While this ironing board allows for the legs to be hung on the hooks, you can always adjust this if you don't have legs like this and hang the ironing board up on the grill for the iron.
LAUNDRY CUPBOARD
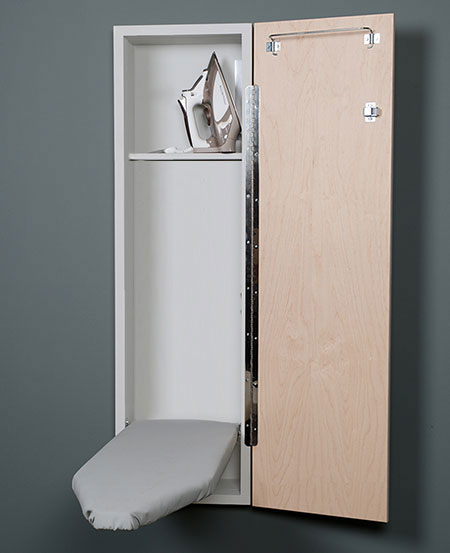
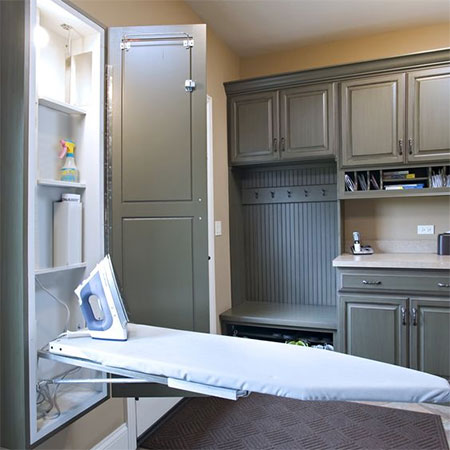
The second option for your ironing board is this laundry cupboard. I like this option as it allows you to hide your ironing board inside the cupboard and out of sight. You can also match the door on the cupboard to that of your kitchen design so that it matches the kitchen. Find instructions for the laundry cupboard after the laundry station.
Match the laundry cupboard to your existing kitchen design by using a door that is similar in style / colour.
GOOD TO KNOW:
The size of the laundry cupboard will be determined by the size of your ironing board. My ironing board is 360mm wide and 1000mm in length. If the width and size of your ironing board is larger than these measurements, you will need to modify your cutting list accordingly
Make a Laundry Station
YOU WILL NEED:
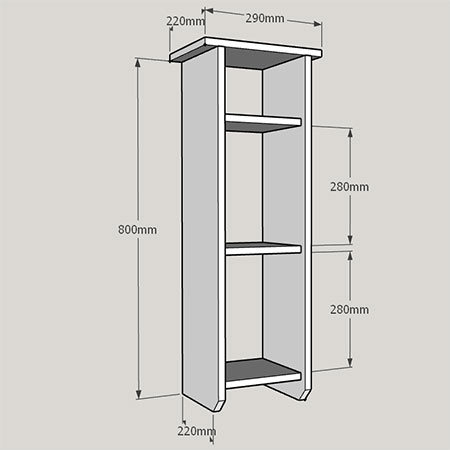
2 of 220 x 800mm 16mm SupaWood - sides
1 of 220 x 290mm 16mm SupaWood - top
3 of 200 x 200mm 16mm SupaWood - shelves
Wood glue
Wood filler
4 x 45mm cut screws
Nylon wall anchors and screws
2 large steel hooks and screws
TOOLS:
Drill / Driver plus assorted bits
Countersink bit
Multi- or orbital sander plus assorted sanding pads
Tape measure and pencil
HERE'S HOW:
1. Assemble the frame for the laundry station by attaching the side sections to the top and shelves using wood glue and screws. Measure, mark and pre-drill and countersink pilots holes.
2. Position the top and secure to the frame through the top into the side sections with screws.
3. Fill all holes with wood filler and leave to dry and then sand all the pieces smooth before painting.
4. The hooks to hang the ironing board are mounted just below the top and secured in place with screws.
5. To mount onto a wall, add the steel braces to the back of the cupboard so that you can measure, mark and mount onto the wall with nylon wall plugs and screws. Alternatively, cut and secure a French cleat to the back of the cabinet for easy mounting and removal.
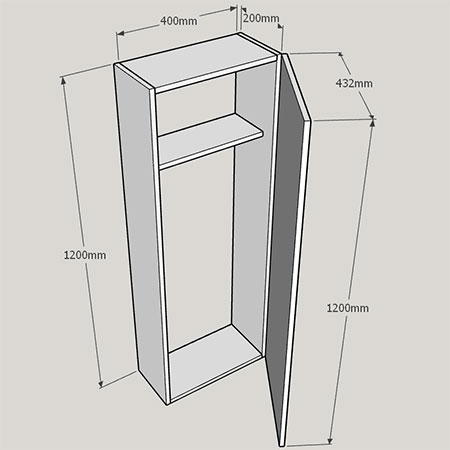
Make a Laundry Cupboard
The size of the laundry cupboard will be determined by the size of your ironing board. My ironing board is 360mm wide and 1000mm in length. If the width and size of your ironing board is larger than these measurements, you will need to modify your cutting list accordingly
YOU WILL NEED:
2 of 200 x 400mm 16mm SupaWood - top and bottom
1 of 150 x 400mm 16mm SupaWood - shelf
2 of 200 x 1200mm 16mm SupaWood - sides
1 of 432 x 1200mm 16mm SupaWood - door
Piano hinge and 13mm screws
Door catch and 13mm screws
4 x 45mm cut screws
Wood glue
Wood filler
Steel angle brackets plus nylon wall anchors and screws
Door knob or handle and screws
TOOLS:
Drill / Driver plus assorted bits
Countersink bit
Multi- or orbital sander plus assorted sanding pads
Tape measure and pencil
HERE'S HOW:
1. Assemble the frame for the cabinet by attaching the side sections to the top and bottom using wood glue and screws. Pre-drill and countersink pilots holes.
2. Measure and mark to affix the shelf to the side sections. Remember to adjust the dimensions for a longer ironing board.
3. Attach the piano hinge to the edge of the door with 13mm screws and then position and secure to the cupboard frame with 13mm screws.
4. Measure and mark to attach the door catch with 13mm screws.
5. Measure and mark the location for attaching your choice of handle or knob.
6. Fill all holes with wood filler and leave to dry and then sand all the pieces smooth before painting.
7. To mount onto a wall, add the steel braces to the back of the cupboard so that you can measure, mark and mount onto the wall with nylon wall plugs and screws. Alternatively, cut and secure a French cleat to the back of the cabinet for easy mounting and removal.