
How to install gutters
Installing your own gutters can save you substantially over professionally installed gutters.
Your local Builders Warehouse sell gutter systems that are designed primarily for easy installation. But with just a little bit more work, you can use these same parts to put together gutters and downspouts that are stronger and better looking too.
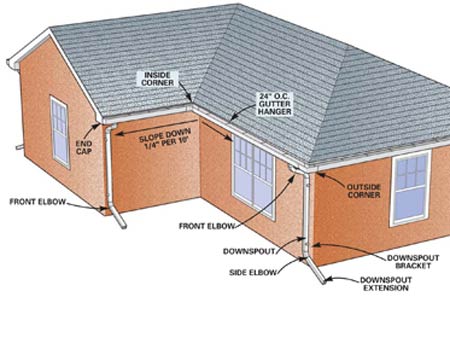
Draw a sketch and measure your house
Record the length of the gutter runs and mark the downspout locations. Then count up the inside and outside corners and end caps (note whether they are right or left ends). Measure the height of downspouts and 50cm each for the extension away from the house at the bottom. Each downspout requires three elbows. There are two types of elbows that turn either to the front or side of the downspout. Most installations require only front elbows, but occasionally you may need a side elbow, usually to turn the downspout extension sideways.
* Locate downspouts in unobstructed areas where water can be directed away from the house. Avoid locations with obstacles like electric meters.
* Slope long gutter runs (10 metres or more) down both directions from the middle and put a downspout on each end.
Preassemble gutters
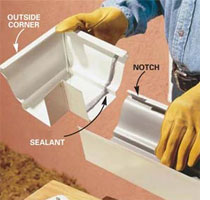
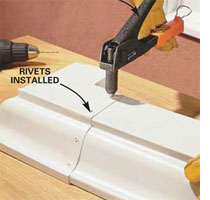
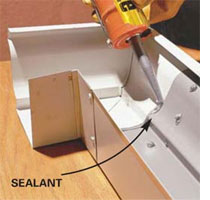
It’s much easier to join sections on the ground than to work from the top of a ladder. Instead of butting parts together and covering the joints with a seam cover as recommended by the manufacturer, overlap all seams from 50mm and then rivet and seal them together.
We’ve shown joining a gutter section to a corner. Use the same process to join two sections of gutter. Overlap the gutters so the inside section is facing downhill to prevent water from being forced out the seam.
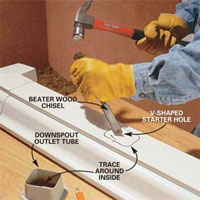
Cut in downspout tubes at each downspout location
First measure from the corner of the house to the centre of your chosen downspout location. Double-check for obstructions. Transfer this dimension to the gutter and cut in a downspout outlet. This method takes a few minutes longer than using one of the short gutter sections with a preinstalled outlet, but it eliminates two seams and looks much neater.

Install trim or fascia board
Many houses have a trim or fascia board fastened just under the roof tiles. You’ll need to check the condition of this and replace if necessary, or if you do not have a fascia board you will need to attach one. Prime and paint bare wood or cement fibre board before you hang the gutters.
Alternatively, you will need sufficient gutter hangers/brackets to attach to the roof beams. Place the hangers at 600mm apart and at least 150mm from the end of the gutter. Attach the hangers to the gutter while it is still on the ground and not when you and the gutter are 2 metres from the ground. Take each section of the gutter up to the eaves and attach the brackets and hangers to the fascia or beams.
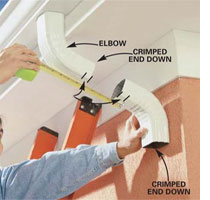

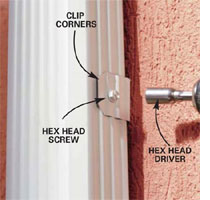
Finish the gutter job by hanging the downspouts. Attach the downspouts to the wall. If you can’t find U-shaped brackets, make them from sections of downspout (above right). They look better than the bands that wrap around the outside.
When installing gutters, take the time and effort to make sure you do it properly. If a gutter is not attached securely, it may fall off during a heavy rainstorm. Wind and other weather could also cause the gutter to become loose. This could cause water to build-up and create puddles.
A gutter that is attached securely will not be damaged by heavy rain. Gutters should also be attached correctly and should not bend or be attached at an angle. This will not allow the water to flow freely through the gutter. If a person is not able to install gutters themselves, there are many companies that can.
via family handyman