
How to install a new ceiling
This detailed guide from Gyproc is comprehensive enough that even a beginner DIY enthusiast can install his or her own ceilings.
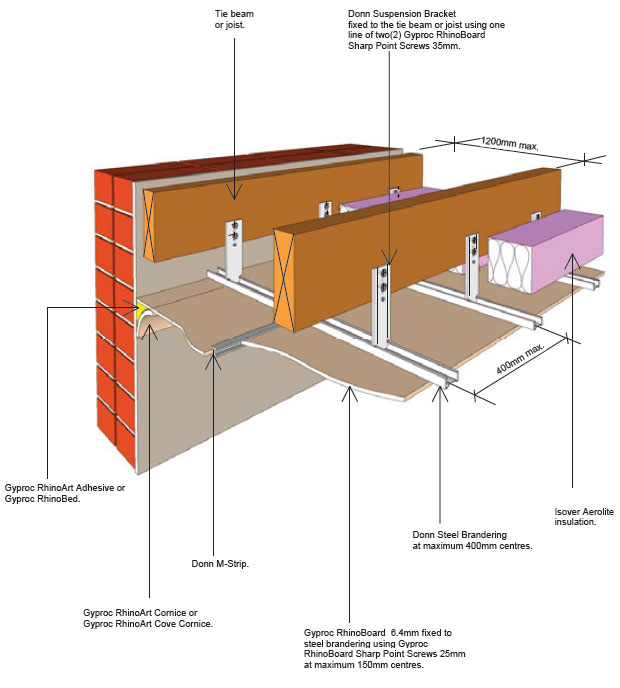
Want to know how to install a new ceiling. Gyproc RhinoBoard 6.4mm M-Strip ceiling consisting of steel branders fixed at 400mm centres in one direction onto which RhinoBoard is fixed, printed side up, at right angles to the branders, using Gyproc RhinoBoard Sharp Point Screws 25mm spaced at 150mm centres.
Joints between boards to consist of Rhino M-Strip fitted over board edges with the narrow flange facing down and boards fixed onto branders to within 25mm of Rhino M-Strip. All nail or screw heads to be stopped and sanded level when dry.
You can buy Gyroc products at your local Builders Warehouse.
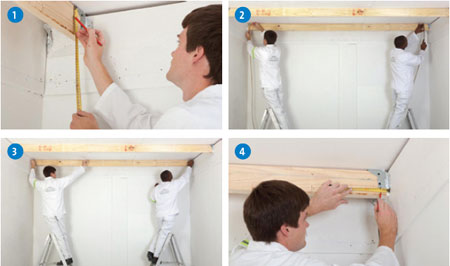
1. Use a tape measure to establish ceiling height; measure and mark the desired height in one corner of the room.
2. Using a spirit level, water level or a laser level, transfer the height mark (as per previous step) to all corners of the room.
3. Join the marks (as per previous step) using a chalk line.
4. Measure 38mm away from the wall for installation of first M-strip ceiling suspension bracket.

5. Mark at 400mm centres.
6. Install suspension brackets using 2 x Gyproc RhinoBoard Sharp Point Screws 35mm per suspension bracket. Use the chalk line as a benchmark.
7. Measure and cut steel brandering to size and clip onto suspension brackets.
8. After installing the steel brandering, install ceiling insulation according to SANS 10400-XA for new buildings.
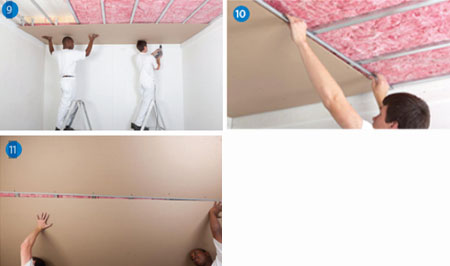
9. Measure and cut RhinoBoard 6.4mm to size. Install the board and fasten using Gyproc RhinoBoard Sharp Point Screws 25mm spaced at 150mm centres.
10. After installing the first board, measure and cut M-strip to size and install.
11. Install the next RhinoBoard 6.4mm. Repeat steps 9 and 10 until entire area is covered.