
Clay brick floors
or hundreds of years we have used brick as a building material for walls and floors. One of the most eco-friendly materials to use in a home, brick is affordable, beautiful when sealed, and easy to lay as a do-it-yourself project.
Brick has a natural beauty that blends perfectly with almost any style of home. Once sealed and protected, a brick floor is just as versatile as any other type of flooring - if not more so.
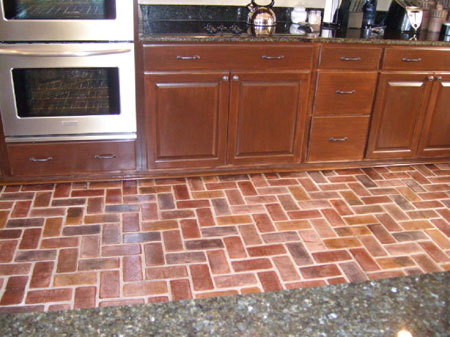
Used extensively for outdoors, brick is gaining popularity as a sustainable flooring material for indoors.
If you're looking for an affordable flooring option for a home - one that you can easily install as a DIY option, why not consider natural brick floors.
YOU WILL NEED;
Quality paving bricks
Fine sand
20kg bag of cement
Stone or brick sealer
Soft sweeping brush
Circular saw with masonry blade or hammer and chisel
2 spirit levels, long and small
2 long sections of square bar
Rubber mallet
Roller, large paintbrush and paint tray
2 boards to stand on*
* You do not want to stand on the sand as your feet will make large dents. If you stand on a board, your weight is spread out and the smooth surface of the sand is not compromised
Preparation
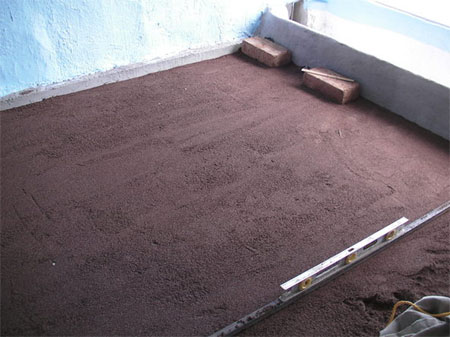
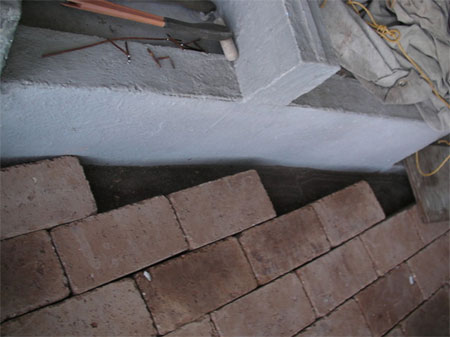
Place a 2cm layer of fine sand over the area and then compact and level the sand. The easiest way to do this is to bury and level a piece of square tubing in the sand on either side of the room, so that the top of the metal is flush with the level you want the sand to be.
You then bridge another piece of metal between the 2 pieces of square tubing, so that it sits on top of them, and drag it backwards and forwards over the area until it is smooth.
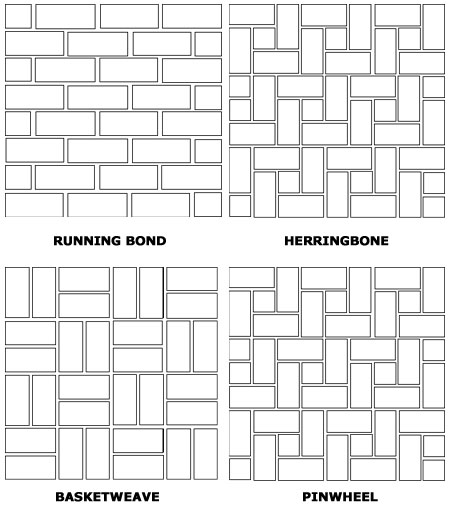
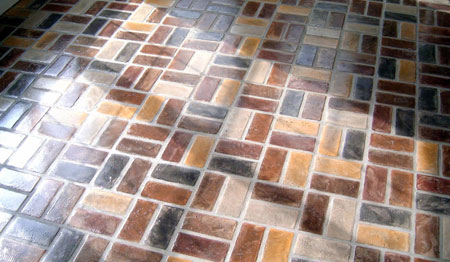
Choose your pattern before you start, and estimate the amount of bricks you will need. Running bond is often the easiest pattern but all are fairly simple once you get started.
Build up a pile of bricks close to the working surface, so that it is easy to lay them across the entire surface without disturbing the sand.
Laying the brick
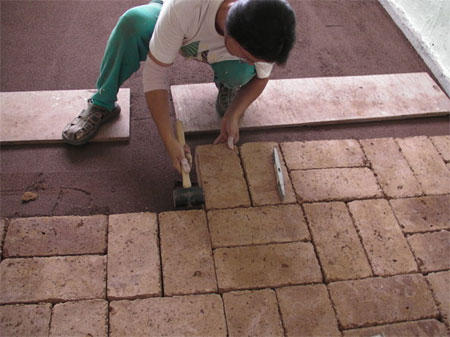
Place each brick - one by one - where you want it to go. With the long spirit level, check the placement with previous bricks as you move along. Use a short spirit level to make sure the brick itself is level in all directions.
Use the rubber mallet to tap the brick tight against its neighbours. And tap down on it to get the level correct. When you get to the opposite end of the wall from where you started, and you do not have a brick to fit in the space, leave it. You should do all the edge bricks at the end.
You can walk on the floor at this stage but do not tread near to unfinished edges.
For all the edges you will have to measure each space and cut or break bricks to fit. Alternatively, you can fill the gaps with a very fine concrete when you do the perimeter. Once you have all the bricks laid, you can fill the perimeter, in between the bricks and walls, with concrete. This does not use much concrete, and can be done in half an hour. Screen your sand and then trowel the concrete smooth and level with the tops of the bricks.

For filling in the gaps, mix a small amount of cement into the fine sand and use a soft sweeping brush to make sure that this fills up all the cracks. A little bit of manual 'tamping' will ensure that the sand settles into the cracks, so walk over the bricks - brush with sand - walk - brush, until the gaps can accept no more. Do this once again after a couple of days if you start to see the gaps.
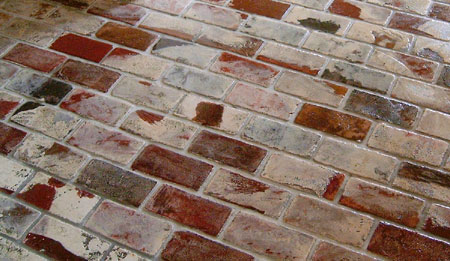
Sealing the bricks is essential, as you want to be able to keep the floor clean at all times. Woodoc 40 is a tough, low-gloss solvent based finish for brick and stone. It protects against water ingress, weathering and pollution. Follow the manufacturer's recommended application guidelines.
Woodoc 40 may be applied by brush to porous brick and stone. Care must be exercised to ensure that the substrate is completely dry, as porous brick and stone tend to absorb and retain moisture. Three liberal, evenly wet coats of Woodoc 40 should be applied, and each coat should dry to touch dry in 6 to 12 hours, and to hard dry within 12 to 24 hours, depending on the prevailing weather. High ambient moisture and poor ventilation may extend drying time to 48 hours per coat. Only apply a subsequent coat once the previous coat has dried completely.
The sealer will darken and bring out the natural beauty of the bricks and ensure that your new floor is durable and hardwearing.

Visit your local hardware store or brick supplier to see the various bricks that they have to offer. Select a colour that will enhance the room decor.
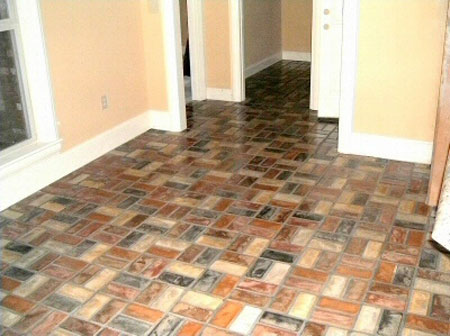
You don't have to stick with one colour, use a variety of colours to create a old world or rustic look to your floors.
via oreilly media | all images www.portstone.com