Add trim to windows
Having already started adding trim around door frames and to corners in my home, the next project I want to tackle is adding window trim. I just think that windows look so much nicer with added trim, and they look more polished and elegant as well.
makeit-loveit.com
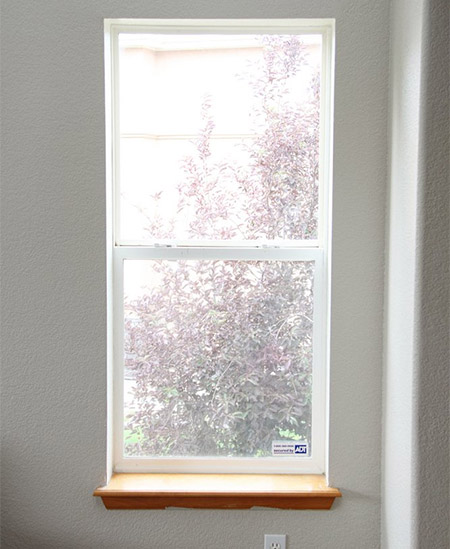
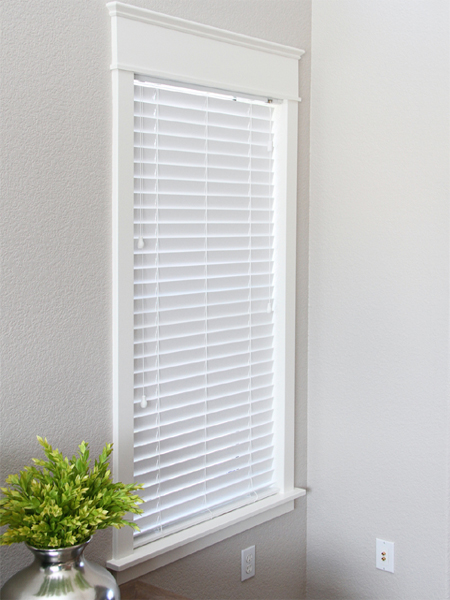
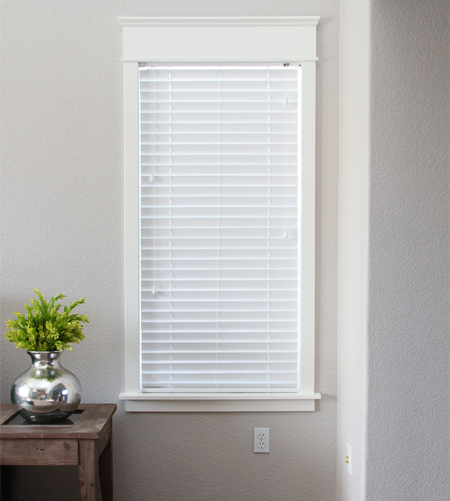
In many homes windows are simply given a plaster trim and the corners rounded off. Some might have a small windowsill added for effect, but in my house I don't even have that. If you plan to hang blinds on windows, adding window trim offers a far more finished look and pumps up the effect.
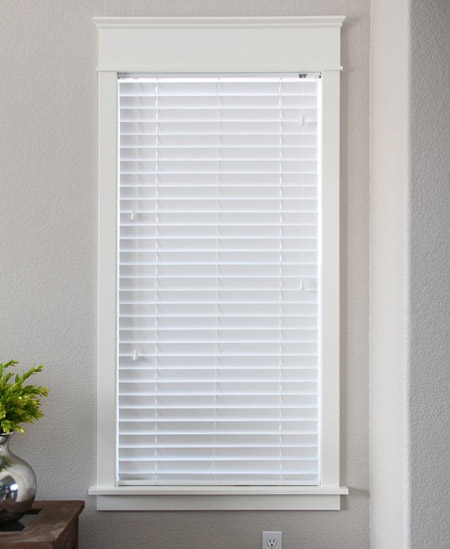
On makeit- lov it, ashley shows what a difference a few pieces of moulding and trim make. For this project you will need half a sheet of 18mm MDF and half a sheet of 6mm MDF, as well as a few length of pine or MDF trim, as well as a few other supplies.
YOU WILL NEED:
Hammer
No More Nails adhesive
Acrylic sealer (in cartridge for use in caulking gun)
Mitre saw or mitre box and saw
Craft knife
Paint scraper
Tape measure and pencil
HERE'S HOW:
Before you start adding the trim you will need to remove the existing windowsill - if there is one. Have a crowbar or hammer and chisel on hand to make the task easier. If you accidentally knock any chunks out, make sure to fill these up before you continue.
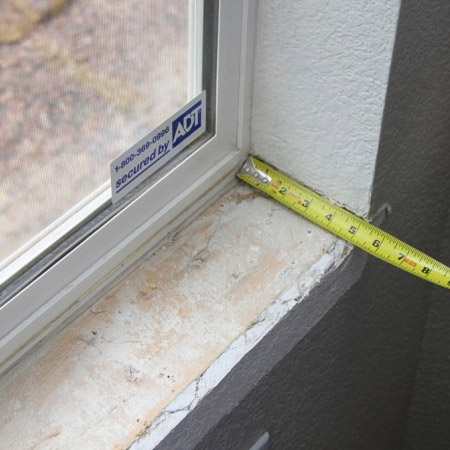
Take accurate measurements for the height, width and depth of the window to ensure that all cut pieces will fit exactly. Also decide how much of a overhang you want on your windowsill.
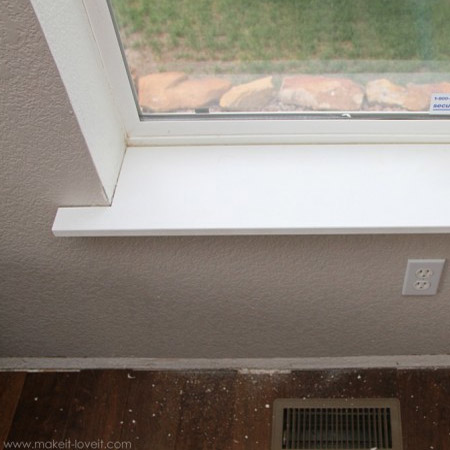
On a piece of 18mm MDF measure and mark for cutting out the shape of the windowsill. Add 5cm to both sides. Be sure to measure both sides and mark them separately - because, most likely, they are a little different. Yeah, no one’s house is perfect.
Once cut, place the board in the window opening. If it’s slightly off, make adjustments until it fits. Glue in place with No More Nails adhesive.
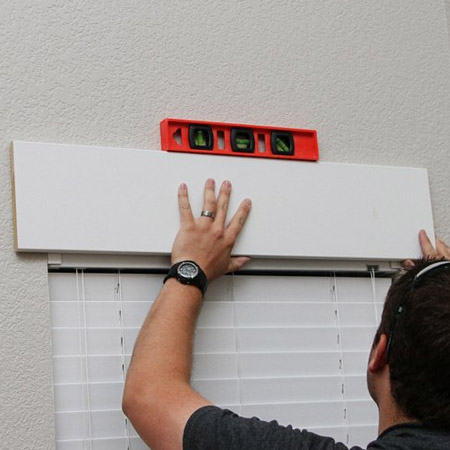
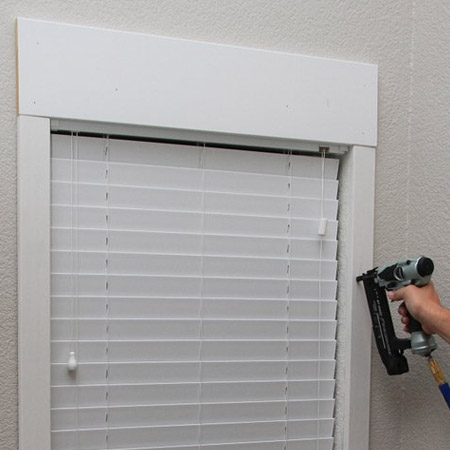
For the top piece, cut 18mm MDF to the height you want, plus 5cm on either side for the vertical strips. You can add the vertical pieces first but we needed our top piece in place first, because it’s slightly hiding some of the blinds behind it, and it was hard to measure where that top board would sit, without having it in place first.
Use a spirit level to be sure that the top board is sitting evenly. Secure in place with No More Nails adhesive. The new formula has quite a bit of 'tack', so the board should stay in place on its own, but you can support if necessary.
With the top in bottom in place and secure you can now cut and mount the vertical or side sections of the window frame.
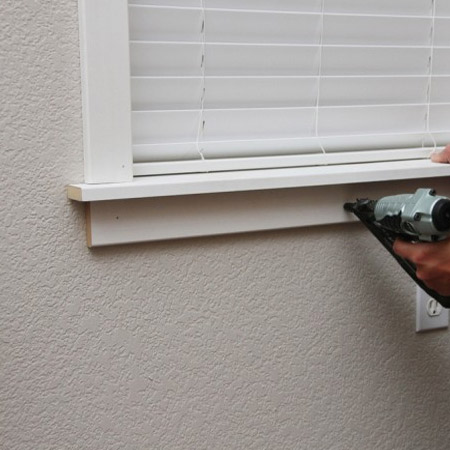
Measure, cut and glue down the bottom apron. This section is cut to the same width as the width of the window plus the two vertical panels.

Measure the width of the top board already mounted and grab your strip of moulding. Mitre the two ends at a 45-degree angle to meet the length measurement you need. Use a hammer and panel pins to affix the moulding to the top panel as shown left.
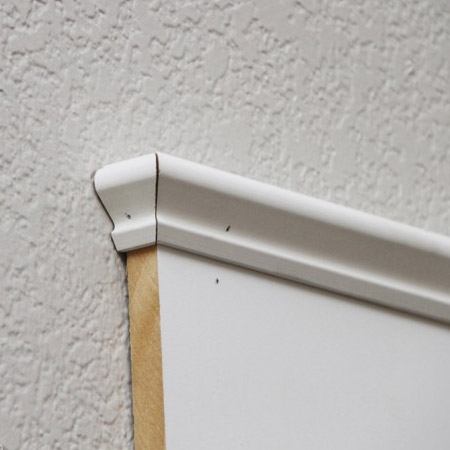
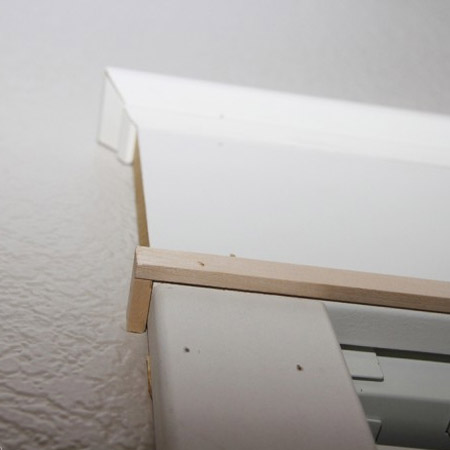
Now you need to cut a 'return' piece, also mitred at a 45-degree angle at one end and then a straight 90 degrees at the other, so that one side sits flat against the wall. Nail it in place. Don’t worry if it’s not perfect... we’ll fill in the cracks later.
Finally, you can add smaller trim sections to add more detail. These can be pinned or glued in place, and you don't have to worry about cutting mitred corners - although you can if you wish.
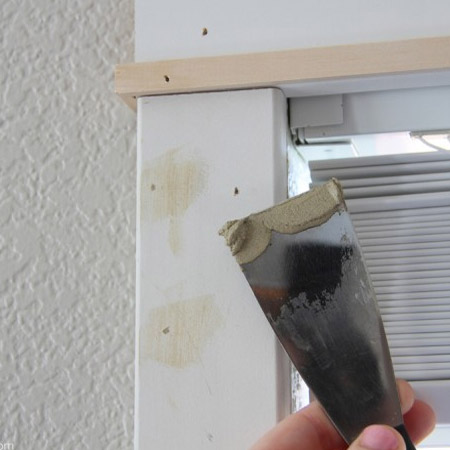
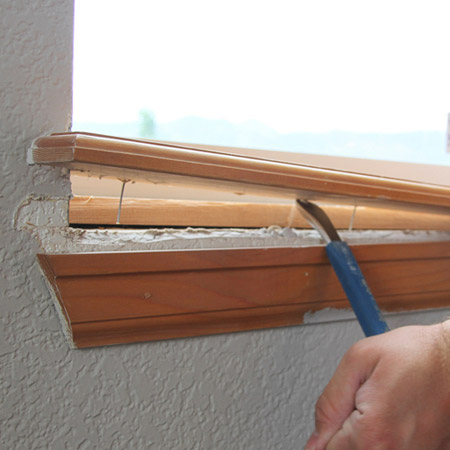
Use a paint scraper and wood filler to fill in any holes - and gaps where moulding joins together. Leave this to dry and then sand smooth with 240-grit sandpaper.
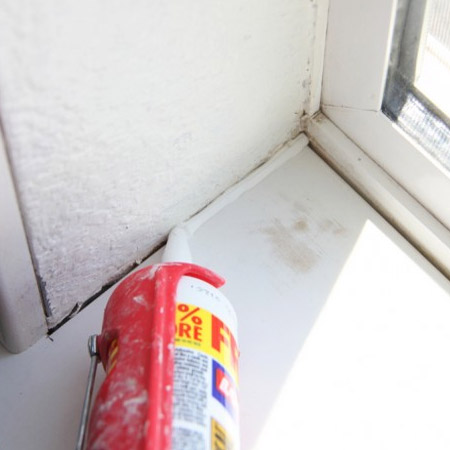
Use a caulking gun to apply a thin bead of acrylic sealer around all the edges and to fill any gaps. We use acrylic sealer because it can be easily painted over. Smooth out with the tip of your finger to remove any excess sealer.