
Make a garden spiral
I first spotted a spiral wind-spinner in a friend's garden and I was captivated by it.
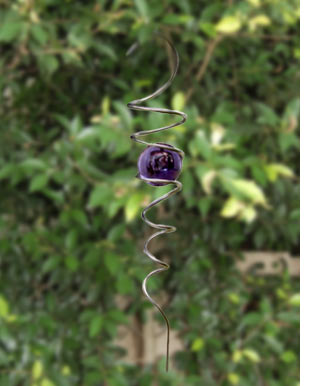
When the breeze turned the spiral, it had a magical hypnotic type of effect. The ball gave an illusion of moving up and down the spiral tail.
After doing a bit of research, I discovered these spinners are available worldwide. I knew I was going to make one or two.
I also knew I was going to have to make a template in order to make one successfully, as I would need some sort of gadget to wrap the metal rod around to make the spiral cone.
How to make a Spiral Wind-Spinner.
This spiral wind-spinner ends up about 650mm long and can accommodate a ball 75mm in diameter, or a little larger.
You will need:
Making the template is the most involved part, but once it is done, making the spiral wind-spinner is a breeze, and the template can be used over and over again. See below for template instructions.

- Aluminium, mild steel, stainless steel or copper wire with a thickness of 6mm diameter and 1650mm in length.
- Balls of 75mm diameter (or slightly bigger/smaller). You can use just about any type of ball, from a plastic ball to a crystal ball, depending on your price range.
Here's how:
-
Simply insert the top of the rod in the notch and hold it in place with a plug, run the rod under another plug on the side of the cone head, and then wrap the rod around the cone to form a conical spiral.
- You can then take the plugs out, slip the spiral off the template, tie a piece of nylon string to the top, hang it from a tree or something else in the garden and drop a ball into it.
Instructions for template:
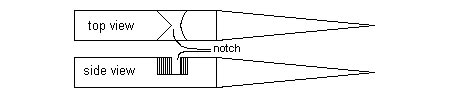
This template is made out of a piece of pine 100mm x 100mm x 1m long with the cone shape at one end and a notch at the top of the cone. Wire is inserted in the notch, held in place by a plug (bolt or rebar) and wrapped around the cone to form a conical (cone) spiral.
The template can be shaped using just a circular saw and a disk sander, although just sandpaper with a sanding pad will do in place of a disk sander if you don't mind a bit of work.
Pencil-mark the top side according to the dimensions given in the diagram below.
Start off by cutting along the point-shaped pencil lines to create a wedge. Turn the wood on its side. Pencil-mark another point-shape on the face of the wedge, as shown on the diagram below. Then cut that point also.


build eazy