Raised Beds and Container Gardening for Less Backbreaking Work
For the past few months, I have been planning the raised beds and container gardens for growing my own produce and I'm pleased to show you the result to date.
02/09/2020
For the past couple of months, I have been putting ideas together for a vegetable garden that would allow us to grow our own produce, not just from a savings point of view, but also for fresh, organic vegetables and herbs that are grown just outside the kitchen. I have a small area in a corner of the garden that receives 2 to 3 hours of morning sunshine and 2 to 3 hours of afternoon sunshine. I long ago decided this would be the perfect spot to grow veggies, herbs and perhaps, later on, a few fruit trees.
Since the space isn't very large, I have opted for a layered design that starts with the raised beds for veggies, plus some vertical gardens using PVC pine and recycled plastic juice bottles. Later on, we will be adding PVC gutters mounted onto the wall above the beds for sowing seed for new seedlings for an ongoing all-year crop.
RECYCLE JUICE BOTTLES FOR VERTICAL VEGGIE GARDENS
Due to the lack of space in my garden to set up as a dedicated area for growing vegetables and herbs, I thought this would be a good opportunity to grow vertical. Raised gardens are working for many who have limited space for growing produce and I have been making self-watering planters for a few years, now it's time to put them to more practical use... growing vegetables.
HERE'S HOW:
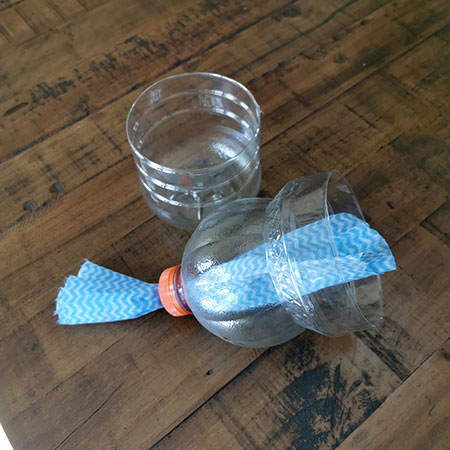
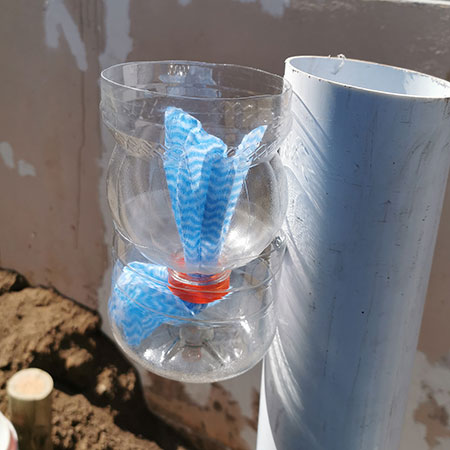
1. To make the planters I use a plastic Oros juice bottle. I suppose it doesn't need to be an Oros bottle, but these plastic bottles have a large area at the top when they are cut in half, and you do need a fair amount of soil to grow veggies. The bottles are cut in half, as you can see above.
2. To make the containers self-watering, a hole is drilled in the top of the bottle and a disposable kitchen cloth inserted through this. I have tried various other materials to see would absorb water the best and these came out tops. Plus, you can pick up a large roll of these disposable cloths at The Crazy Store or your local supermarket.
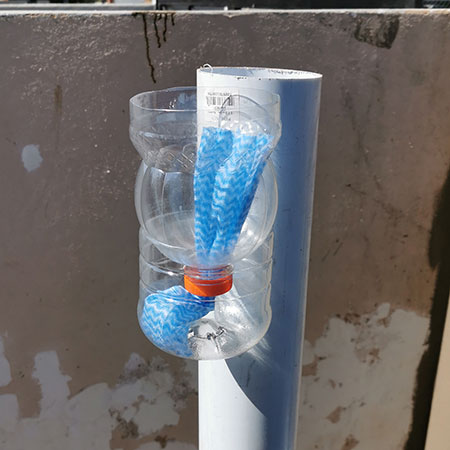
3. The bottom half of the juice bottle is fastened to the PVC pipe. I'm only using PVC pipe because they were left over from a neighbours home renovation - you could just as easily use gum poles or similar. The bottom half of the bottle is fastened onto the pipe using [2] 16mm screws and washers.
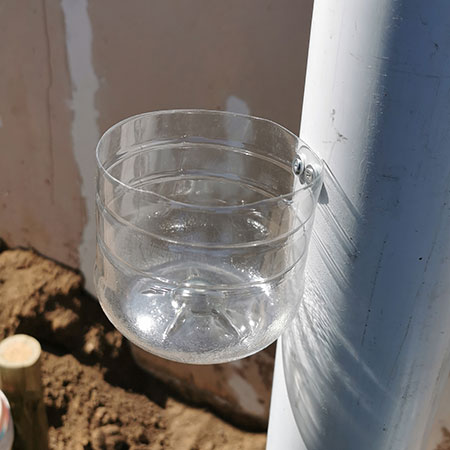
ABOVE and BELOW: The bottom half of the bottle serves as a water reservoir. The top section is where you will add soil and plant your veggies. Water in the reservoir is absorbed up the cloth to keep the soil moist - not sure yet for how long but will keep you updated on this.
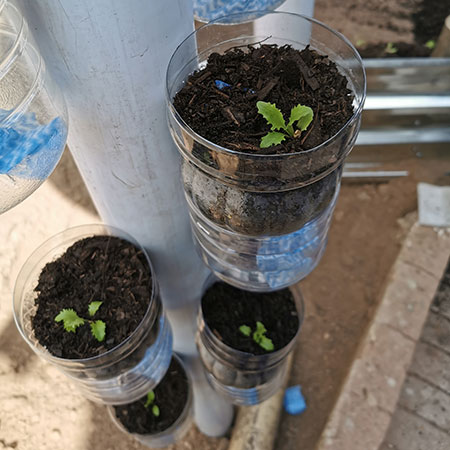
4. Fill the top half of the container with potting soil, making sure to spread out the disposable cloth within the soil. The cloth absorbs water from the reservoir and helps keep the soil slightly moist, so it needs to be spread out within the soil.

5. Once you have added the soil, you can add your seedlings. I have planted lettuce in this vertical planter but will also be planting other veggies and herbs in others.
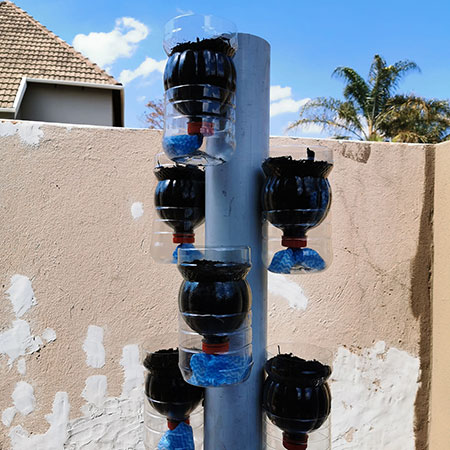
BELOW: One vertical vegetable garden is now complete. You can see how the plastic containers have been staggered around the PVC pipe to allow more containers per pipe.
RAISED GARDEN BEDS
The decision for raised beds was taken because both hubby and I are getting on in years and it is just so much easier not have to kneel or bend down too much. But raised beds are ideal if you want to cut down on backbreaking garden work, whether you are young or old!
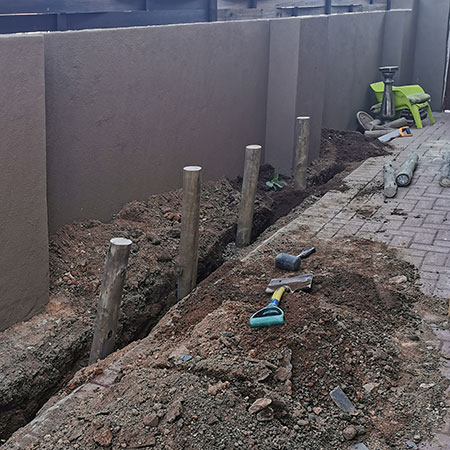
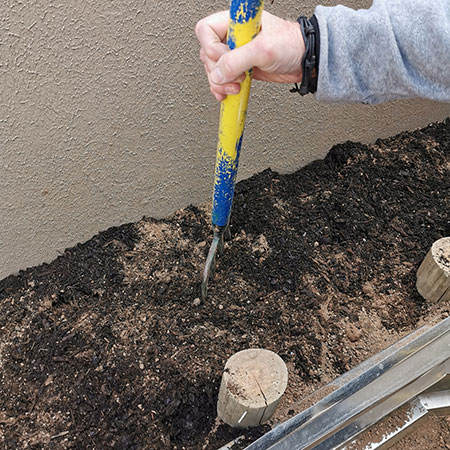
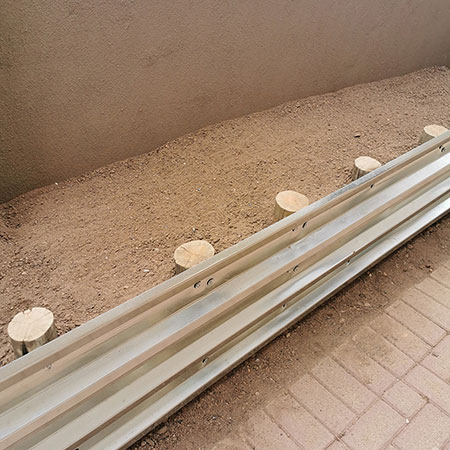
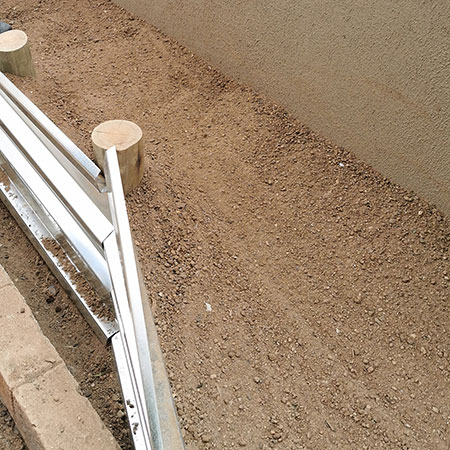
1. To install the raised bed a channel was dug out 300mm deep. The 75-100mm gum poles were cut 900mm in length so that 300mm would be below ground and 600mm would support the IBR sheet that would form the side of the raised bed. To cut the IBR sheet to size you will find instructions in this article.
2. A mix of 1:cement, 2:sand and 4:stone was poured around each post and then left overnight before filling up again with soil.
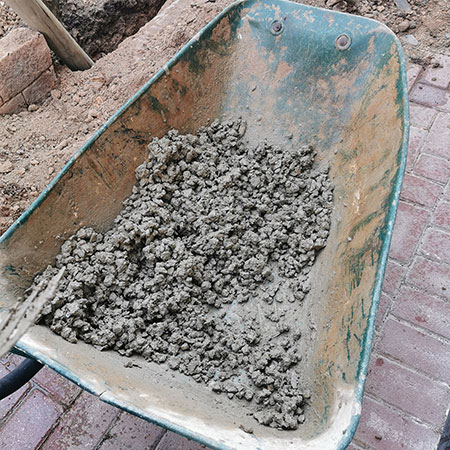
ABOVE: When mixing the cement, sand and stone, don't add too much water. The mix should be wet but still a bit dry.
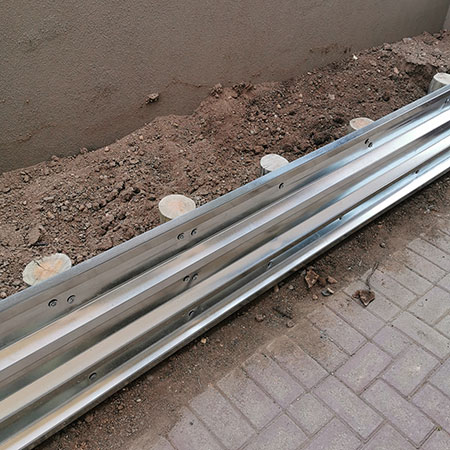
The IBR sheeting was secured onto the posts with roofing screws and washer. The screws were angled slightly - in different angles - for a secure mounting onto the gum poles.
3. To fill the beds I used soil from another area of the garden we are busy working on. If you don't have soil you can use, you can buy quality garden soil by the half-load or full load, depending on how much you need, and have it delivered. The soil was full of grit, bits of cement and thousands of stones. The easiest way to sift the soil to remove the rubbish was to fold over a piece of chicken wire and sift the soil.
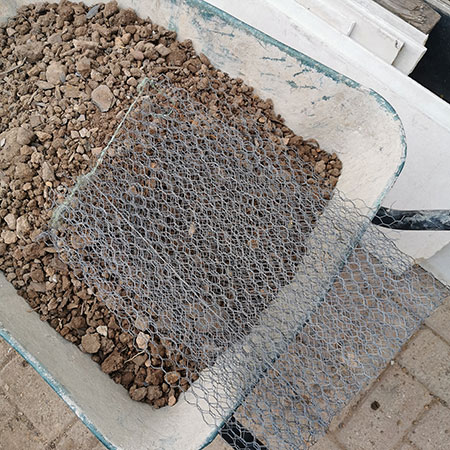
ABOVE: An easy method for sifting soil is to fold over a piece of chicken wire. Place the chicken wire over a bucket to separate soil from rubble and then toss the rubble into a wheelbarrow for removal.
ABOVE and BELOW: Once sifted, the soil only has a few bits of grit and that's fine for vegetables.
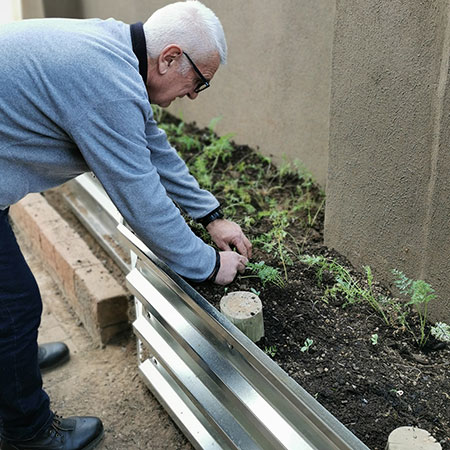
4. You will need to enrich the soil with organic compost and some all-purpose fertilizer. We used Wonder Organic Vita-Boost Vermicompost. This will add essential nutrients to the soil to get them started. Now you are ready to start planting your seedlings.
GOOD TO KNOW: I previously sowed seeds for planting into the raised beds and recommend that you sow seed in a sunny spot and water well until they reach a reasonable height for plating into your containers or raised beds.