
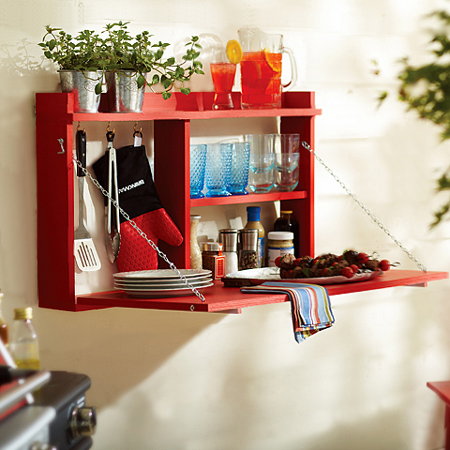
Outdoor bar for braai area or patio
This nifty wall bar is just the thing for outdoor next to the braai, on a patio, or even on a balcony. You can make it out of pine, or marine plywood if you want to leave it outdoors.
YOU WILL NEED:
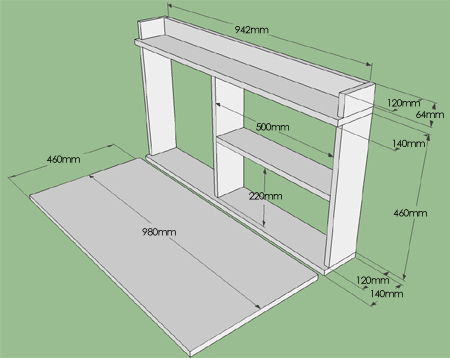
2 of 140 x 940mm pine - top/bottom
3 of 120 x 460mm pine - sides | centre divider
1 of 120 x 942mm pine - top shelf back
2 of 120 x 64mm pine - top shelf sides
1 of 120 x 500mm pine - inner shelf
1 of 460 x 940mm pine - door
2 small square dowels, trimmed to fit - door stops
Piano hinge, 950mm length
Eyehooks, 2
S-hooks, 2
Chain, 1 metre length
Wood glue
Wood filler
Side hook latches, 2
Plascon Wood Primer and Sure Coat Enamel
or Wood stain and Woodcare top coat
Paintbrushes
The wood can be cut to size at your local Builders Warehouse or you can do it yourself with a jigsaw, circular saw or tablesaw, carefully measuring and cutting each piece to fit.
HERE'S HOW:
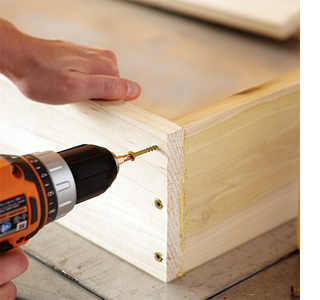
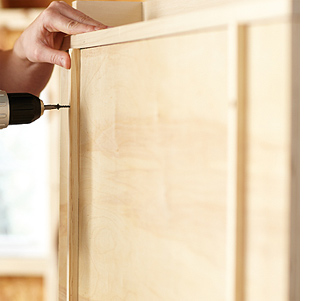
1. Assemble the sides, top and bottom pieces to make the frame. Ensure they are accurately put together using a level or T-square. Carefully apply wood glue on both sides of where the pieces will meet before joining. Then, fasten together with wood screws, making sure to quickly take off any excess wood glue that is visible.
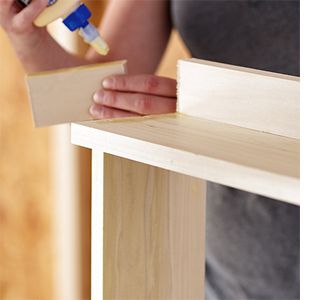
2. Next, place the back top, middle, and shelf pieces, making sure all are flush and square. Install and fasten them to the frame using the same steps and materials used above.
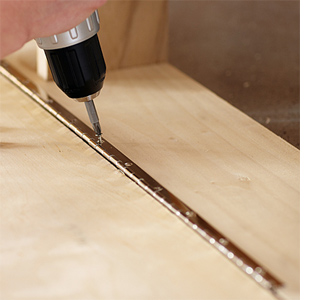
3. Centre and then attach the piano hinge onto the front piece with 16mm screws. Make sure the other side of the hinge is fastened to the bottom portion of the bottom piece of the shelf frame. Test the hinge to make sure the front piece closes and opens properly.
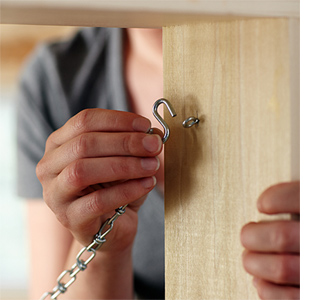
4. Attach eyehooks to the inside of the cabinet about 30mm in from the front edge. Secure the chain to the door flap with a 16mm screw and then insert the S-hook at the end, making sure it is secure. Test all parts to ensure the front piece works efficiently. You can cut the chain if too long.
5. Check where to mount the two square dowel rod stops to ensure they will stop at 90 degrees when the front flap is opened and folded down. Place the dowel stops about 50mm in from each side and screw to the front panel. The stops ensure that the weight is supported should any item be placed on the panel when in use.
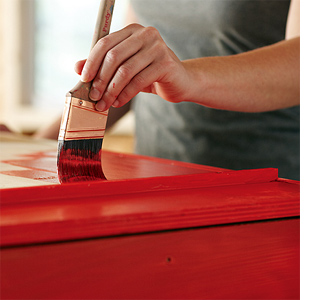
6. Fill any holes or gaps with wood filler before sanding down the piece with 120- and then 240-grit sandpaper. Apply wood primer or stain of your choice to all wood surfaces. Apply wood primer and paint using acrylic paint in your choice of colour.

7. Now you are ready to attach the side latches to hold the flap closed when not in use. Fit picture hangers to the back of the frame for mounting onto the wall.
Mount the assembled and completed buffet cabinet, checking it with a level after installation to make sure that it will be fully functional and safe.