
New tabletop for garden table
I have been lusting after a raw edge table for some time now. Pairing them with the right pieces can lead to some gorgeous outcomes. But that price tag!!! I have seen them for less, but still way too much for my pocket. So, Kristin over at The Hunted Interior decided to do what she does best... make one.

thehuntedinterior.blogspot.com
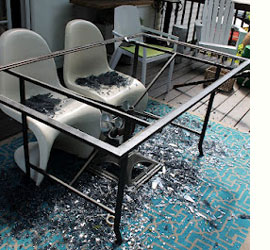
After our outdoor glass table crashed last week we knew we immediately had to make a new one. Now that it is warm out, we try to eat outside as much as possible. That is kinda hard to do on a table with no top! Since the base was in great condition, we decided it would be best to keep it and create a new wood top. We looked at a picnic style tops, solid tops... and we ended up with a bit of a combo.
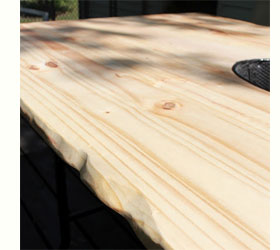
We pieced together two large pieces of wood with a narrower one down the middle.

To attach the wood together we used our old faithful method of applying exterior No More Nails down the side of each board, place them side-by-side and securing with some scrap pieces that are also glued and screwed. Once you flip over the top you simply sand down any edges that aren't flush. This gives you a strong and sturdy top.
For our ice bucket, we traced the shape of your ice bucket on to the top where you want it and then cut it out with a jigsaw.
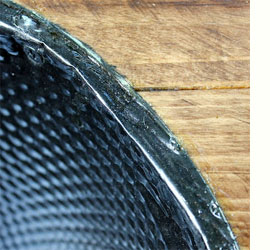
The hubs had the brilliant idea to uncurl the buckets rim so we could hammer it flat onto the table top. This covered up any places where a jigsaw may have messed up { cough cough }. We added screws around the interior perimeter of the bucket into the table opening to keep it secure.
Now comes the fun part... The EDGES!
I pulled out our belt sander. And let me tell you this thing is for real. It really could tear up a piece of furniture, which is not usually the intended goal, but it worked perfectly for this. There is no science to this part, just go at it with all you've got. Remember you can always go back and make any of your cuts deeper.
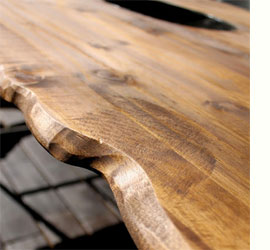
Once you are happy with your edges, it's time to stain and seal. You can use Woodoc Gel Stain or add stain concentrate to clear Woodoc 30 (Woodoc 50 or 55 for coastal regions).
I coated every nook and cranny of this thing, starting with the bottom. It wouldn't make any sense to simply coat the top, as the base would be still be exposed to the natural elements as well. Since we were using pine boards I applied three coats of sealer, sanding down with steel wool in between the first and second coats.
This is honestly the longest part of this project because of the 24 hour time. The table itself was literally constructed in an afternoon. After all the coats were dry, we attached the top to our base. The hubs came up with yet another brilliant idea... Gosh he's good to have around.
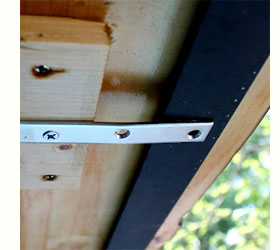
He took some thick metal braces and screwed them into the scrap wood. The piece overlapping the metal than acted as a vice and clamped the top to the metal base.