
Build a concrete and wood garden bench
Combine the strength of concrete with the warmth of wood to make a stylish bench for the garden.
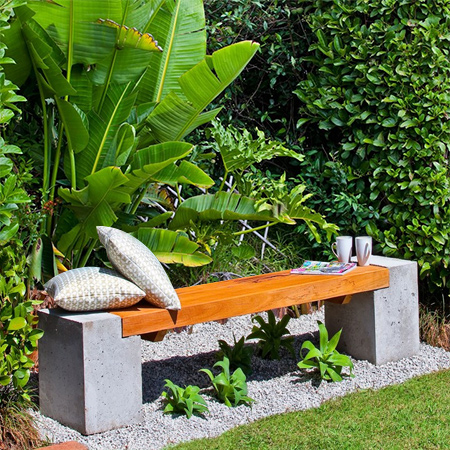
This bench allows you to put your DIY skills to excellent use to combine concrete and wood for a beautiful, modern bench for the garden. Not only will you save yourself a fortune - you also have the satisfaction of knowing that you made it yourself.
YOU WILL NEED:
2 of 434 x 467 x 16mm shutterply - sides
400 x 467 x 16mm shutterply - back
400 x 400 x 16mm shutterply - base
400 x 377 x 16mm shutterply - front
32 x 94 x 400mm x pine - shutter
Concrete, 1 of 50kg bags per block, depending on size of polystyrene block
Concrete sand, 2 wheelbarrows
Seat slats, cut to size - pine or hardwood*
3 of 44 x 44 x 360mm pine or hardwood - cleats
45 and 75mm screws
Polystyrene blocks, cut to fit
TOOLS:
Wheelbarrow
Spade
Steel finishing trowel or float
Circular or mitre saw
Electric planer
Orbital sander
Drill / Driver plus assorted bits
Spirit level
Tape measure and pencil
Rubber mallet
Safety gloves and dust mask when working with cement
*Consider using new or reclaimed scaffolding planks, or reclaimed timber beams for the seat slats.
Buy everything you need for this project at your local Builders Warehouse.
HERE'S HOW:
GOOD TO KNOW: Materials indicated are for a single form, so double the quantities to make two forms that can be poured at the same time. If you do use the same form you need to clean after each use. Click here for PDF on quantities and materials for successful concrete projects.
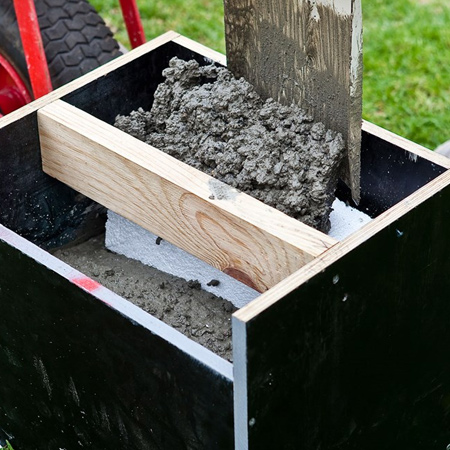
1. Assemble the shutterply to create the formwork for pouring the cement. The blocks here are 400 x 400mm square with a height of 450mm and a 140 x 90mm rebate across the top to support the seat.
2. Attach the panel sides to the back and base with 45mm screws. Make sure all joints are flush. After that attach the front so top edge is 90mm down from top of sides. Place and secure the shutter between the sides - with back edge 140mm from front edge. This creates the step in the block.
GOOD TO KNOW: All screws should be on the outside of the form to allow easy removal and a smooth finish once the concrete has been cast.
3. Pour sand and cement into your wheelbarrow and slowly add water to make a workable mix. The mix should not be too stiff or too sloppy. as it will not flow into corners of formwork. Continue adding concrete to fill up to level of bottom of rebate. .
GOOD TO KNOW: Use a rubber mallet to tap the form so it settles properly and eliminates excess trapped air bubbles.
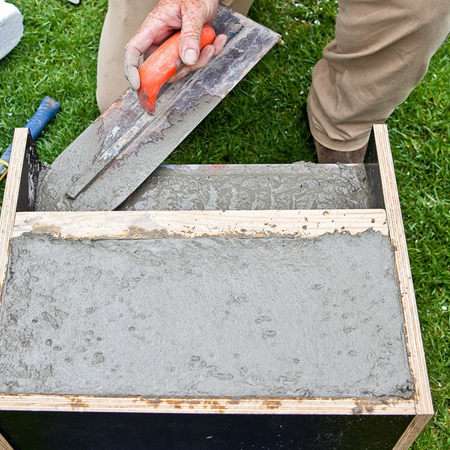
4. Fill the form to the top and then use a steel finishing trowel or float to smooth surface. Make sure concrete rebate finishes flush with underside of shutter. Leave the concrete to cure for 7 to 10 days, occasionally misting with a hosepipe in hot, dry weather.
GOOD TO KNOW: It helps to mist and then cover with plastic for a few days to ensure a solid curing process with less cracks.
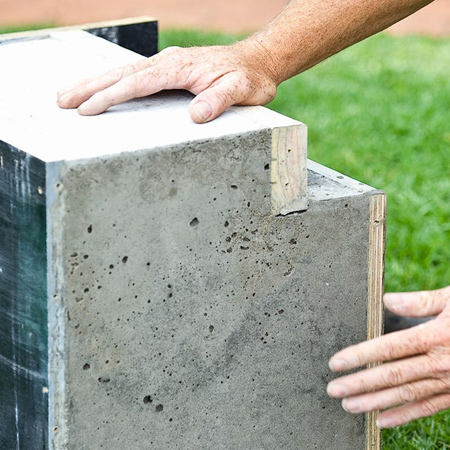
5. After curing, unscrew the forms and gently tap with a rubber mallet to release. Carefully remove the form piece by piece - tipping over to remove the base.
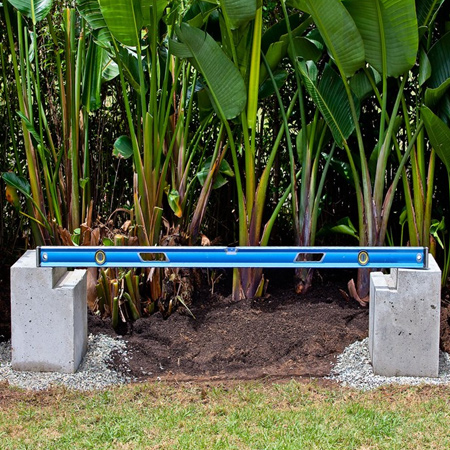
6. Layout where the bench will be situated and place the concrete blocks. Use a spirit level to check the level and adjust where necessary.
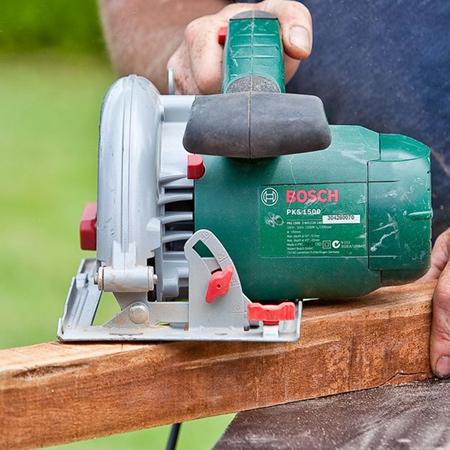
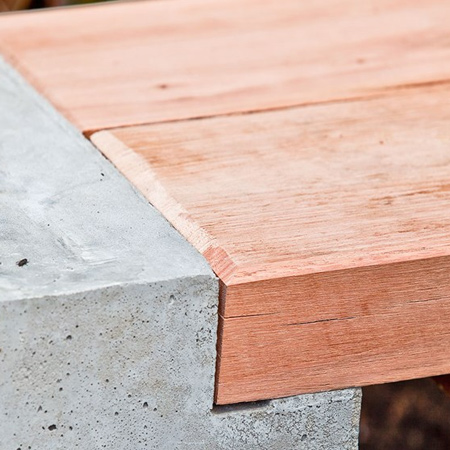
7. After placing the concrete blocks, cut the seat pieces to the desired length (the ones here are 2100mm). Use an electric planer to chamfer the edges for aesthetics and to prevent splinters. Use a sander to smooth all surfaces, starting with 120-grit and finishing with 180- / 240-grit.
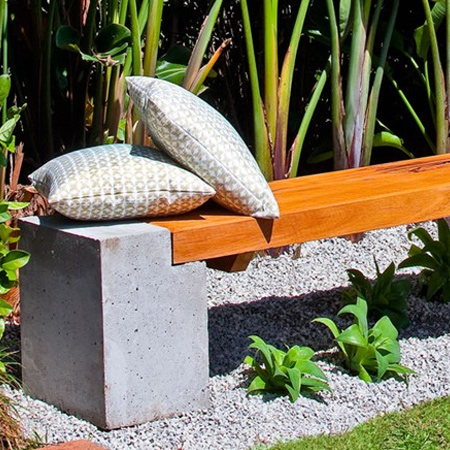
8. Cut a 45-degree angle at each end of the cleats. Place a cleat at each end and one in centre and secure to the underside of the seat slats with 75mm screws. Position finished seat on the rebates of the concrete blocks.
Finishing
Use Woodoc Exterior Sealer in clear or tinted to protect your new outdoor bench.
bhg.com.au