
Putting Up Fences
Katie of Our House Story shares her hilarious experiences in fence building. This project goes to show that you CAN do anything if you really put your mind to it !
08/2024
We don’t have anything against renters, since we were there ourselves, and there are definitely good ones. The ones with domestic disturbance calls, who park their leaking trucks in front of your house, park their car so that it hangs over into your driveway, and who may, or may not have shot a gun into their television set and then left it sitting in the street for over a week – those kind of renters? We can do without them! So, when the latest renters moved out, we decided it was time to build a fence because we desperately need some privacy!
ourhousetory.wordpress.com
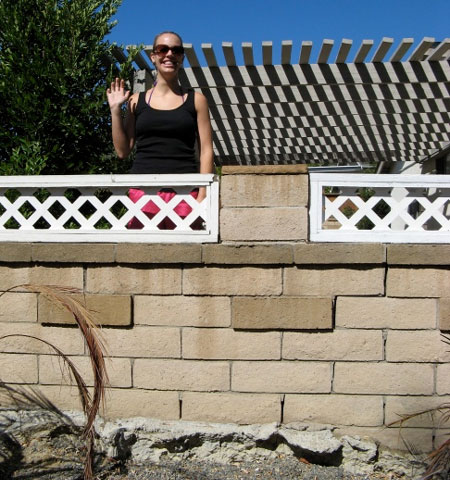
That’s me standing in our next door neighbour’s garden - looking down into our own garden. Beyond the fact that we really wanted to be able to sit naked in the garden during our nightly barbeques (just kidding, guys!), the fact that they could see directly into our master bedroom sitting was also a drawback.
That was our view from the master bedroom. They had a clear shot looking into our master bedroom, so we constantly left the curtains closed, and that resulted in a gloomy feel in our master sitting room.
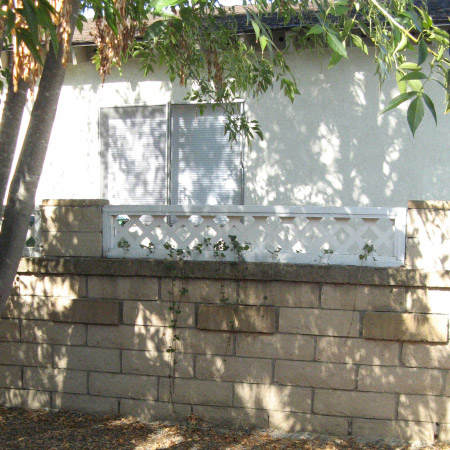
The existing wall was about half a metre tall, and we decided to add another metre to the top to create a little more privacy. The only problem? The existing stone wall was falling apart.
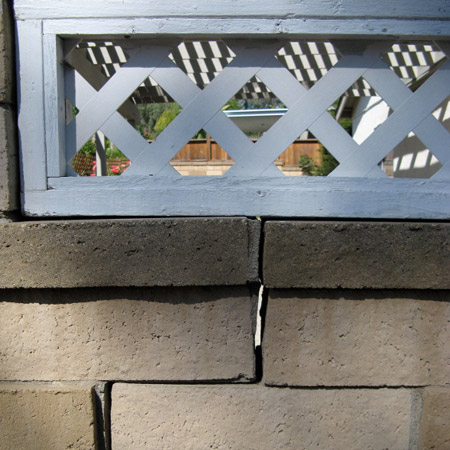
Unaware of the fact that stone fence installation is going to be a hilarious experience, we started by rebuilding the wall (I’m quite the stone mason), and by knocking off those stone caps that were holding the lattice in. Of course, those stone caps were filled with concrete and rebar, and knocking them off may have incidentally resulted in us breaking some stones underneath - so, off to the store we went.
Three and a half hours later, the stone fence was entirely repaired, and ready for us to begin mounting the fence to the stone wall.
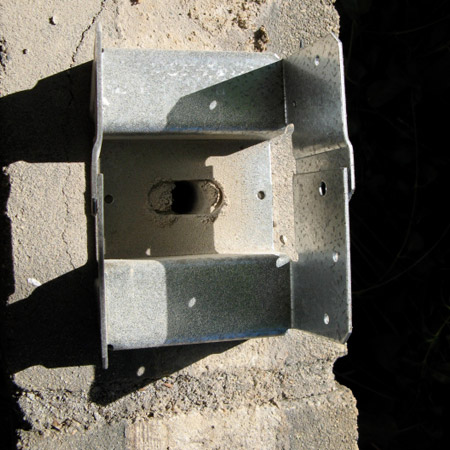
After three and a half hours of repairing the fence, we were slightly short on patience when it came to drilling through concrete stones to sink in anchor bolts to secure the metal post bases. I am not exaggerating (well slightly exaggerating) when I say it took 20 minutes to drill each hole.
There were 7. We each took turns, but it was beyond exhausting. And by the end of the first day, we finally had the stone wall repaired, and the metal post bases mounted. It was about an 8 hour day, and we were d.o.n.e.
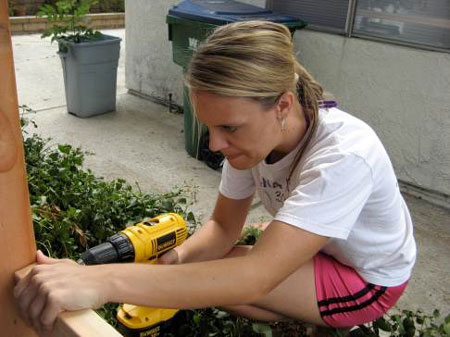
Day 2 brought us securing the posts to the metal bases, and building the structure to support the fence. Please note that my look of extreme concentration in the picture below is a result of the fact that I am such a pro with the drill that I hold the next screw in my mouth so that I’m ready. Yep, it was about two minutes after this picture that I was quoted as saying I need my own drill. That way we could work faster, because we could both work at the same time!
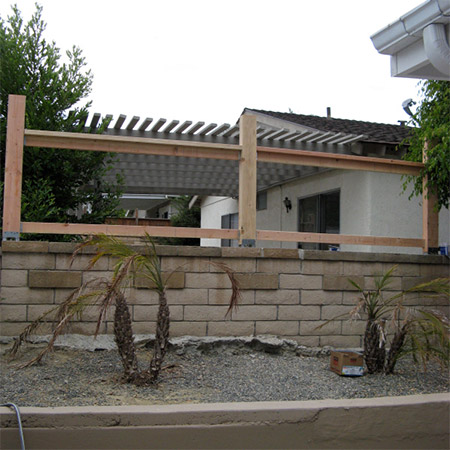
After we had all the supports secured, we had something that looked like this.
Then, finally, came the fun part! I’m not even kidding. Once the support structure was built, the rest of this probably took about two hours. I suppose at this point I should also point out that the fence runs about 14 metres on the side of the house. This is no small fence. It’s more like the Great Wall of China now.
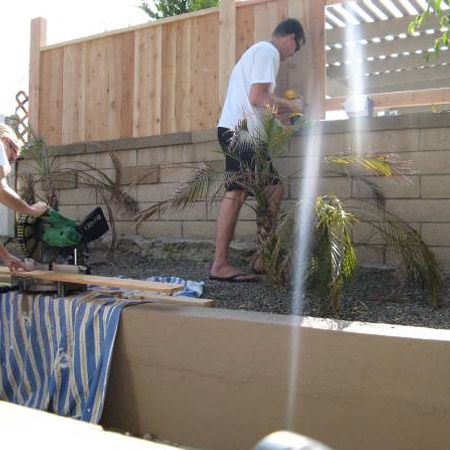
I was responsible for cutting the boards, while Chris screwed them all to the fence structure.
I should also point out that we determined the height of the fence by figuring out how we could cut the fence boards directly in half to save money. So, rather than needing to buy 100 fence slats, we only bought 50.
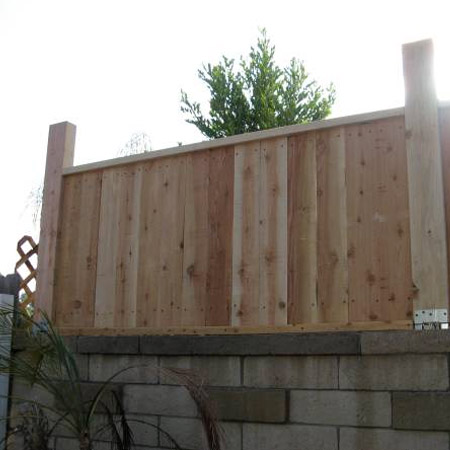
We still need to attach a lattice to the top so that it matches the rest of the fence in the garden, and then we’ll need to paint it white.
Here in South Africa we don't have the luxury of being able to buy cedar, but as an alternative we do have pine or meranti. The former is reasonably priced for building a fence, but do shop around for the best pricing you can get. Meranti, on the other hand, is more expensive and will last longer.
Whatever timber you use for outdoor fencing, it needs to be sealed to protect against the elements. You can paint over timber after applying wood primer to the surface, but the best is to apply an outdoor sealer such as Woodoc 30, 50 or 55.