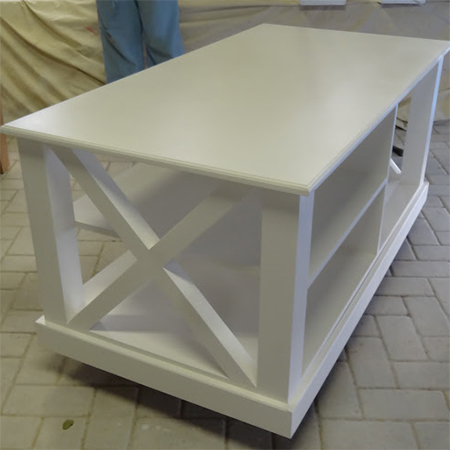
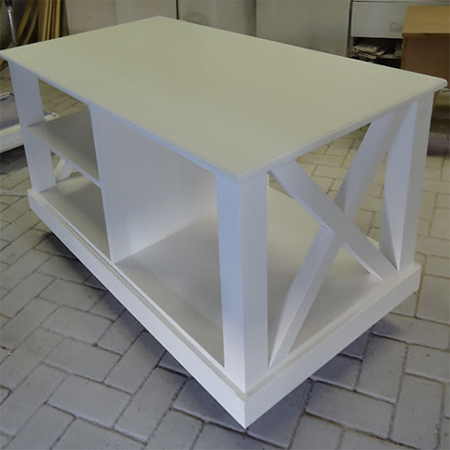
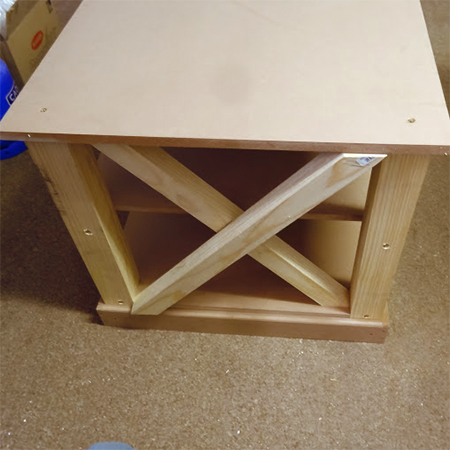
DIY elegant, modern coffee table
This elegant coffee table would look good in any living room. It has plenty of storage space for books and accessories, and the design is very simple to assemble. Distress the table if you prefer a more Shabby Chic finish.
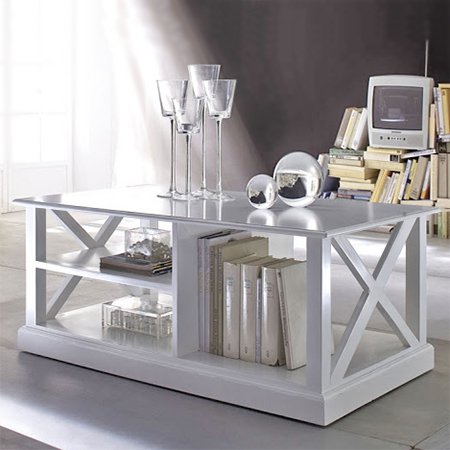
This elegant and sophisticated coffee table would cost in the region of R3500 if you wanted to buy new, but you can make it yourself for about R800, including the cost of paint.
YOU WILL NEED:
1 of 640 x 1240mm 16mm SupaWood - top
1 of 600 x 1200mm 16mm SupaWood - base
1 x 450 x 600mm 16mm SupaWood - divider
1 of 550 x 600mm 16mm SupaWood - shelf
2 of 70 x 1200mm 16mm SupaWood - front panel
2 of 70 x 632mm 16mm SupaWood - side panel
4 of 69 x 69 x 536mm PAR pine - legs
2 of 44 x 44 x 1800mm lengths of PAR pine - crossbeams
4 x 35mm cut screws
5 x 75mm cut screws
6 steel corner braces or brackets and 16mm screws
Wood glue
Wood filler
Wood Primer
TOOLS:
Drill / Driver plus assorted bits
Countersink bit
10mm spade bit
Mitre saw or mitre box and backsaw
Orbital or Random Orbit Sander plus 120- and 240-grit sandpaper
Optional: Router and decorative bit
Tape measure and pencil
You wil find everything you need for this project at your local Builders Warehouse.
HERE'S HOW:
All sections are pre-drilled with 3mm countersunk pilot holes unless otherwise specified.
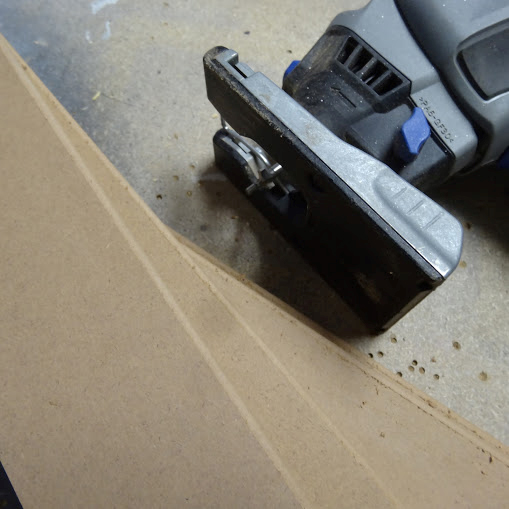
1. Before you start assembly there are a couple of pieces that need to be cut and routed. On the base measure 69 x 69mm for the legs to be mounted and cut this out with a jigsaw.
2. Mark at the centre of the cut out on the long side and drill a 4mm pilot hole x 75mm deep for mounting the legs to the base.
3. On the top, front and back panel, and the side panels, use a Trio or Router and decorative bit to finish off the outside edges.
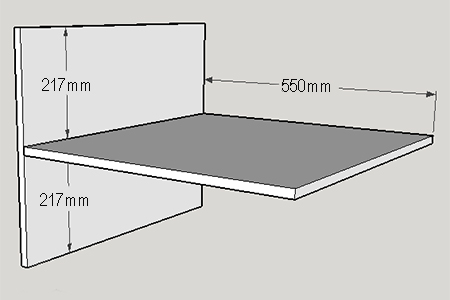
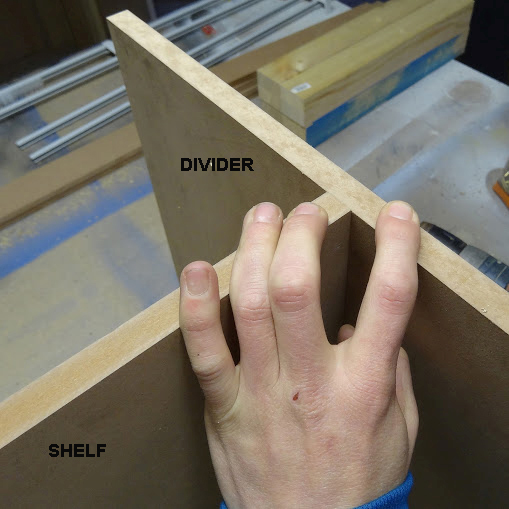
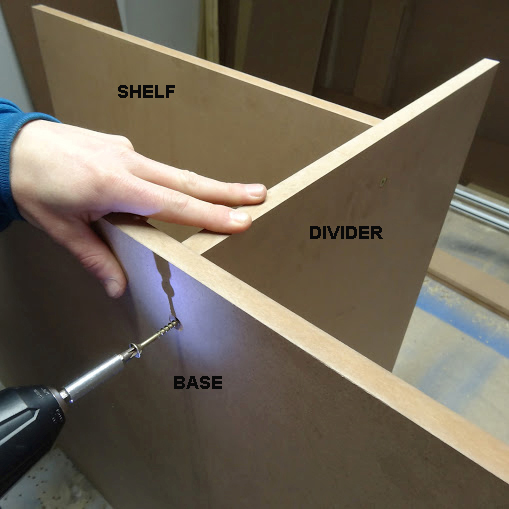
4. Measure and mark at 217mm from the top and bottom of the divider and use this as a guide to mount the shelf using 4 x 45mm screws.
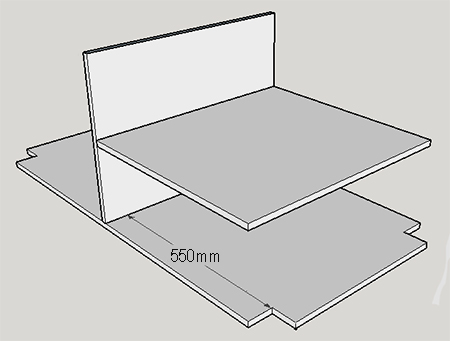
5. Measure and mark at 550mm in on the shelf side and draw a line. Also draw a line at 566mm - on both sides of the base. Use this as a guide for securing the base to the divider.
6. On the legs for the side where the shelf in mounted, measure and mark around the leg at 70mm and 86mm, and 303mm and 319mm; also mark the centre point at the front of each leg (34.5mm). On the remaining two legs only draw a 70mm and 86mm line with a centre mark at the front. On this mark drill a 10mm deep hole with a 10mm spade or drill bit.
7. Using the drawn lines as a guide mount the legs to the base and shelf using 5 x 75mm screws. These holes can be filled with a 10mm plug or using layers of wood filler.
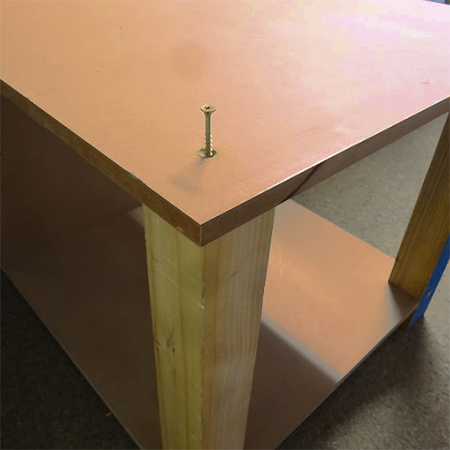
8. Allow a 20mm overlap all the way around the top before screwing the top to the legs and divider using 4 x 45mm screws.
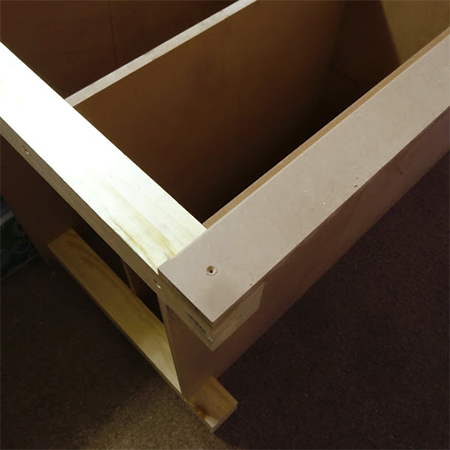
9. Secure the front and back panel to the legs. Repeat this for the side panels, adjusting the screws slightly to avoid the screws already place for the front panel.
GOOD TO KNOW
Add [2] steel angle braces or brackets along the front and back panel, and one each on either side, and secure to the underside of the base to ensure the panels are firmly fitted along all edges.
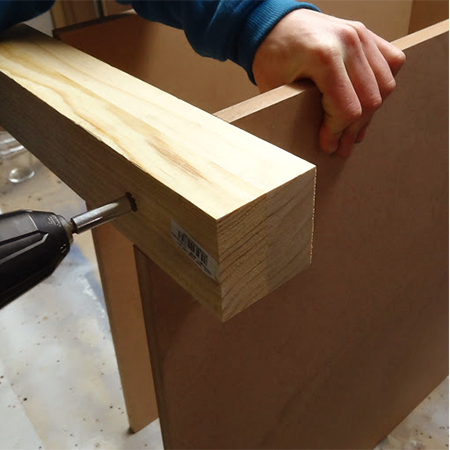
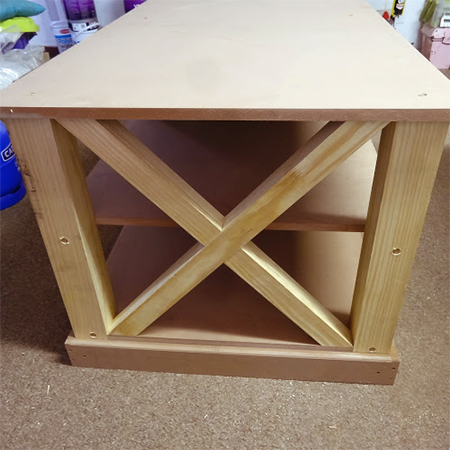
10. To make the crossbeams, first cut four 650mm lengths of 44 x 44mm PAR pine. On one length cut a 42-degree angle at the top. Place this against the side of the table and mark at the bottom for the correct length. Repeat this for the second leg, and for the legs on the other side. It is far better to do it this way than to provide exact lengths and cutting angles, as a few millimeters here and there in the final assembly can make a lot of difference when fitting the crossbeams.
GOOD TO KNOW
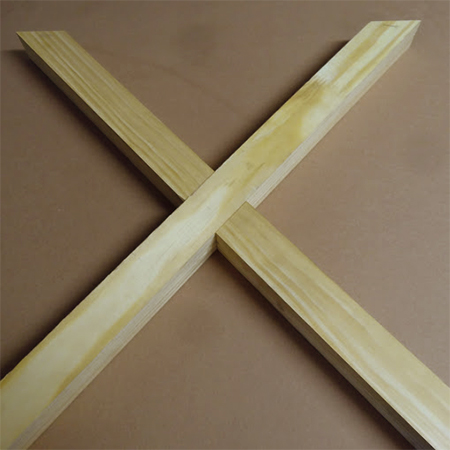
Keep the crossbeams in pairs for side A or side B, so that you now exactly which piece fits where.
11. Take one pair of crossbeams and place these in position in the side of the table to mark the exact point where the two crossbeams intersect - draw a line on the top and bottom of both crossbeams. Repeat this for the other side.
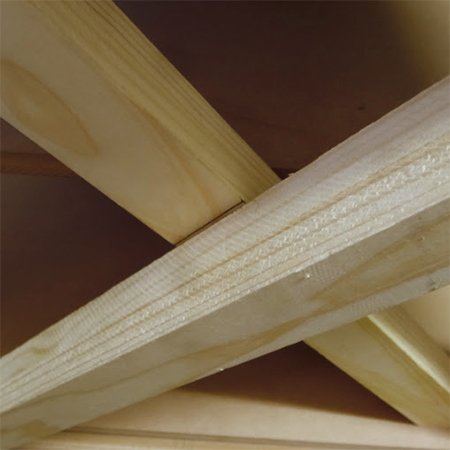
12. So that the crossbeams overlap you need to remove exactly half the thickness on both beams. The crossbeam at the back will have the top half removed while the crossbeam at the front will have the bottom half removed. These will then slot together to create the 'X' shape at the ends of the table.
GOOD TO KNOW
You can use a table saw, mitre saw or a wood chisel to remove the half sections, since the pine is laminated - glued together and is reasonably easy to remove.
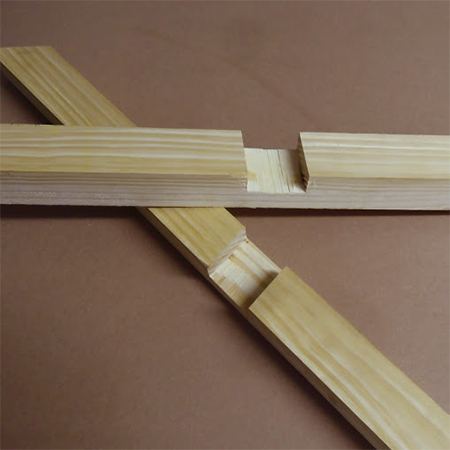
13. Use wood glue to glue the sections together and then clamp and leave overnight.
14. Secure the crossbeams in place with a bead of wood glue on the ends.
Finishing
- Fill all screw holes with wood filler and leave to dry.
- Sand all the cut edges with 240-grit sandpaper until smooth.
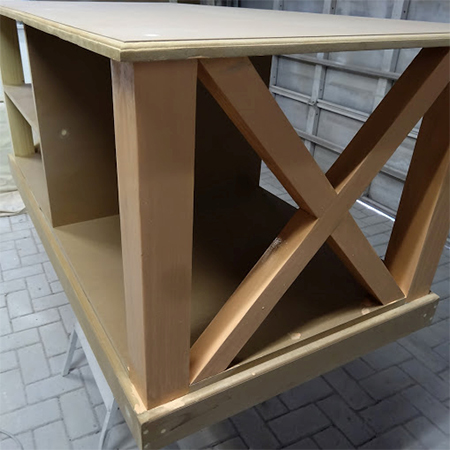
- Before painting use Wood Primer on the pine sections. Apply two coats with a paintbrush and foam roller combination, allowing the first coat to dry before applying the second coat.
Painting
- Using a Bosch PFS spray system is the easiest way to paint detailed furniture and application is easy and quick.
- Alternatively, use a paintbrush and foam roller combination for a smooth finish.
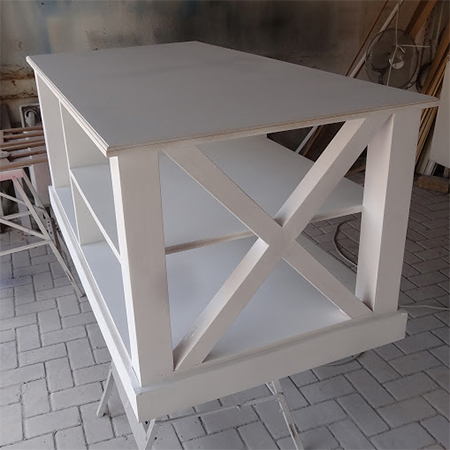
For painting projects I prefer to use Plascon Polvin. This matt paint can easily be sanded between coats with 300-grit sandpaper, and after the final coat with 1000-grit sandpaper. This provides a silky smooth finish over which you can apply antique wax or clear acrylic sealer.