
DIY Mobile storage unit
Making your own DIY storage unit is a quick and easy project that will only cost around R500 for materials and accessories. You can buy laminated pine board at your local Builders Warehouse and have this cut to size, and they also stock a range of castor wheels.
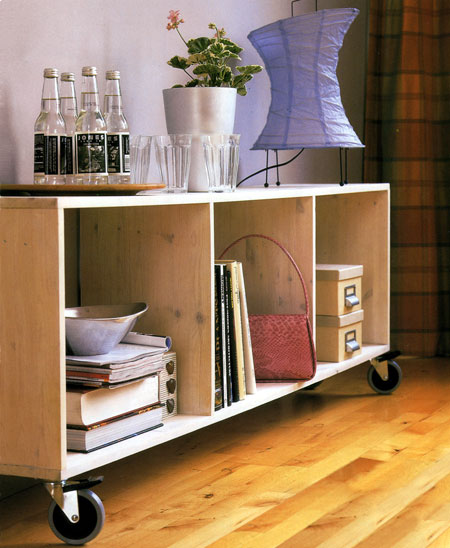
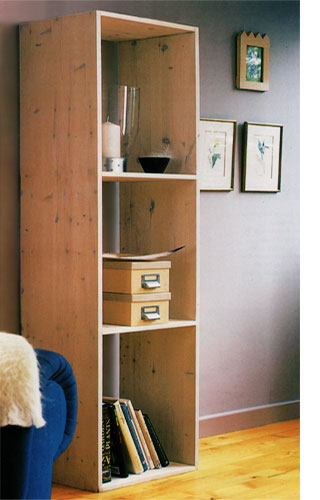
The simple design of this storage unit allows you to create an upright bookshelf or display cubby, or to put it on its side, add some castor wheels and turn it into a mobile storage unit. Once assembled, you can finish off the storage unit in a variety of ways. Stain and seal with Woodoc 10 interior sealer.
Simply sand smooth with 240-grit sandpaper and wipe clean with a cloth lightly dampened with mineral turpentine before applying Woodoc 10 according to the instructions on the can. Rust-Oleum 2X spray paint comes in a wide range of colours. Take the unit outdoors to spray.
YOU WILL NEED:
3 of laminated pine shelf 315 x 1800mm
Wood glue
24 of 3 x 35mm half-shank wood screws
16 0f 3 x 16mm wood screws
Tape measure and pencil
Drill/Driver and assorted bits
Corner clamps
Optional: 4 castor wheels*
Note: If the storage unit will support heavy items, use a total of 6 castor wheels (2 in the centre)
HERE'S HOW:
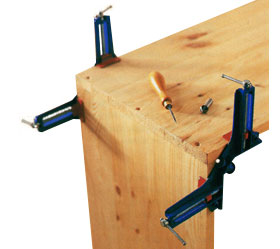
When assembling the storage unit, make life easier by using corner clamps. These nifty clamps align two sections together into a perfect 90-degree angle and hold firmly whilst you join together. The storage unit is designed to use 2 lengths of 1800mm long x 315mm wide laminated pine shelving - without any waste.
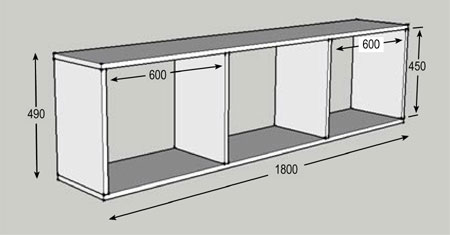
The easiest way to assemble is to measure and mark and then drill pilot holes and countersink all the pieces in advance. On the long sections, measure and mark in 20mm and 590mm from the end and draw lines. The first 20mm line is for the end panels. On each 590mm line drill a pilot hole 30mm in from each side and in the centre.
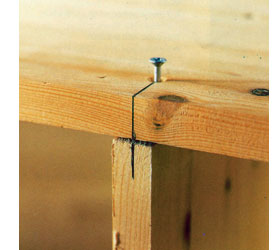
Drive half-shank wood screws through the top and bottom, but not completely through the board. Place and align each end panel and then the centre panels and continue to drive the screws into the panels. Use the 16mm screws to attach the castors to the base of the unit. Use your thumb as a guide for placing the castors at each corner.