
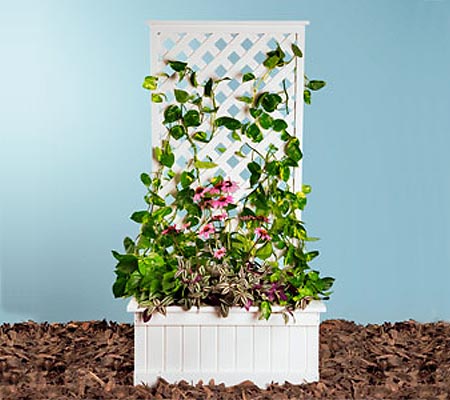
Make a trellis planter box
Perfect for planting up with creepers, climbers and roses, a trellis planter box is also ideal for sectioning off a nice secluded area as a garden retreat - a place where you can go to sit down, have a glass of wine, and relax after a hard day's work.
I've always loved the idea of a large garden filled with colourful flowers and luscious vegetables. But it always turns out to be too much work. Avid gardeners tell me that I'm missing the point, but spending weeks on my hands and knees yanking weeds and swatting away bugs isn't my idea of fun.
Then I discovered container gardening, the popular practice of planting in pots, trays, window boxes and other portable containers. What makes this appealing to me - and millions of others - is that it requires very little space and a minimal commitment of time.
This planter trellis is my favourite container-gardening project. It makes an attractive privacy screen for a deck and can hide a pool pump or a propane tank.
YOU WILL NEED:
34 of 20 x 100 x 350mm pine tongue and groove (box panel)
2 of 20 x 100 x 790mm pine (box trim)
2 of 20 x 76 x 790mm pine (box trim)
2 of 20 x 100 x 445mm pine (box trim)
2 of 20 x 76 x 445mm (box trim)
2 of 50 x 100 x 700mm pine (cleat)
7 of 20 x 100 x 445mm pine (bottom slat)
2 of 1 x 76 x 840mm pine (rim, front/back)
2 of 20 x 76 x 445mm pine (rim, side)
2 of 50 x 50 x 1490mm pine (lattice upright)
1 of 50 x 50 x 640mm pine (lattice crossbar, lower)
1 of 50 x 50 x 720mm pine (lattice crossbar, upper)
1 of 20 x 100 x 760mm pine (lattice trim cap)*
1 of 12 x 660 x 1210mm pine (lattice)
TOOLS:
Compound mitre saw
Circular saw
Exterior wood glue
Pneumatic nailer or hammer
Drill
Screwdriver
Table saw
Jigsaw
Clamp
HERE'S HOW:
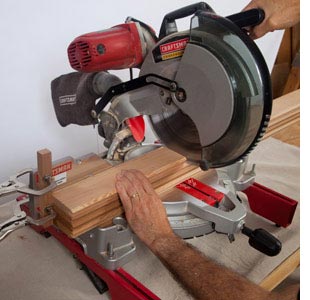
1. Begin by cutting the tongue-and-groove used for the planter box. Cut grouped pieces using a compound miter saw with a stop clamped to its fence. This method ensures all the parts are accurately cut to the same dimension. Lacking a mitre saw, you could carefully measure, mark and cut the parts freehand with a circular saw using a crosscut guide.
2. Cut the cleats that the planter rests on and the horizontal trim to which the tongue-and-groove pieces are nailed.
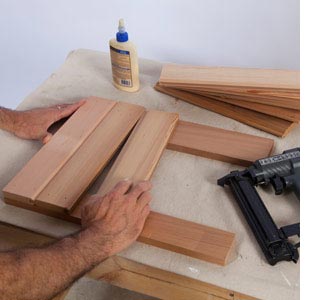
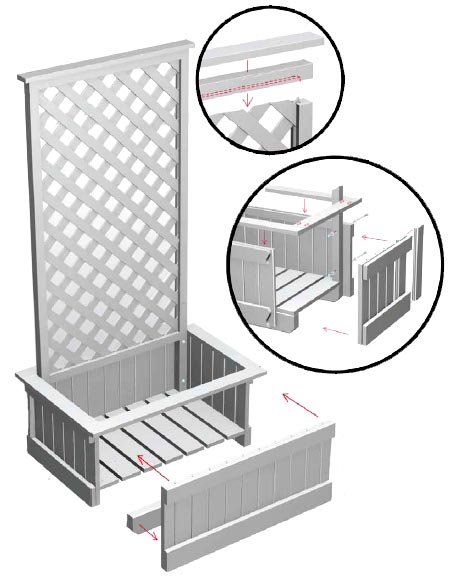
3. Use exterior wood glue and 3 cm nails to assemble the planter box panels. Fasten the tongue-and-groove pieces to the horizontal trim using a pneumatic finish nailer or hammer and nails. Position the rough-sawn surface of the tongue-and-groove pieces so they face the outside of the planter box and face-nail through the back of each piece into the trim.
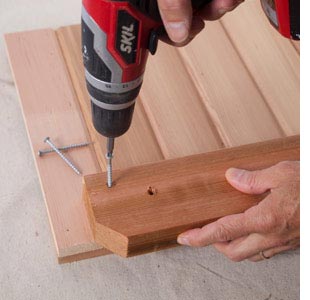
4. Next, fasten the cleats to the front and back panels using 60mm decking screws. Note that the bottom of the cleats is not flush with the bottom of the panels but is offset by 2 cm.
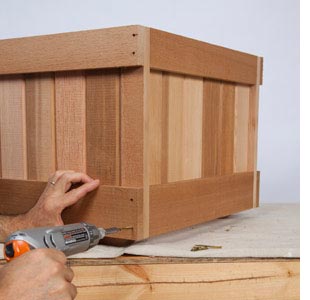
5. With the panels completed, assemble the planter box by attaching the panels to each other. Drill pilot holes, then drive 60mm screws through the front into the side panels. Do the same to attach the back to the sides. Once the box is built, lay the bottom slats in and fasten them to the cleats with 3 cm nails.
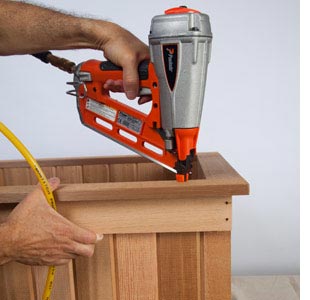
6. The planter box rim consists of four 20 x 76mm pieces joined with pocket screws. Cut the pieces, bore the holes into them, and join with pocket screws.
Place the completed rim on the box with an equal overhang. Fasten to the top of the box with 6cm nails.
7. The lattice frame is simple to build, but you should note that the frame's groove is handled three different ways. In the top horizontal frame member, the groove is stopped at both ends. In the bottom horizontal member, the groove runs out both ends. In the two vertical frame members, the groove runs out the top and is stopped at the joint where the part meets the horizontal frame member.
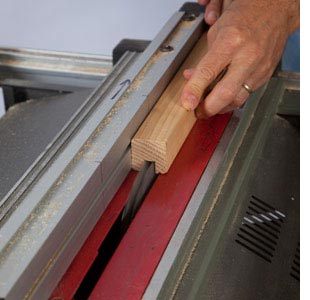
Cut the frame members, and cut the grooves into the pieces using a dado blade in the table saw. To cut a stopped groove, make a registration mark on the side of the workpiece that indicates where the groove stops. Likewise, with the dado blade raised to the depth of the groove, mark the diameter of the saw blade on the saw table (the position of the front tooth and the back tooth). Stop cutting a groove when the registration marks are aligned.
If you're experienced with a table saw, you can begin a stopped groove by carefully pivoting the workpiece down along the side of the fence and onto the dado blade (known as a plunge cut). If the thought of that makes you uneasy, align the registration marks and raise the blade into the workpiece. Square off the end of a stopped groove using a chisel.
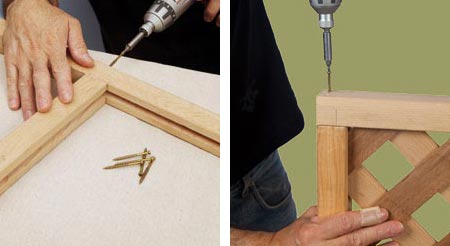
8. With the frame parts grooved, fasten the sides and bottom pieces together using deck screws.
9. Cut the lattice to length using a clean-cut blade in a jigsaw. This reduces the likelihood of cracking or splintering one of the lattice slats. Slide the lattice into the groove and fasten the crossbar. Attach the cap on top of the lattice frame. Finally, clamp the lattice assembly to the planter box and bore the bolt holes for mounting the frame, then bolt the lattice to the box.
popular mechanics