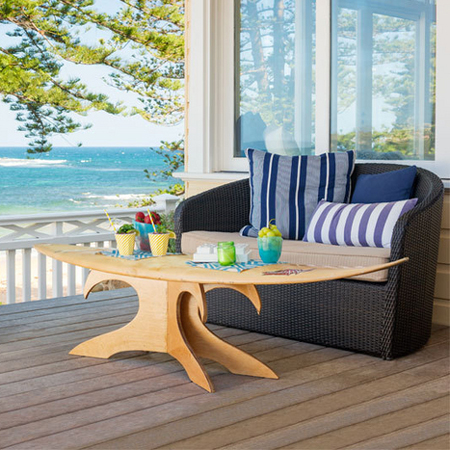
How to make a surfboard table
Although we show you how to make a surfboard table, you can use this base for almost any table design you want. Replace the surfboard with a glass top, or make your own tabletop, for an indoor or outdoor table. Make the base out of pine plywood for an inexpensive coffee table that looks good.
nz.lifestyle.yahoo.com
YOU WILL NEED:
2 of 830 x 380 x 18mm pine or marine plywood
400 x 450mm piece of cardboard
Wood filler, pine
180-grit sandpaper
No More Nails adhesive
(or silicone rubber bumpers for glass top)
Plascon Woodcare Varnish
(or primer and paint)
TOOLS:
Craft knife
Tape measure and pencil
Carpenter's square
Jigsaw and clean cut blade
Circular saw
Straightedge
Clamps
Painting equipment
HERE'S HOW:
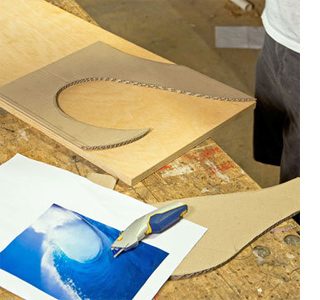
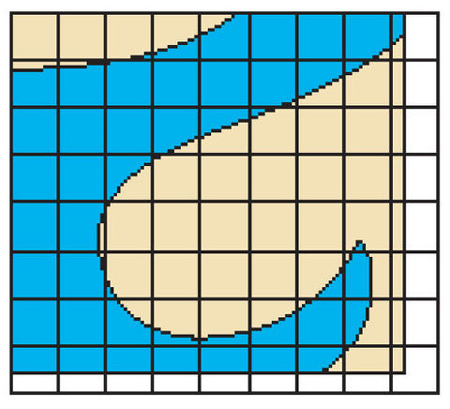
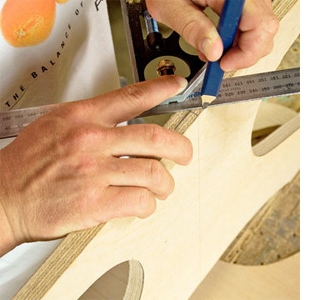
1. For the legs, use the diagram (below). Print out and enlarge, or transfer the design directly onto a piece of cardboard. A good size for the wave is 380 x 415mm. Now you need to transfer the wave shape onto one end of a 380 x 830mm piece of 18mm plywood. You can use pine plywood for indoors or on a covered patio, or marine plywood if the table is going to be placed outdoors.
2. Flip the design over and repeat on the other side of the sheet of plywood, so that you have two wave designs on one sheet. Now repeat this on the second sheet of plywood. These two sheets will form the base for the table.
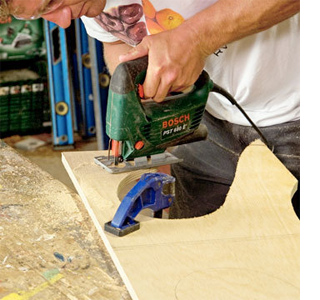
3. Use a jigsaw with clean-cut blade to cut out the wave shapes, making curves as smooth as possible. Sand smooth with 180-grit sandpaper. If you need to fix any rough sections, use 120-grit sandpaper first.
4. Find and mark the centre lines on both leg sections. Draw 45° lines through centre marks. Do this at top and bottom, making sure angles tilt same way.
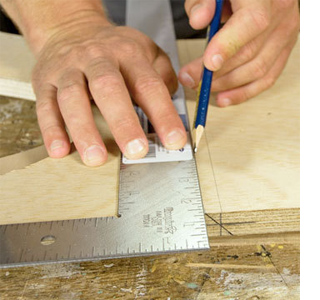
5. At the point where the 45° lines meet face of legs (this should be 9mm from centre line) draw a line parallel to centre line across both legs.
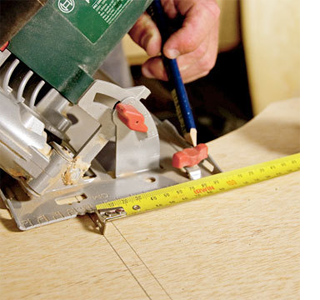
6. Set your circular saw to cut at 45° and set depth of cut so it just goes through 18mm plywood when cutting on angle. Align the centre of the blade to the line you just drew on the leg panel and then measure and mark the outer edge of saw base on plywood. Do this at top and bottom of leg.
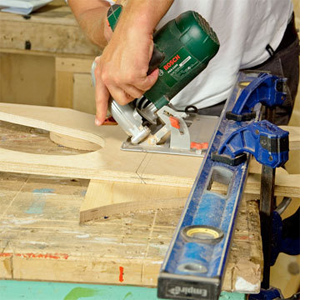
7. Clamp a straightedge to the marks made for the saw base and cut. The straightedge guides the saw for a straight cut. You should end up with 2 leg panels exactly the same size. Sand the cut edges smooth, without sanding off centre lines.
NOTE: As the panel is simply cut in half, these legs will be about 12mm longer than uncut legs when assembled, but this will hardly be noticeable.
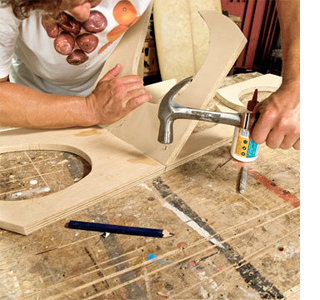
8. Lay the uncut leg panel on a workbench and test-fit one of the cut legs. Align the centre of edge of cut leg with 45° line on edge of uncut leg. Pre-drill 4 angled nail holes that are about 80% of nail diameter.
NOTE: If you don’t pre-drill, the leg will tend to slip sideways as you try to nail.
Remove the cut leg, apply exterior wood glue and then put leg back in place and fix with nails. Finish off nails with a nail punch so they won't be visible.
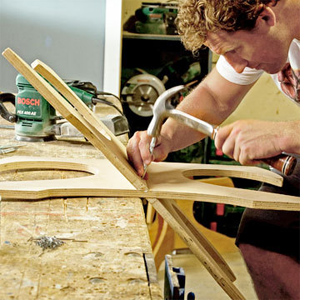
9. To attach other cut leg, clamp complete and uncut leg panel to your workbench - with half of leg overhanging edge. Attach the second cut leg in same way, pre-drilling before nailing. Make sure that the 2 cut legs are aligned.
10. Fill in any nail holes with a small amount of pine wood filler. Let this dry and then sand smooth with 180-grit sandpaper. Apply two coats of Plascon Woodcare (for interior or exterior as applicable), or apply wood primer and paint in your choice of colour with acrylic paint.
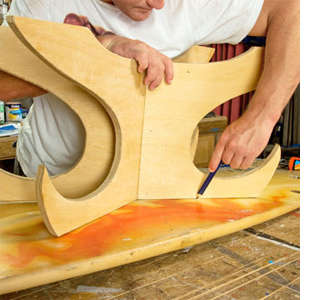
11. Centre the joined legs onto the back side of the surfboard or your coffee table top and draw around legs to mark position.
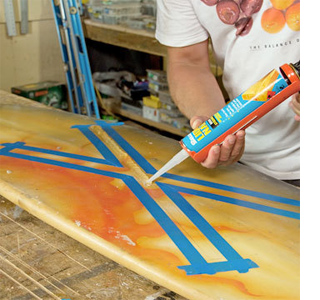
12. Use masking tape, placed about 6mm outside outline of legs, to make removing excess adhesive easier later on. Provide a generous bead of No More Nails adhesive down centre of each leg outline. Position leg assembly and wiggle it gently so it’s well bedded into adhesive. Pull away masking tape to leave a neat edge. Let table stand overnight to allow glue to set.
NOTE: If you are using a glass top, glue silicone or rubber bumpers onto the top of the legs to hold the glass firmly in position.