
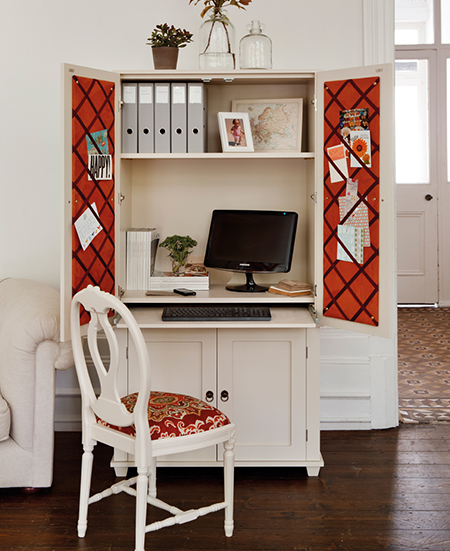
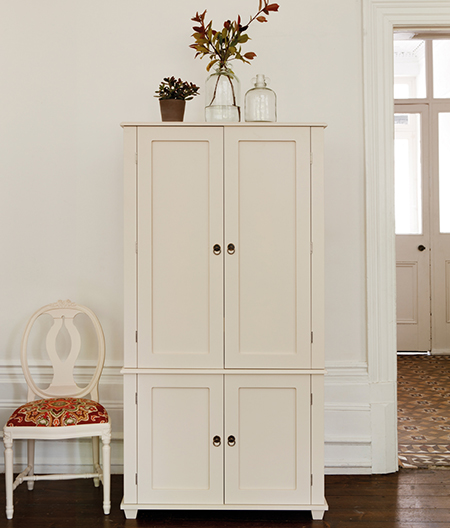
DIY Shaker style home office cabinet - Making the base cabinet
This Shaker style cabinet or cupboard is perfect for setting up a home office, or leave our the keyboard slider and use as a TV cabinet, or even a linen or storage cupboard. The assembly is not as difficult as it might seem.
YOU WILL NEED:
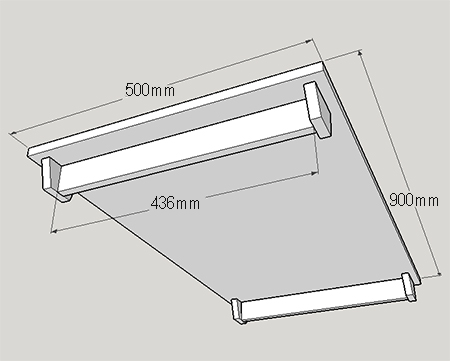
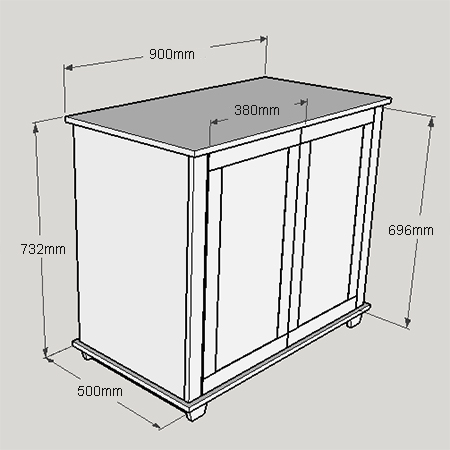
2 of 500 x 900mm - base / divider
4 of 50 x 80mm - feet
2 of 50 x 436mm - base support
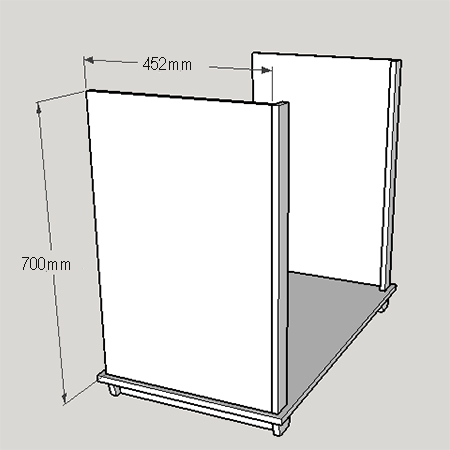
2 of 50 x 700mm - base cabinet fronts
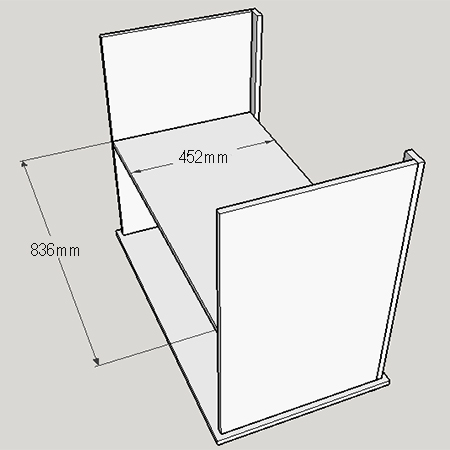
2 of 452 x 700mm - base cabinet sides
1 of 452 x 836mm - base cabinet shelf
2 of 380 x 696mm - base cabinet doors
Optional: 3 x 50mm supawood strips for doors
4 x 45mm cut screw
8 butt hinges and 16mm screws
2 knobs or handles
TOOLS:
Drill / Driver plus assorted bits
Countersink bit
Orbital or random orbit sander plus 240-grit sanding pads
Tape measure and pencil
HERE'S HOW:
NOTE: All sections are assembled by pre-drilling 3mm countersunk pilot holes and using 4 x 45mm screws unless otherwise specified.
1. On each foot measure in 15mm from both sides at the bottom and draw a line from the top corner to the mark. Cut this away with a jigsaw or mitre saw. Glue the feet onto the base support using Pattex No More Nails and leave to dry.
2. Measure and mark a 16mm border around the base - both sides. Using the drawn line as a guide, drill countersunk pilot holes through the top of the base and into the feet and base support. Use 2 screws per foot and 3 along the length of the base.
3. Pre-drill countersunk pilot holes to attach the front panel to the sides - flush with the outside edge. Position inside the drawn guides on the base and attach through the underside of the base.
GOOD TO KNOW
As an alternative to using screws to attach the front panel
to the sides, you can substitute this by using a pockethole jig, biscuit
joiner or dowels.
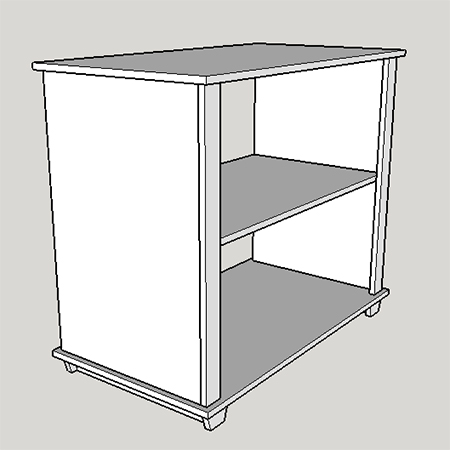
4. You have the option of adding a fixed or adjustable shelf to the base cabinet. For an adjustable shelf measure and mark for fitting adjustable shelf pins.
5. Measure and mark a 16mm border around the top - both sides. Use this as a guide for securing the top to the sides and front frames.
GOOD TO KNOW
While we explain how to attach the hinges now, it is better
to paint the cabinet and doors and then attach the hinges.
6. To attach the doors, mount the butt hinges 50mm from the top/bottom of the edge of the door. Drill 2mm pilot holes to prevent the board from splitting. Allow a 2mm gap at the top and bottom of the door and hold in place to mark and drill 2mm pilot holes for attaching the hinge to the frame. It helps to have an extra pair of hands to hold the door while you mark the frame.
Any hardware and the backing board can be attached once painting has been completed.
Not responsible for errors or omissions