
Make a shadowbox display shelf
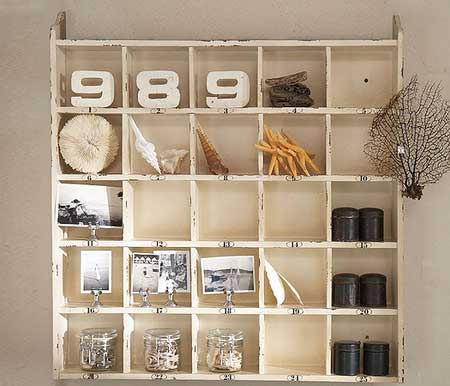
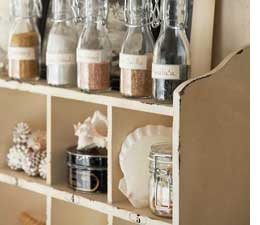
Here's a really attractive way to display small decor accessories, or even use as a storage shelf. This shadowbox display shelf is really easy to make...
I
'm really into the Shabby Chic look at the moment and love to paint everything an off-white colour and then distress the edges - it looks so romantic! However, if you prefer to look of stained wood (see bottom of page) you can easily leave out the painting and stain to match your decor.
YOU WILL NEED:
[1] of 100mm wide pine plank
[1] piece of backing board cut to the size of your shelf
Wood glue
Jigsaw or off-cut saw
Tape measure
180-grit sandpaper
Prominent Paints matt - off-white
Paintbrush
[2] picture hangers
HERE'S HOW:
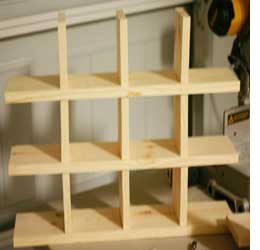
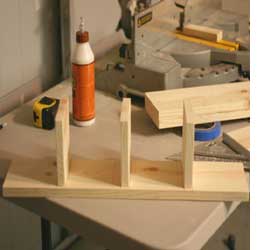
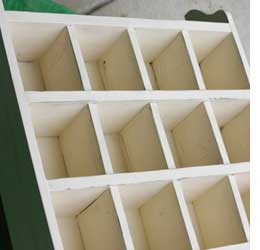
1. You need to make three individual sections as shown above. Each section is one long strip and three small uprights. These sections are glued together to increate the internal framework for the box (see image above).
Note: I haven't given any measurements as you can make the box as small, or as large, as you need.
2. Cut an extra strip for the top and glue in position.
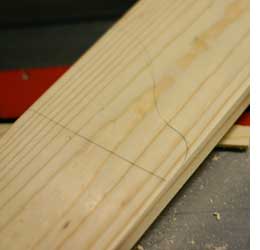
3. The sides of the box are longer to allow for a decorative section that you will cut at the top using a jigsaw.
4. Glue the sides in place.
5. Attach the backing board to the back of the shelf unit with wood glue. Let the glue dry overnight before you begin painting.
6. Paint all surfaces with Prominent Paint matt in an off-white. Apply two coats, allowing each coat to dry before applying the next coat.
7. Once completely dry, lightly sand the edges with 180-grit sandpaper. You can distress the edges as much as you like depending on the final look that you want for the shelves.
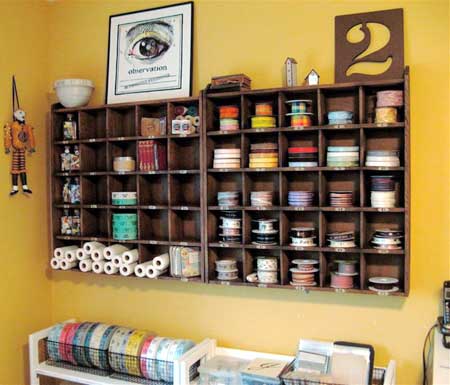
There are so many uses for this shelf: Use it for display, hang it on the wall above your craft station for storing essentials

beeinourbonnet.blogspot.com