
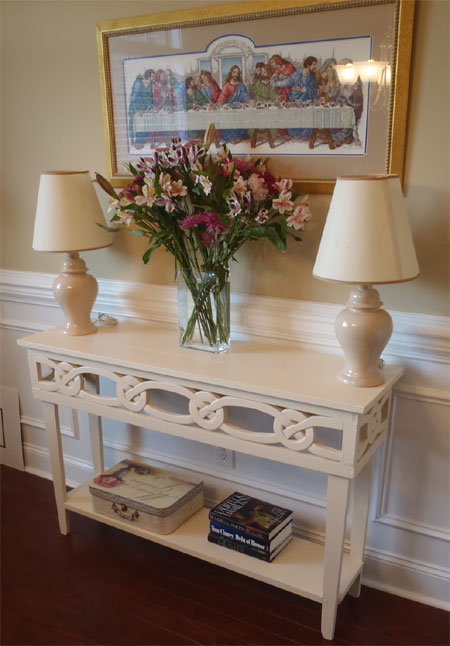
DIY console table
Dress up your entrance with this gorgeous console table featuring a simple carved design that looks intricate and expensive. Liz at lazy liz on less shows us how to make the table and do the carving - and it's easier than you might expect!
YOU WILL NEED:
[2] 380 x 400mm laminated pine - top | bottom shelf
[4] 44 x 1360mm PAR pine - front/back apron | panel edge
[5] 44 x 300mm PAR pine - side apron | centre support | panel edge
[2] 250 x 1360 laminated pine - decorative front/back panels
[2] 250 x 300 laminated pine - decorative side panels
[8] Steel corner braces or brackets
Wood glue
Wood filler
Drill/Driver plus assorted bits
Orbital sander plus 120- and 240-grit sanding pads
Jigsaw and clean-cut blade
Sharp wood chisel
Clean, lint-free cloth
Mineral turpentine
Tape measure and pencil
HERE'S HOW:
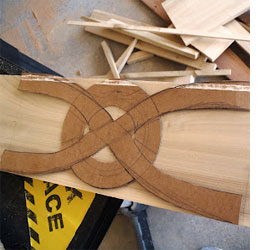
To do the detailing, cut out a stencil that you can use to transfer a repeat design onto the timber or board. If you have never used a wood chisel before, have some scrap wood on hand for a practice run before you start the main project.
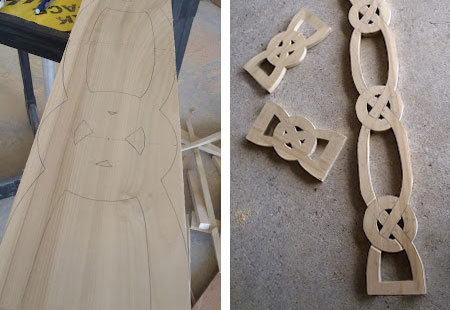
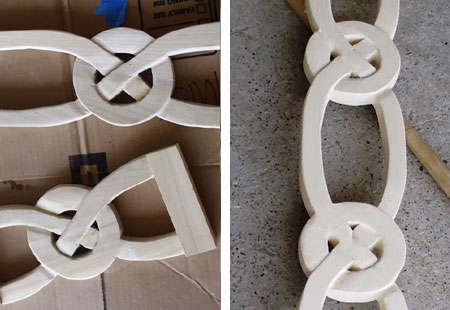
After cutting out the sections for detailing with a jigsaw, you use a sharp wood chisel to chip away for the 3D effect. Some intensive sanding with a multi-sander or Dremel MultiTool with sanding attachment removes and smoothes.
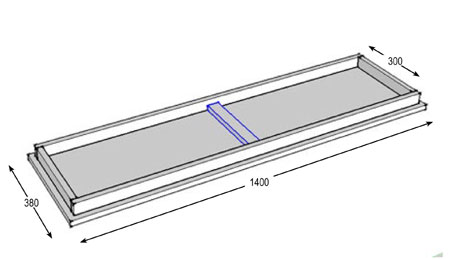
1. Place the table top face down on a flat, level surface. Attach the front, back and side frames to the back of the top with corner or angle braces.
2. Insert the centre support and screw in place.
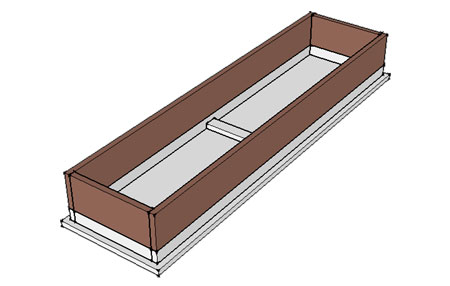
3. After cutting, carving and sanding the decorative panels, it's also a good idea to paint them before mounting. It's far easier to paint loose than when they are in place. After painting, you can use dowels, biscuits or pockethole jig to attach the panels to the apron. Alternatively, joining braces on the inside can be used to fasten the panels to the apron.
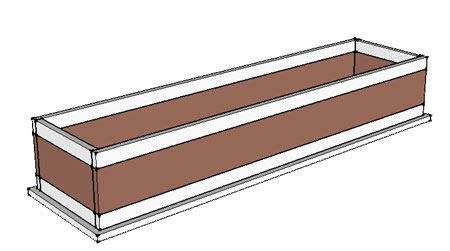
4. Attach panel edges as in point 3 above.
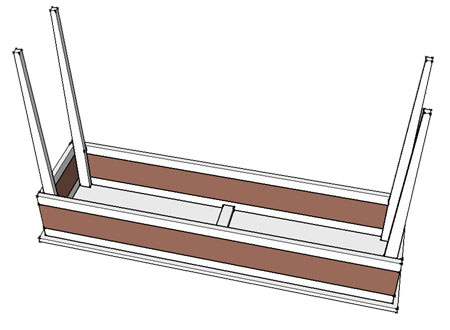
5. Cut the legs to taper by measuring and marking 238mm down from the top of each leg and 20mm in at the bottom of each leg. Use a jigsaw to cut the taper and then sand smooth.
6. Insert the legs into frame and drive screws through each leg into the apron and panel edges.
7. The final step in the assembly process is to cut out and attach the bottom shelf. The complete board measures 380 x 1400mm and you will need to cut with a jigsaw to fit. Once cut to size, use the jigsaw to cut out a recess to fit snugly around each leg. I haven't given any measurements here, as every table will be slightly different and it is better to cut to size rather than have the shelf too small or not fit nicely.

Finishing
Because we used pine for the table, you can stain and seal or paint with acrylic PVA... the choice is up to you. If you want to apply a stain and sealer, Woodoc offer a range of wood stain concentrates and gel stains that you can use to achieve the desired wood tint. Choose either Woodoc 5 absolute matt or Woodoc 10 satin or gloss interior sealer and follow the instructions on the tin.
If you want to paint your new console table, you can use acrylic pva in matt, satin or gloss finish. If you use a matt, be sure to apply Woodoc antique wax over the finish for added protection.