
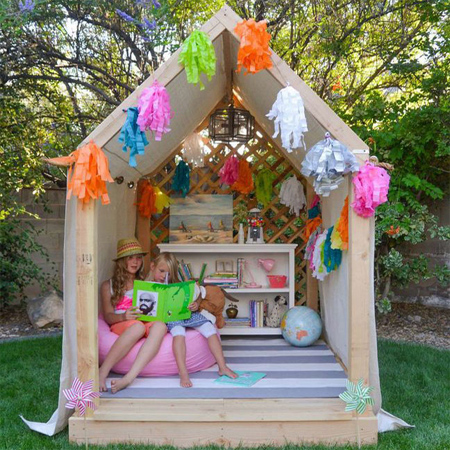
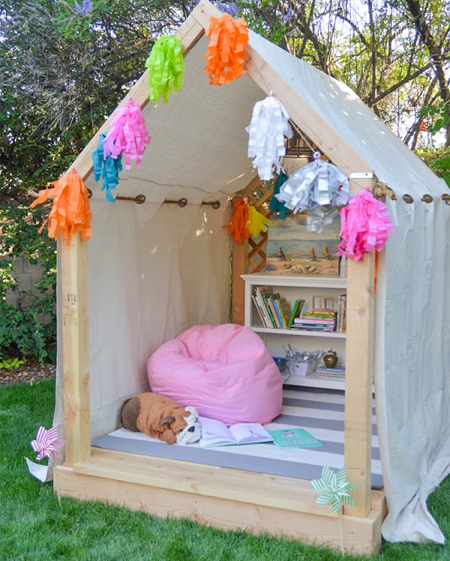
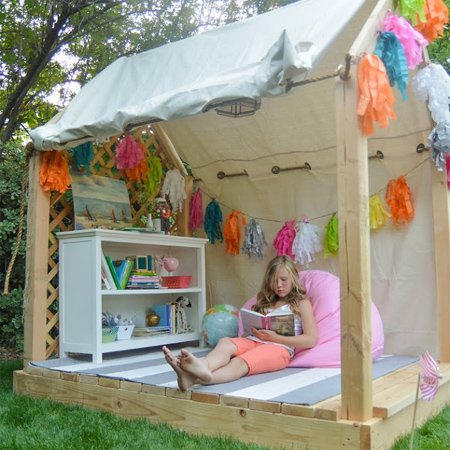
Reading corner for outdoor kids
If your kids love spending time outdoors but you're worried about them spending too much time in the sun, this reading corner is just the thing. The frame is made out of PAR pine that you will find at your local Builders Warehouse. While you're there make sure to buy a canvas dropcloth, which is perfect for covering up the frame!
vintagerevivals.com
When I saw this project on vintage revivals I realised that with a few modifications here and there, and a few tweaks for local supplies, this would be perfect for outdoor kids. This cute reading corner will allow your kids to spend more time outdoors without you having to worry about them getting sunburnt.
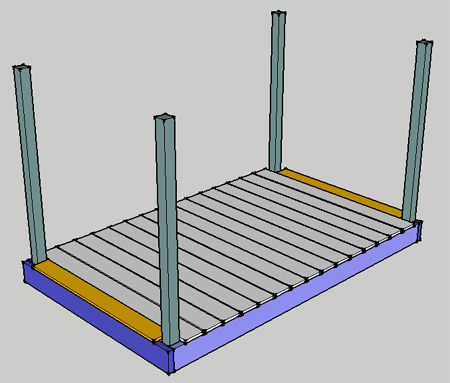
Building the frame base
YOU WILL NEED:
3 of 39 x 150 x 2400mm PAR pine - base frame
2 of 39 x 150 x 1500mm PAR pine - base frame
4 of 69 x 69 x 1500mm PAR pine - uprights
2 of 20 x 69 x 1040mm PAR pine - roof frame
2 of 20 x 69 x 940mm PAR pine - roof frame
1 of 20 x 69 x 2400mm PAR pine - roof crossbeam
8 steel angle brackets
2 of galvanised roofing brace
6 of galvanised bream hangers
Pack 6 x 75mm screws / 5 x 45mm screws / 16mm screws
Pack deck screws
Drill/Driver + assorted bits + countersink bit
Orbital sander + 120- and 180-grit sanding pads
Mitre saw, jigsaw or circular saw
HERE'S HOW:
1. Use 39 x 150mm PAR pine to build a base frame. Pre-drill and countersink holes before joining the sections together with 6 x 75mm screws.
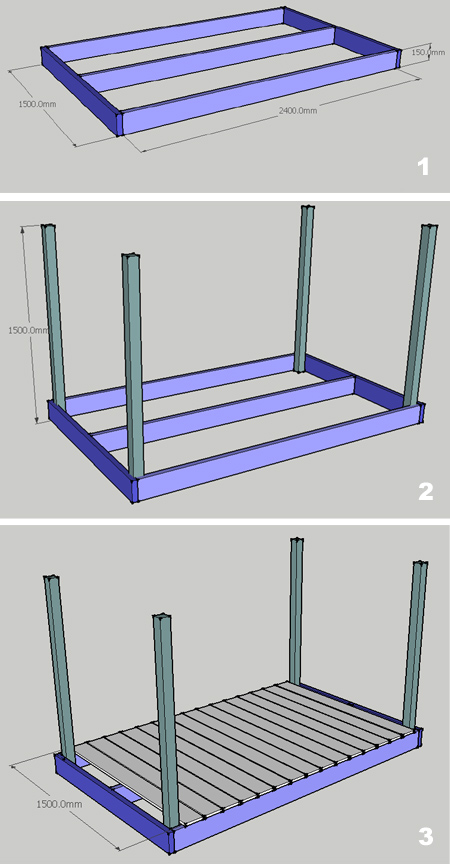
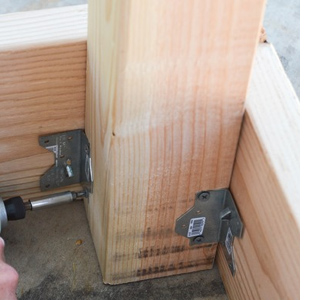
2. Place the 69 x 69 x 1500mm PAR pine posts at each corner. Use steel brackets to secure to the inside of the frame. For added stability I would also pre-drill, countersink and drive 6 x 75mm screws through the front and side on the outside of the frame. Remember to stagger the arrangement of screws on the outside.
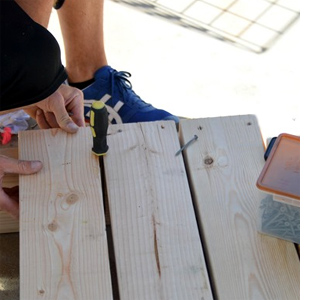
3. Use deck screws to attach 20 x 140mm PAR pine for the floor. Use two screws on the edges and centre to secure to the frame. Leave a 3mm gap between the upright posts at both ends. Space 16 boards along the length of the frame, leaving a gap between the boards, and secure.
Finish off the deck by cutting a rebate in two sections of PAR pine to fit around the upright posts. Don't make the cut too tight - you need to allow for a certain amount of expansion and contraction. Secure these two sections to the frame and centre section in the same way.
Adding the roof section
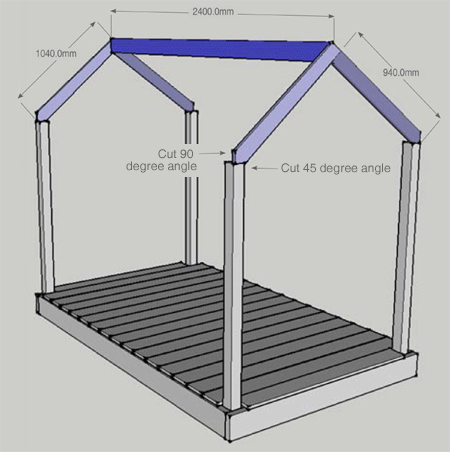
The basic roof frame consists of 2 pieces of 1040mm and 2 x 940mm strips of PAR pine joined together and attached to the 2400mm long crossbeam. To join these sections you will need to visit your local Builders Warehouse and look where the keep the galvanised roofing assemblies. Here you will find a selection of brackets and braces that can be used to join these pieces.
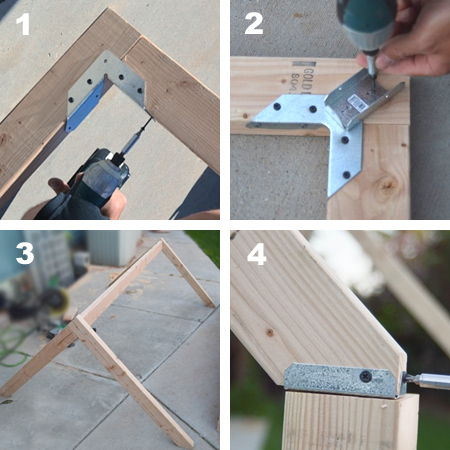
1. After cutting the angles on each of the frame sides, join these together with a galvanised roofing brace.
2. Use galvanised braces at the back of each frame for mounting the crossbeam.
3. The completed roof assembly.
4. Have someone help you mount and attach the roof assembly to the frame using galvanised brackets.
NOTE: This roof is not designed to support weight and is purely a frame to support the canvas covering for the reading corner.
Adding the canvas cover
YOU WILL NEED:
Large canvas dropcloth
5 metres rope
Eyelet kit and steel eyes (large)
Hammer
Expandable trellis
Wire nails, 20mm
HERE'S HOW:
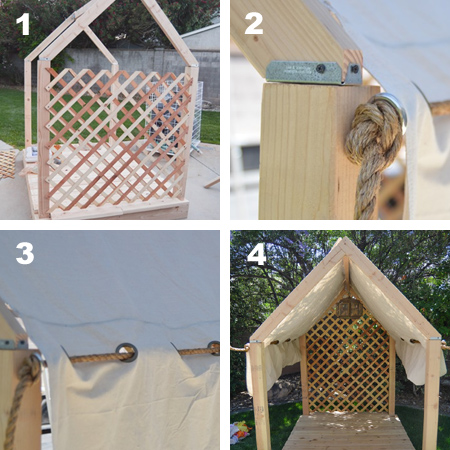
1. An expandable trellis - found in the gardening section at your local Builders Warehouse - is stretched to fit and nailed in place at the back.
2. To support the canvas dropcloth, large eye hooks are screwed into the upright posts to support a thick rope.
3. You will need an eyelet kit to make holes to thread the rope along the length of the canvas side. Alternatively, sew hoops to the inside of the canvas to allow the rope to be threaded through.
4. Completed canvas cover.
For protection I would recommend that the entire structure be sealed with Woodoc 50 or Woodoc 55 for maximum protection from the elements.