How difficult is DIY plastering?
We have been receiving a lot of queries of late regarding plastering. Since winter (or dry season) is the best time to tackle plastering projects there are obviously quite a few homeowners getting stuck in. If you want advice on how to plaster or find out whether plastering is easy or difficult, read on...
I am in the process of modifying the entrance to my home, which requires the building and knocking down of walls. To offer advice and assistance on plastering I am posting this feature to provide more information on the process and technique involved in applying plaster. It wouldn't be fair if I didn't do it myself, so although I have a great guy helping me out, I decided it was time to get down and dirty and at least plaster a small wall.
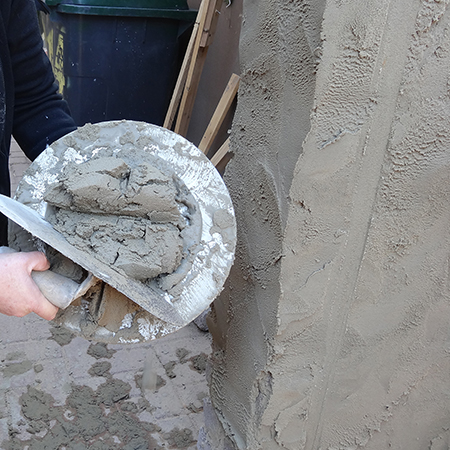
My local Builders didn't have a hawk board in stock, so we improved by mounting a steel tray that I had onto a thick piece of pine dowel. Worked like a dream! The mix used for the plaster finish was 1 wheelbarrow of cement to 3 wheelbarrows of sand. This made enough plaster mix to work with before it started to dry and could no longer be used. A large dollop of plaster mix was placed on the make-do hawk board.
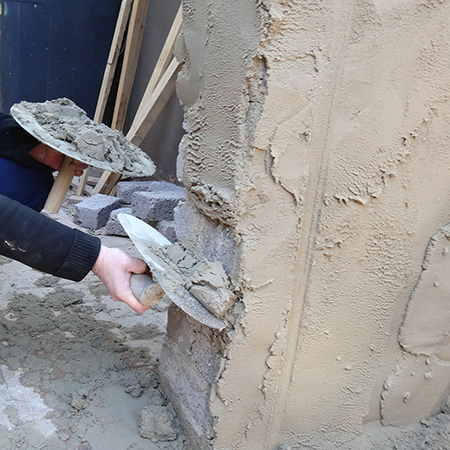
With quite a large dollop of plaster mix on the trowel, this was applied to the wall from the bottom up. You need to press against the surface as you apply.
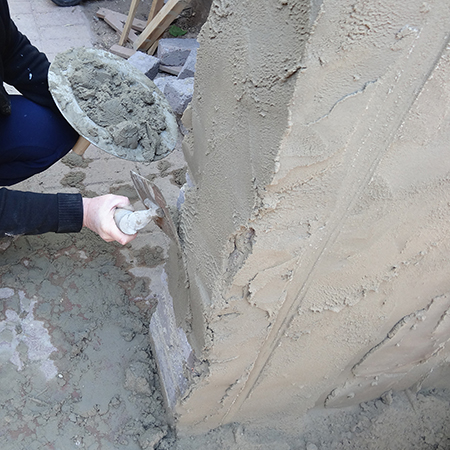
Without lifting the trowel away from the surface, slowly drag up the wall to spread. Use a heavy hand and push as you move up so that the plaster sticks to the wall. If you don't press hard the mix will fall off and you will have to start again.
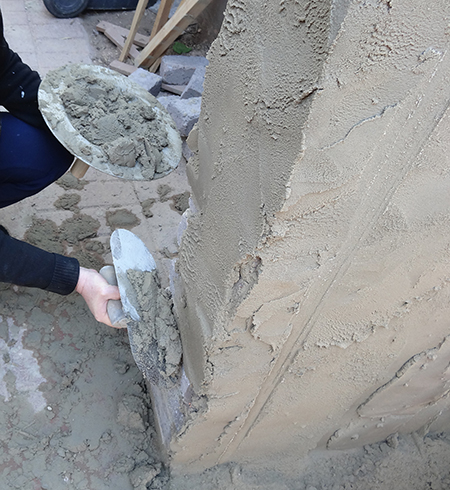
Continue to apply and spread - working from the top down - until you cover the entire wall. It's essential to spread the plaster as evenly as possible, but it doesn't need to be perfect.
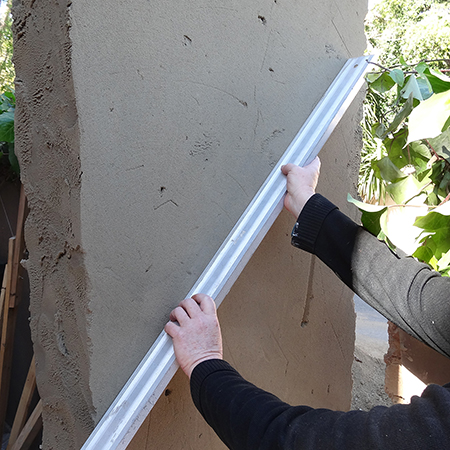
After covering the entire wall, use a straightedge to even and smooth the finish. A straightedge is simply a piece of aluminium or steel that is long enough and perfectly straight to scrap away any excess plaster.
This is where I stopped and let the professional take over. Sibusiso has done plenty of building / plastering projects, so I wasn't going to cock it up at this stage.
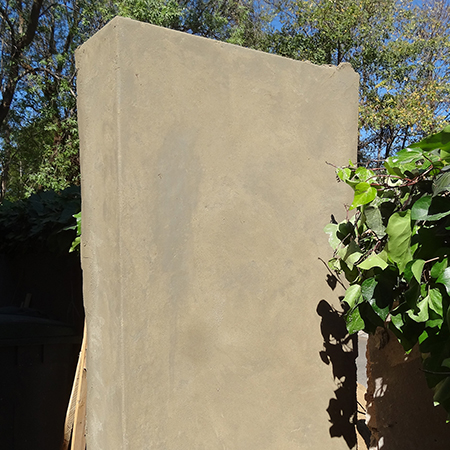
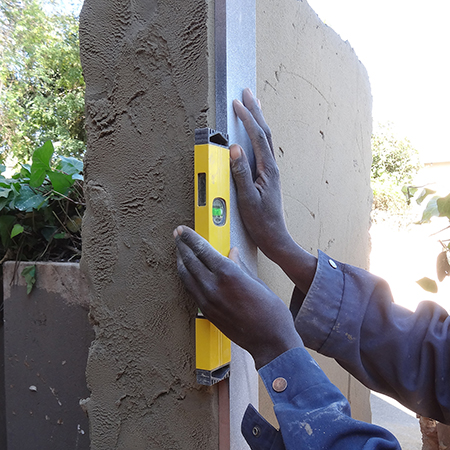
Using a straightedge and spirit level you can achieve perfectly angled corners all the way around.
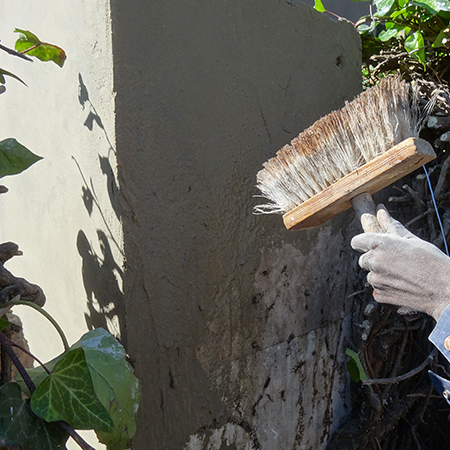
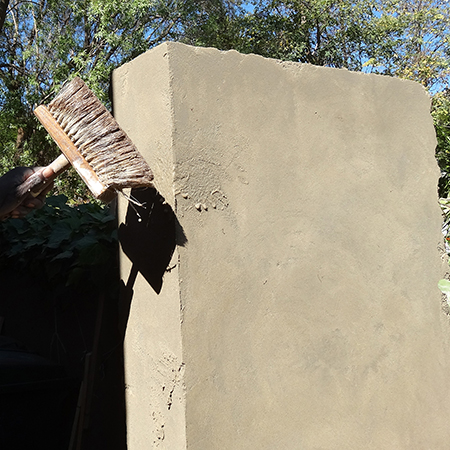
Use a whitewashing brush to continuously splash the plastered surface as you work to smooth the finish. Only a light splashing is needed - you don't have to make the surface of the plaster too wet.
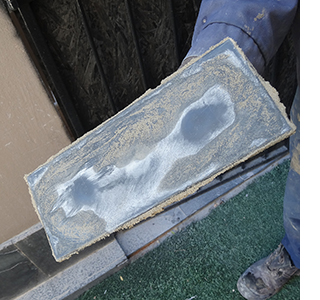
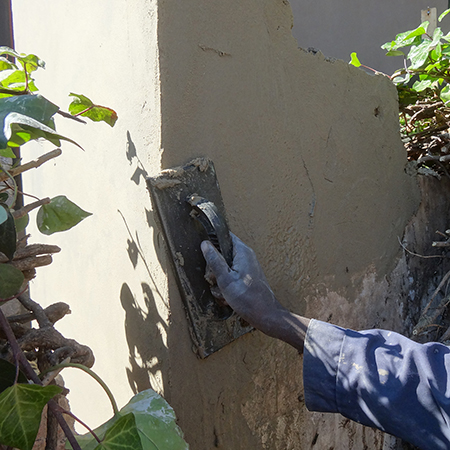
Smoothing is done using a wood or plastic float. I wouldn't recommend using a plastic float, but this was all they had in stock. The surface of the plastic float wasn't even and we had to use a sander to get it smooth enough to use! On the wet plaster use the float to smooth the finish - splashing lightly with water as required so that the plaster smooths easily.
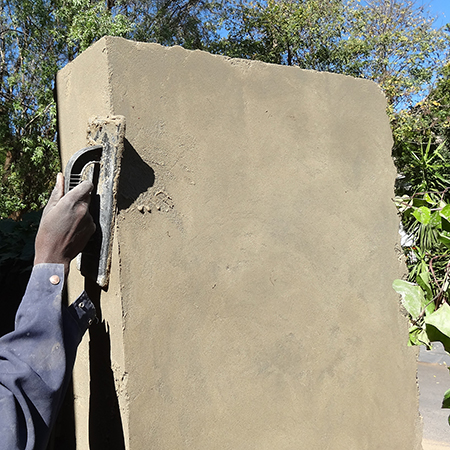
While Sibusiso used the float to round off the corners, you can also use a corner profile. You will find an extensive range of building and plastering tools at your local Builders Warehouse. If you're not sure what a particular tool is used for... ask!