
Home DIY: Wall-mounted bedside table
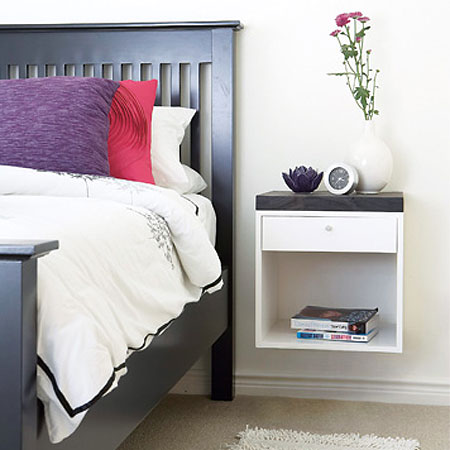
I think the idea of having a wall-mounted bedside table is great. It takes up less room than a free-standing bedside table, it's easier to clean the bedroom, and you can even use the space underneath for a storage basket if you need to.
YOU WILL NEED:
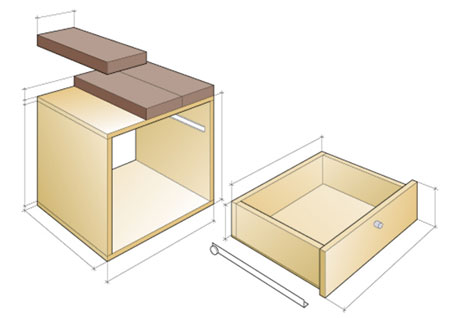
18mm SupaWood cut to sizes:
2 |
420mm |
400mm |
top/base | ||
2 |
400mm |
370mm |
sides | ||
2 |
370mm |
90mm |
drawer front/back | ||
2 |
320mm |
90mm |
drawer sides | ||
1 |
400mm |
100mm |
drawer face | ||
1 |
370mm |
350mm |
3mm masonite |
drawer base | |
3 |
400mm |
140mm |
wood choice |
top |
Drill/Driver plus assorted bits
Combination bit or countersink bit
Orbital sander plus 180-grit sanding pads
Woodoc 5 or 10 interior sealer, tinted or plus stain concentrate
Woodoc steelwool
Paintbrush
Lint-free cloth
Mineral turpentine
Acrylic satin or sheen in your choice of colour
16mm and 35mm wood screws
Panel pins
Hammer
Wood glue
Assorted clamps
Tape measure and pencil
2 sets drawer runners
Drawer knob
HERE'S HOW:
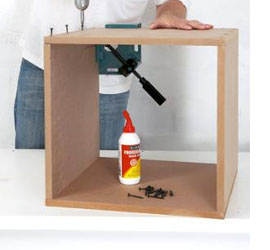
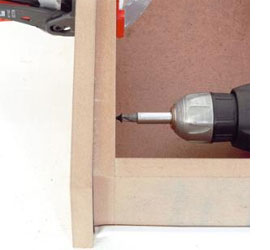
1. For this project you are going to start with a basic square frame. Position top and base against the sides and use a combination bit to countersink and drill pilot holes, securing with wood glue and 35mm wood screws. If you don't have a combination bit, use a 3mm wood bit and countersink bit.
GOOD TO KNOW
Use corner clamps to hold the sides while the adhesive dries.
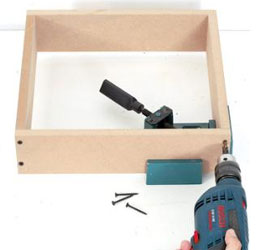
2. To make the drawers, position the front and back against the sides to countersink and drill pilot holes, securing with adhesive and screws.

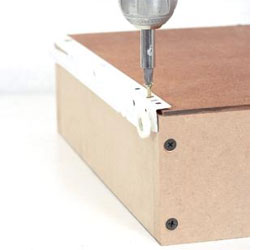
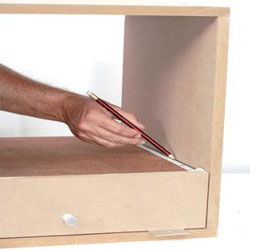
3. Position the base on the frame, securing with panel pins 6mm from the edge - five each side. I also like to add a bead of wood glue around the edge before attaching the panel. It adds more strength.
4. To attach the drawers runners, place the runner on the base of the drawer with the wheel at the back, use a bit to drill holes into the base and sides, securing with the supplied screws.
5. Clamp the drawer face/front to the front flush with the base of the drawer and with equal overhang on the sides, drill pilot holes in the corners from inside, securing with screws.
6. Turn the cabinet upside down to position the drawer flush with the front, position the drawer runners with the wheels at the front, mark the holes and remove the drawer to drill holes, securing with 16mm screws.
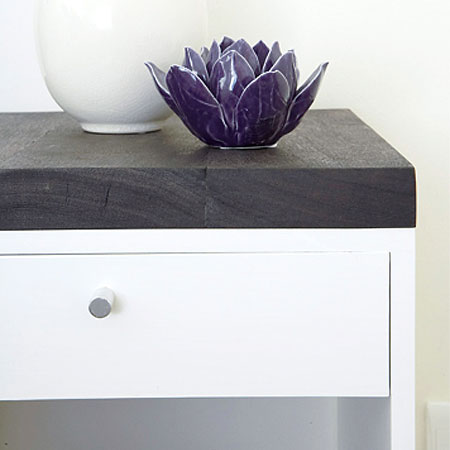
7. To make the wood top you can use a variety of timber. Reclaimed scaffolding planks sanded smooth are great for this type of project, but you can also use pine or meranti. Apply adhesive along the joining edges of the wood, position them together on wood offcuts to add two clamps, tightening until adhesive squeezes out and leave to dry.
GOOD TO KNOW
If you plan of staining the wood tops, it's a good idea to do this before you mount them onto the cabinet. Having said that, you can also paint the cabinet now with acrylic satin or sheen in your choice of colour.
Wipe down with a lint-free cloth slightly dampened with mineral turpentine. Use Woodoc 5 or 10 interior sealer pre-tinted or with added stain concentrate in your choice of wood tint to stain and seal the wood top.
GOOD TO KNOW
Wipe away excess glue that oozes out before it has chance to dry.
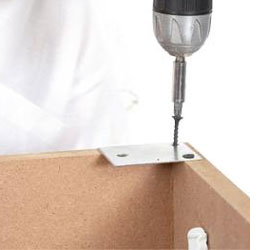
8. Save on floor space by mounting the cabinet on the wall using fixing plates or keyhole brackets with wall anchors. Secure fixing plates to the back of the cabinet then position it against the wall. Check that it’s straight with a spirit level then mark and drill holes for wall anchors.
freshhomeideas.com