
DIY multi-drawer storage unit
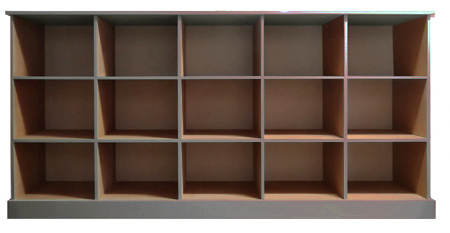
I know there are plenty of DIYers out there who have been waiting to make a multi-drawer unit or pigeon hole cabinet. This 15-drawer cabinet was recently completed for a client and although it looks difficult, the hardest part is making up all the drawers.
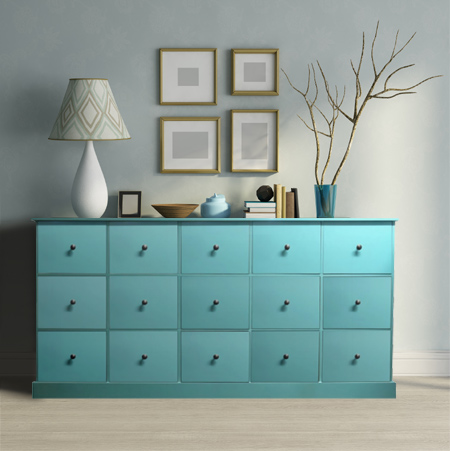
The multi-drawer pigeon hole cabinet was designed by Shabby Chic for a client who wanted to add to a large entrance hall. What makes this unit so unique is the colour. Although this cabinet is larger than the norm, which is usually a 3 x 4 arrangement, you can easily modify the dimensions to make a smaller unit.
YOU WILL NEED:
A |
2 |
384 |
2174 |
16mm SupaWood* | horizontal drawer supports | |
B |
4 |
384 |
984 |
16mm SupaWood* | vertical drawer supports | |
C |
2 |
384 |
1083 |
16mm SupaWood* | sides | |
D |
1 |
400 |
2238 |
16mm SupaWood* | top | |
E |
1 |
384 |
2174 |
16mm SupaWood* | bottom | |
F1 |
2 |
100 |
384 |
16mm SupaWood* | base sides | |
F2 |
1 |
100 |
2238 |
16mm SupaWood* | base front | |
1 |
1000 |
2250 |
3mm white Masonite | backing board |
180- and 240-grit sanding pads
4 x 30mm smooth shank screws
4 x 40mm smooth shank screws
Wood filler
Panel pins
TOOLS:
Drill/Driver + assorted bits
Countersink bit
Jigsaw and clean cut blade
Orbital sander
2 trestles or workbenches
Hammer
Tape measure, steel rule and pencil
Calculator - if you're blonde like me!
Have all your board cut to size at your local Builders Warehouse - it saves time and all you have to do is assemble!
GOOD TO KNOW
Why no wood glue? It isn't always necessary to use wood glue, especially when using smooth shank screws. These screws are designed to pull the boards together tightly.
HERE'S HOW:
1. The first step in this project is to cut and assemble the frame for the drawers. This is one of those projects where you start in the middle and work your way towards the outside. In this way it's easy to attach the frame for the drawers to the sides, top and bottom for a sturdy arrange-ment. Use a steel rule (or tape measure) and pencil to mark the horizontal and vertical sections as follows:
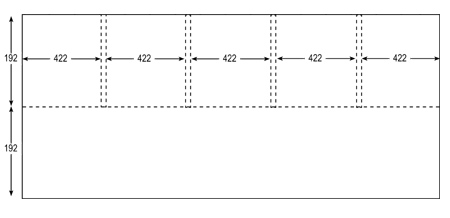
A. Horizontal uprights
1. Draw a line horizontally down the centre at 192mm, so that you have two half sections, each 192mm wide.
2. Working from one end, measure and mark at 422, 438, 860, 876, 1298, 1314, 1736, 1752mm from the edge to the centre mark - see below.
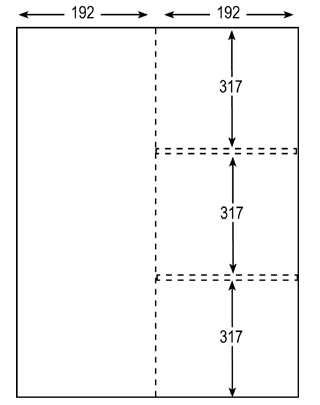
B. Vertical uprights
1. On the 4 vertical uprights, draw a centre line at 192mm.
2. Measure and mark at 317, 333, 650 and 666mm from the outside edge to the centre line.
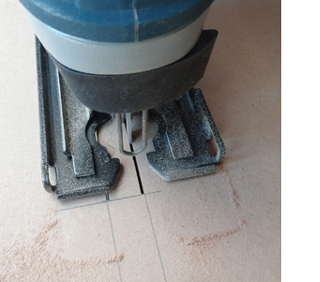
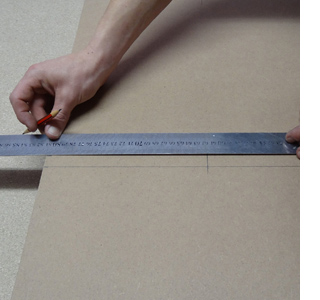
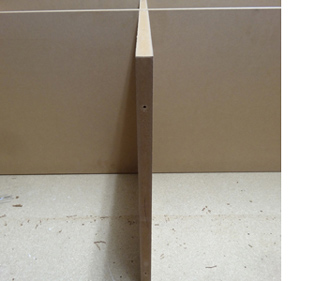
3. Now you need to cut out the marked strips on both the horizontal and vertical sections.
4. Place the board on two trestles to support at either side and leave the cutting area exposed.
- Use a clean-cut jigsaw blade.
- Cut on the inside of the pencil mark.
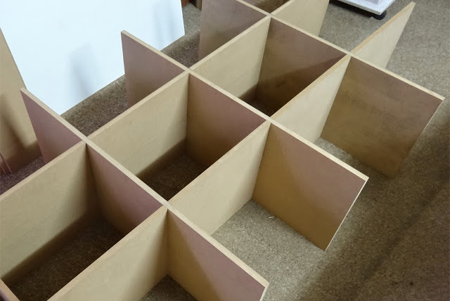
ABOVE: Here you can see how the individual marked sections have been cut out to half the width of the drawer supports. It's important that the cutting be perfectly straight, so take your time.
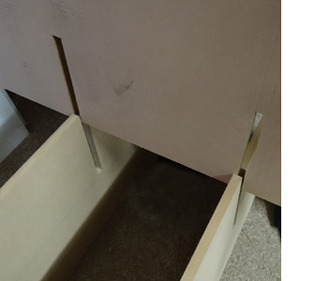
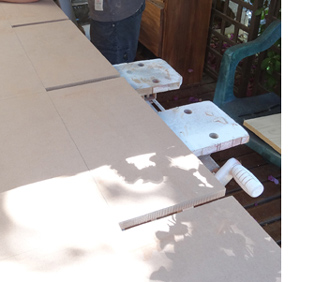
5. Sand the cut edges with 180-grit sandpaper to smooth. To slot the sections together, lay the horizontal supports on a flat surface - you may need someone to hold the boards in an upright position for you. Place the vertical supports so that the cut sections line up accurately.
GOOD TO KNOW
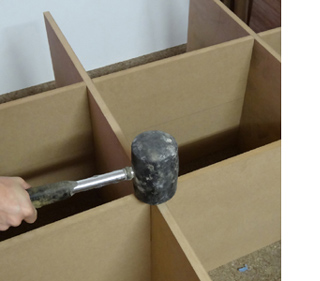
Have a rubber mallet handy to tap down any stubborn sections. You want the front edges to line up perfectly flush.
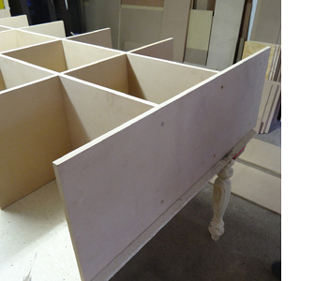
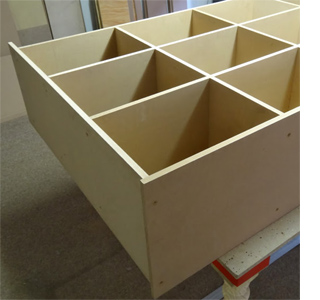
ABOVE: Completed drawer support assembly.
6. On the edge of all horizontal and vertical sections, measure and mark 50mm in from the top and bottom edge and drill a centred 3mm pilot hole. These will be used for attaching the top, bottom and side sections.
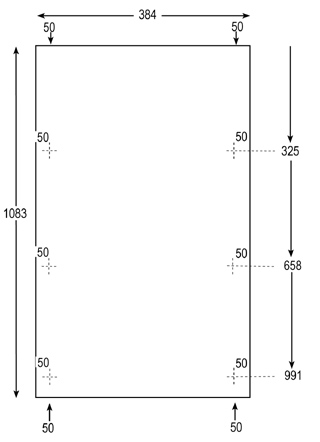
C. Sides
1. On both sides measure and mark as follows:
- From the top edge at 325m 658 and 991mm.
- From the front and back edge at 50mm in.
- Along the top and bottom edge at 50mm in.
2. Drill 3mm pilot holes at all marks.
3. Countersink pilot holes on the outside of both side panels - the side that will be visible.
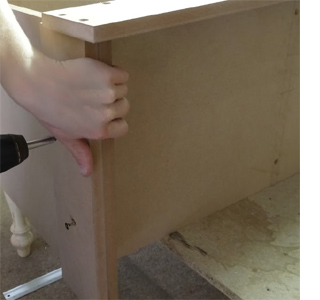
4. Place the sides accurately against the edge of the centre dividers, lining up the top edge, and join together using 4 x 40mm screws.
GOOD TO KNOW
For accurate placement, drive the screw through the board so that only the tip of the screw shows through the other side. Use this to mark up with the pilot holes in the edges of the centre drawer divider section.

D. Top
1. Measure and mark at 24, 462, 900, 1338, 1776 and 2214.
2. Drill 3mm pilot holes and countersink
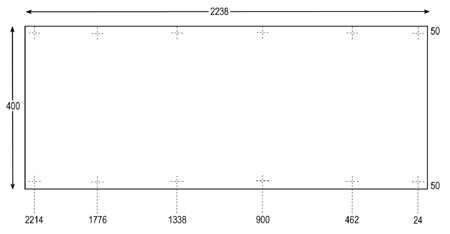
3. Attach the top to the side and centre frame sections. Remember to use the tip of the screw to line up accurately with the pre-drilled pilot holes.
E. Bottom
1. Measure and mark the base at 430, 868, 1306 and 1744mm. Drill 3mm pilot holes and countersink.
2. Along the front edge measure and mark at 50, 568.5, 1087, 1605,5 and 2124mm and drill 3mm pilot holes.

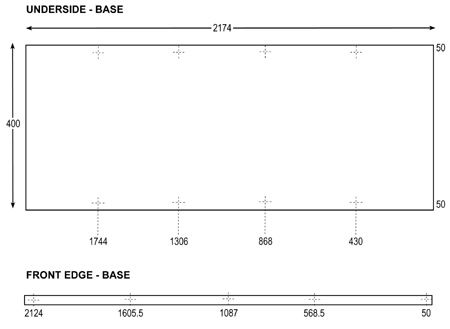
3. Attach the base to the bottom of the centre divider, lining up the tip of the screw with the pre-drilled pilot holes.
4. Drive screws through the side into the edge of the base.
F. Bottom apron
Line up the bottom sides (F1) before drilling 3mm pilot holes. Countersink and attach with 4 x 30mm screws.

Position the front apron (F2) squarely and drill 3mm pilot holes. Countersink and attach with 4 x 40mm screws.
Finishing
Fill all holes with wood filler and allow to dry Use panel pins and a hammer to attach the backing board. Use an orbital sander and 120-grit sanding pads to ensure all edges are flush. Use 240-grit sanding pads to polish cut edges and prepare for painting.
Note: Home-Dzine or Janice Anderssen does not accept any liability of responsibility for errors or omissions.