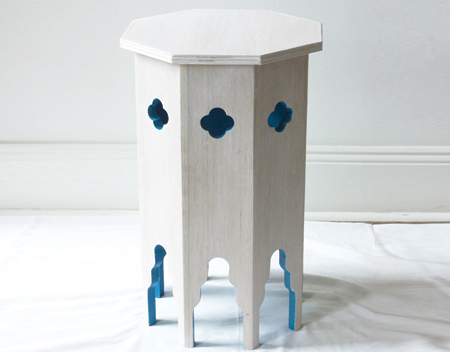
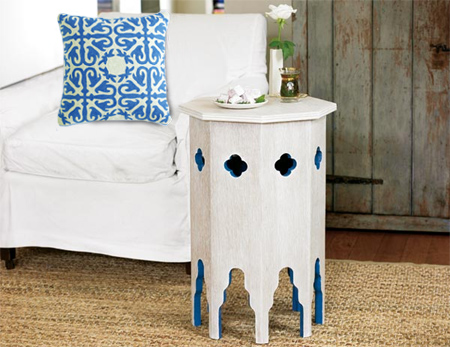
Make a Moroccan side table
Here's how to make a traditional Moroccan-inspired table using a simple design with bright colour and decorative cutouts. You can use PG Bison SupaWood for this project, or marine plywood if you intend to place the Moroccan table outdoors on a patio or in the garden.
YOU WILL NEED:
Wood glue
Wood filler
Moulding or trim
3,5 x 30mm screws
180-grit sandpaper
Plascon Sure Coat Acrylic paint
Plascon Wood Primer
Paintbrushes
Masking tape
TOOLS
Drill/Driver plus assorted bits
32mm and 38mm Hole saw
Jigsaw and clean-cut blades,
circular saw
Tape measure and pencil
Compass
Clamps
Optional: Mitre saw
CUTTING LIST
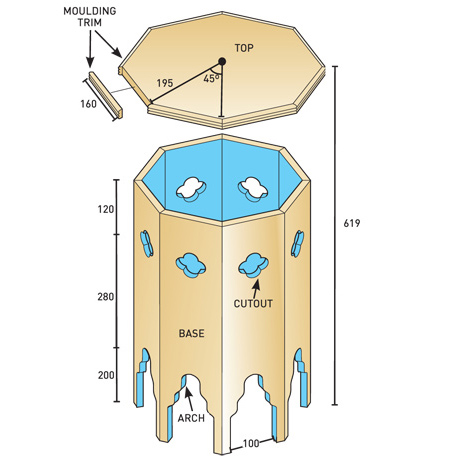
8 of 19mm x 135 x 600mm pine or SupaWood - base
4 of 19mm 90 x 450mm pine or SupaWood - top
4 of 19mm x 90 x 70mm pine or SupaWood - cleats
You will find everything you need for this project at your local Builders Warehouse, and you can have all your timber and board cut to size to make assembly easy.
HERE'S HOW:
1. Mitre base panel edges
To form the octagonal shape, the base panels are joined with 45° mitres by bevelling the opposing edges at 22.5°. You will need a mitre saw for this, or you could use a jigsaw with an adjustable base, circular saw or Dremel Saw Max.
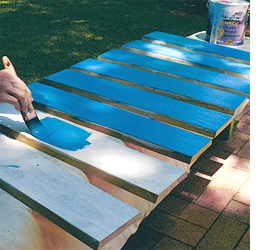
2. Preparation
Before assembly, apply Wood Primer and then paint the base panels. If necessary, lightly sand with 180-grit sandpaper before painting. Apply two coats of matt acrylic on the inside faces, avoiding paint build-up on the bevelled edges. Be sure to allow sufficient drying time between coats.
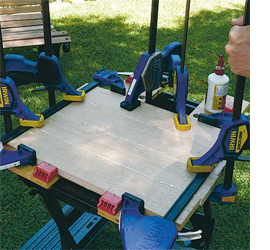
3. Glue top
Position the top pieces side by side, applying wood glue to the adjoining edges, securing with long clamps at the side and small clamps to keep the top flat. Wipe away any excess wood glue before it dries. Leave to dry overnight.
DIY TIP:
Apply masking tape over the worktable under the joints to prevent sticking.
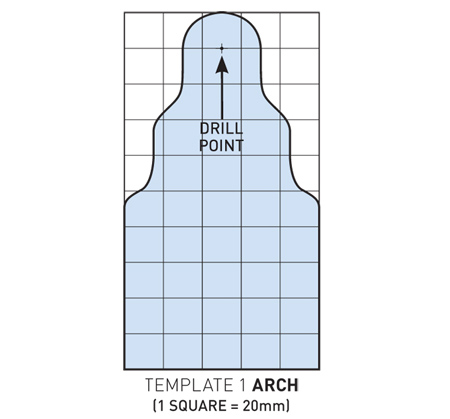
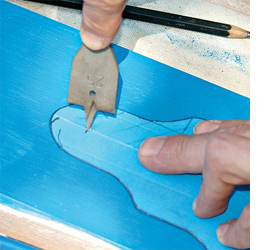
4. Draw arches
Transfer the arch template above onto a piece of cardboard. Cut out the shape, making a hole at the drill point 19mm from the top. Transfer the arch onto the base panels.
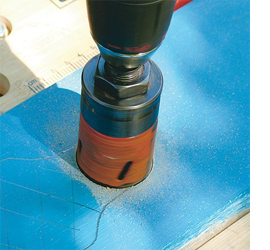
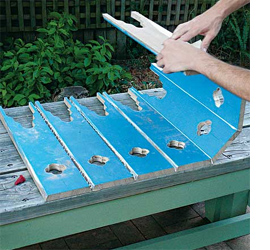
5. Cut out arches
Using a 38mm hole saw, cut out the top of the arch, starting at the drill point. Use a jigsaw to finish making the arch. Sand the edgesand then prime and paint the edges. Leave to dry.
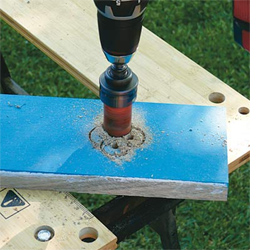
6. Cut out detail
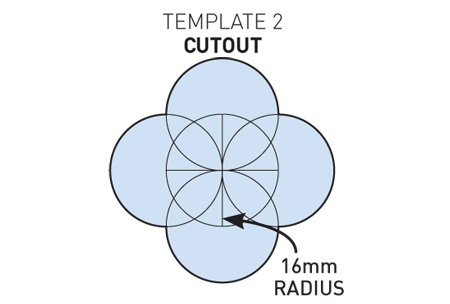
On each base panel, 120mm from the top, draw a line across. Set a compass to 16mm to mark a circle at the centre. Position the compass on the intersecting points to mark up four circles. Use a 6mm wood drill bit, to drill a starter hole at the centre of the circles. Use a 32mm hole saw to make the circles, drilling until the bit starts to break through, turn the panel over to finish the holes from the other side.

7. Complete tabletop
From the centre, mark eight 194mm lines 45-degree apart and join the marks to outline the octagon shape. Cut the octagon with a jigsaw or circular saw. Cut the moulding with ends at 22.5-degree, position the pieces around the top, securing with wood glue and tape until dry.
8. Assemble the base
Position the base panels, unpainted faces up, and join the edges with masking tape. On the other side, apply glue to the bevelled edges then roll into an octagon, securing with tape until dry. Sand the base and top with 180-grit sandpaper.

9. Attach tabletop
On each cleat, drill two 6mm countersunk holes through one side and a hole through the perpendicular side. Use two 3,5 x 30mm countersunk screws to attach cleats to the inside of the base. Position the tabletop, securing up through the cleats.