
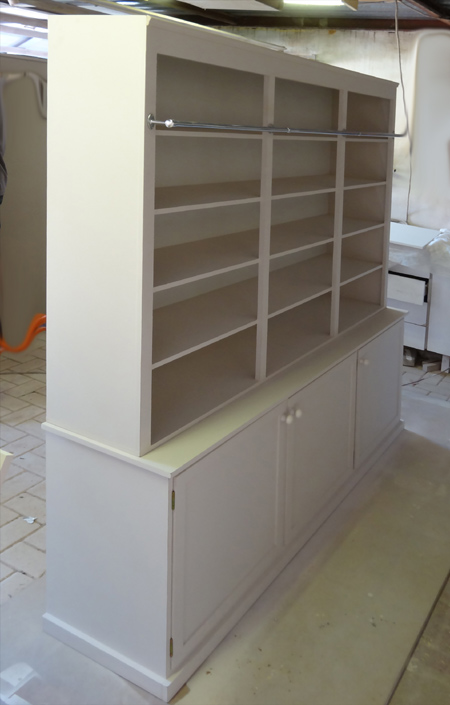
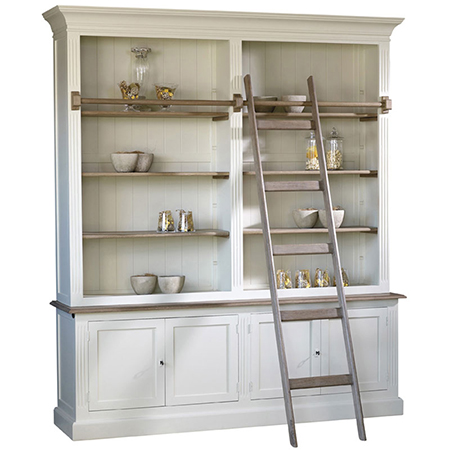
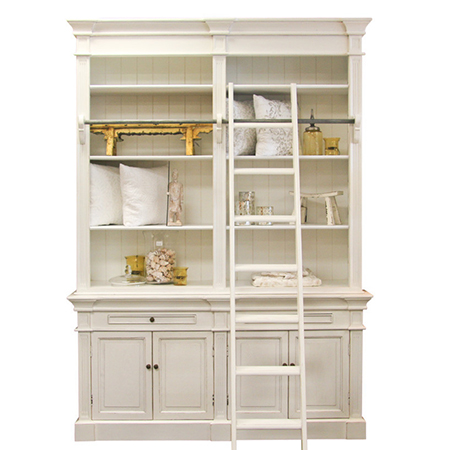
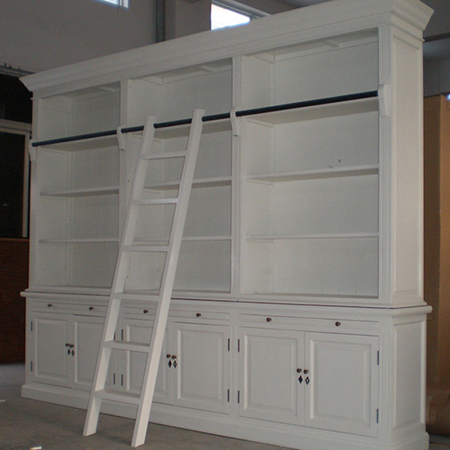
DIY library bookcase with ladder
This DIY library bookcase offers good looks and space-saving design in one. An integral ladder allows you to make full use of the height of the bookcase, making use of vertical storage space and freeing up valuable floor space.
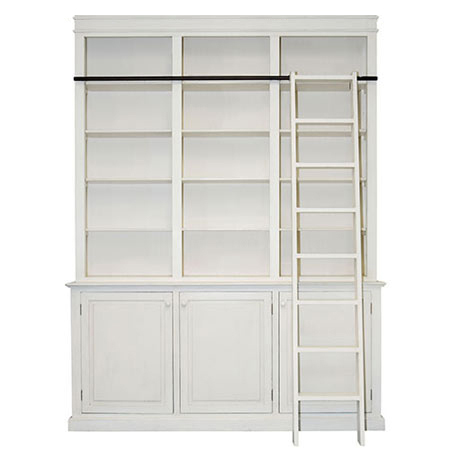
This DIY library bookcase is made in two sections: the lower storage cupboards and upper shelves. This allows you to easily add on extra height without making the unit too heavy to move around. Alternatively, there's no reason why you can't break it into several different sections.
YOU WILL NEED:
2 of 384 x 684mm - base sides
2 of 384 x 1736mm - base top frame / bottom
1 x 384 x 1736mm - *additional base support
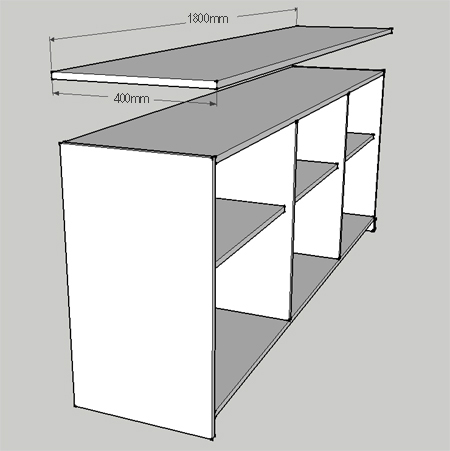
1 of 400 x 1800mm - base top
3 of 384 x 602mm - base uprights
3 of 360 x 566mm - base shelves
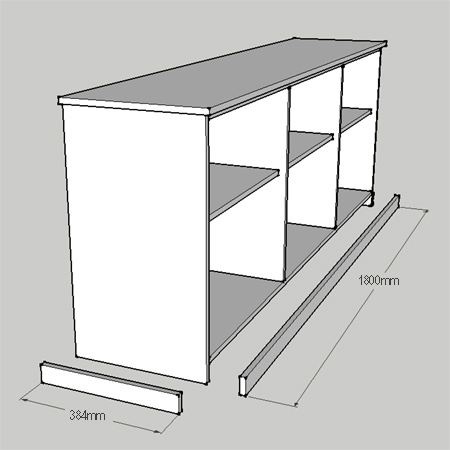
2 of 50 x 384mm - base side aprons
1 of 50 x 1800mm - base front apron
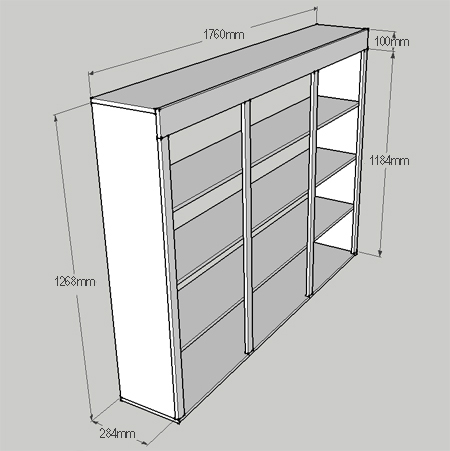
1 x 284 x 1760mm - shelf section top
1 x 100 x 1760mm - shelf section top panel
1 x 300 x 1760mm - shelf section bottom
2 of 284 x 1268mm - shelf section sides
4 of 40 x 1184mm - shelf section uprights
3 of 284 x 1728mm - shelf section shelves
3 of 564 x 598mm - doors
1 of 1290 x 1750mm - 3mm masonite backing - shelf section
1 of 640 x 1758mm - 3mm masonite backing - base
4 x 50mm cut screws
6 decorative butt hinges for doors
3 decorative knobs
12 shelf pins
Wood filler
120- and 240-grit sanding pads
Plascon
Double Velvet (or Plascon Polvin and you choice of clear acrylic
sealer or antique wax)
TOOLS:
Drill / Driver + assorted bit
Countersink bit
Orbital or random orbit sander
Long steel rule or straightedge
Heavy-duty stapler and 10mm staples
Tape measure and pencil
OPTIONAL: Router or Dremel Trio and decorative edge bit
FIND EVERYTHING YOU NEED FOR THIS PROJECT AT YOUR LOCAL BUILDERS WAREHOUSE
HERE'S HOW:
Note: All joined sections are pre-drilled with a countersunk pilot hole and secured with 4 x 50mm screws, unless otherwise specified.
Assemble the base cabinet
Designed as a separate unit, the base cabinets are split into three
storage areas, each fitted with a door.
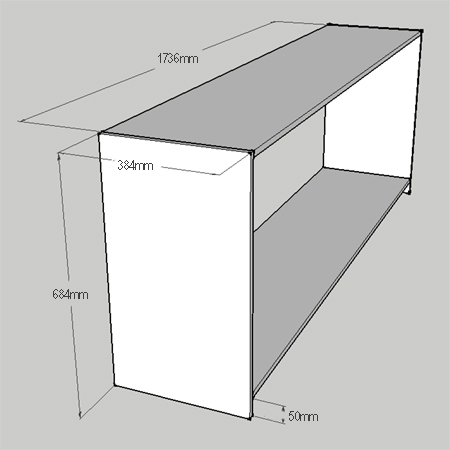
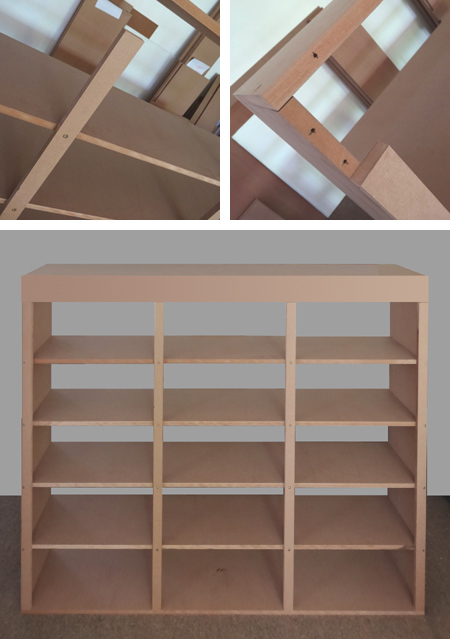
1. On the bottom of each side measure up 50mm and use this as a guide for mounting the base. The 50mm gap at the bottom will later be covered with an apron.
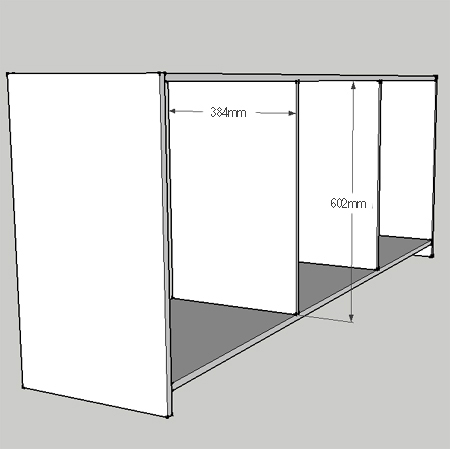
2. With the frame on its back, measure and mark 566mm and 582mm in from both sides of the base and top and use this as a guide for mounting the uprights. Position the base uprights at the mark and drive screws through the base and top sections to secure.
Note: *To add extra support to the base, an additional support base was added underneath, and this has been included in the cutting list. This additional base is screwed to the bottom of the base already fitted.
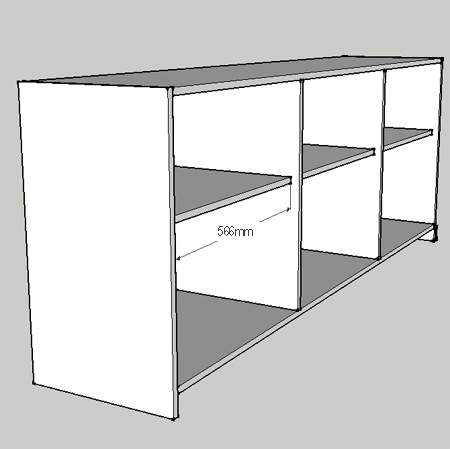
3. Measure up, mark and drill holes for mounting shelf pins for adjustable shelves. You can set these at any height. The adjustable shelves are fitted last.
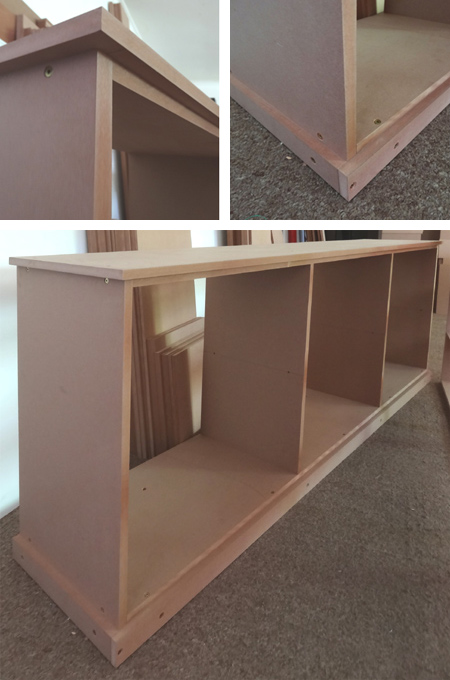
4. Secure the top by screws driven through the underside of the top frame.
GOOD TO KNOW
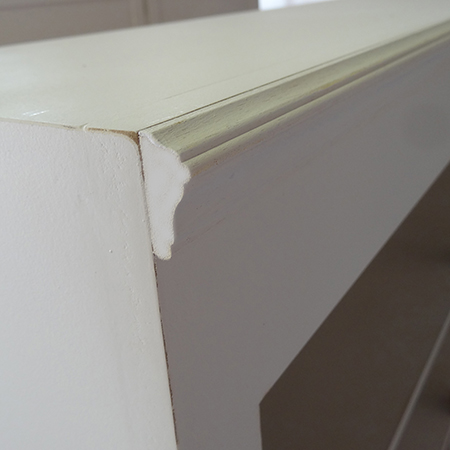
Before mounting the top you have the option of using a Router
or Dremel Trio to add a decorative edge.
5. Attach the base front and side aprons onto the bottom of the base. As with the top, you have the option to use a Router or Dremel Trio to add a decorative edge to the top of the apron before attaching.
6. Secure doors to the base unit with decorative hinges. Add your choice of knobs after painting.
Assemble the shelf section
1. Attach the top (284 x 1760) and bottom (300 x 1760) to the sides.
2. The shelves can be fixed or adjustable and set to whatever height you require. Measure and mark for mounting the shelves inside the frame.
3. Mount two uprights to both sides.
4. Measure and mark 534mm from both side uprights and use this as a guide to mount the uprights onto the front edge of the shelves.
5. Attach the front top panel.
Finishing
- Fill all holes with wood filler and let this dry.
- Sand filled holes and edges with 120- and then 240-grit sandpaper.
- Paint with Bosch PFS spray system or paintbrush and foam roller.
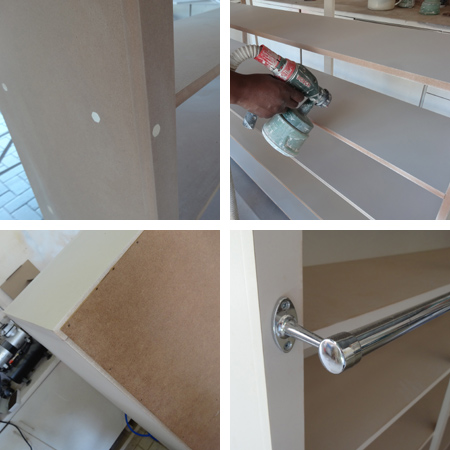
We used Plascon Polvin for this particular project in order to distress and finish with antique wax.
Adding detail
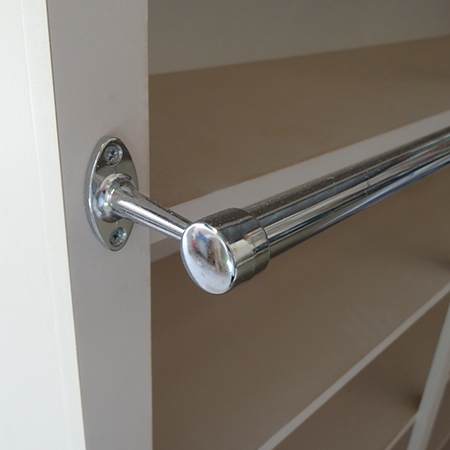
- A brushed chrome rail was mounted with support brackets for accommodate the ladder.
- There are various alternatives for mounting decorative brackets rather than steel support brackets.
- Pine moulding or trim can be attached to add a decorative plinth on top of the cabinet.

We accept no responsibility or liability for errors and omissions.