DIY laptop stand or laptop lap tray
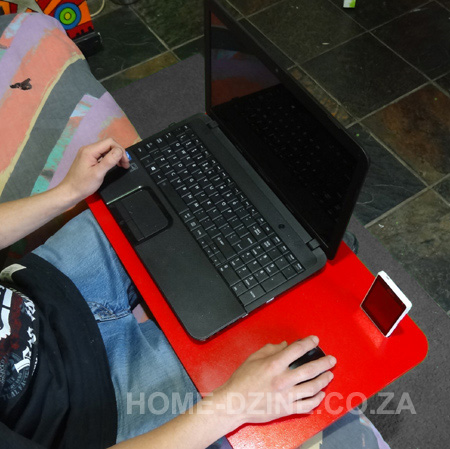
This laptop stand or lap tray is perfect for anyone who finds themselves working in a situation where a table or desk isn't available. I made this laptop stand for my son, who is presently doing studies and either sits on his bed or couch. The laptop stand has holes that allow for air circulation, and even a slot for your iPad or smart phone.
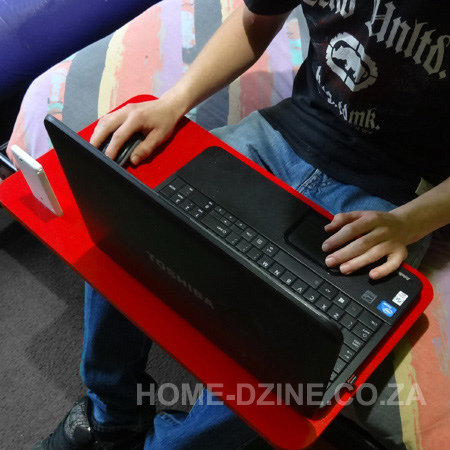
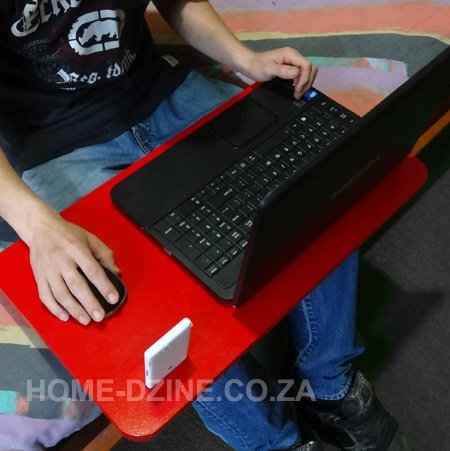
I quite often find myself working in front of the TV to catch up on work, and also not to miss out of my few favourite TV programmes. This laptop stand or laptop tray allows me to work comfortably while I relax.

To make the laptop stand or lap tray all you need is an offcut of timber or board. I used a scrap piece of 16mm supawood for my tray.
YOU WILL NEED:
Piece of timber or board large enough to accommodate your laptop and iPad
Wood glue
120- and 240-grit sandpaper
Rust-Oleum 2X spray paint in your choice of colour
TOOLS:
Drill / Driver plus assorted bits
Countersink bit
25mm spade bit
Tape measure, steel rule and pencil
OPTIONAL: Dremel MultiTool
HERE'S HOW:
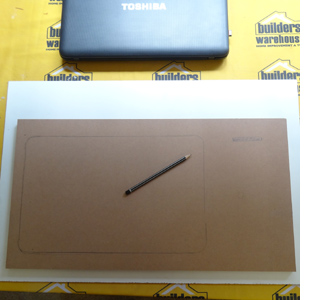
1. Use your laptop and iPad or smart phone to draw the outline onto your piece of board with a pencil. If you don't need a space for your phone, leave a gap on the side if you like to use a mouse with your laptop.
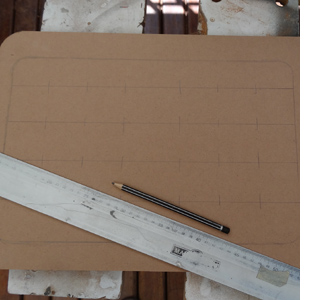
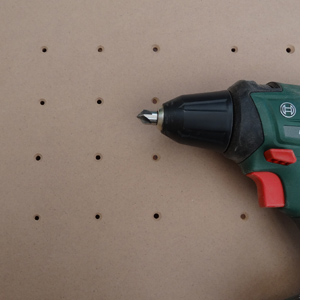
2. Within the outline area for your laptop, divide up into 5cm (approximately) square sections. These marks will be your guide for drilling holes to allow for air circulation.
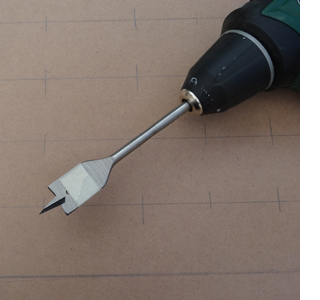
3. Depending on the thickness of the board you are using, wrap a piece of masking tape around the spade bit so that you know how deep to drill. You need to drill deep enough that you only have small holes through the base of the board.
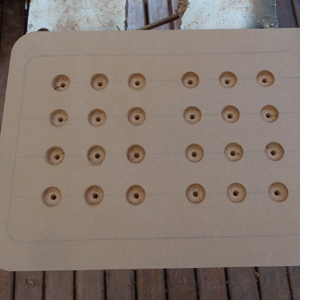
4. Here you can see how the spade bit has drilled a large hole that is half the depth of the board, but also has a smaller hole that goes right through to the other side. Sand the drilled holes with 120- and then 240-grit sandpaper.
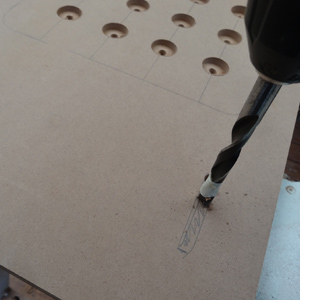
5. Now you are going to use a 10mm wood bit to drill out for your iPad or smart phone. Check the width of your pad or phone before you drill. Mine is just under 10mm, so a 10mm drill bit is perfect. If your pad or phone is larger, you might need to use a small spade bit. Again, I have marked the drill bit so that I know how deep to drill.
GOOD TO KNOW
When drilling out, try to keep the drilled holes as close as possible to reduce the time spent cleaning up in the next step.
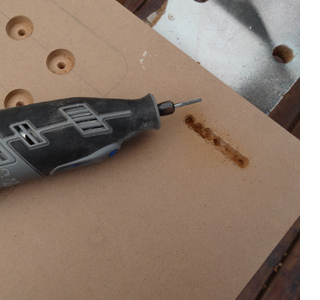
6. If you own a Dremel MultiTool, cleaning out the drilled slot is easy and there are various accessories that you can use to remove excess and leave a nice smooth finish. If you don't own a Dremel MultiTool you can clean out the slot with 120-grit sandpaper.
7. Tidy up the back of the board by using a countersink bit on slow speed to quickly remove any rough edges.
 \
\
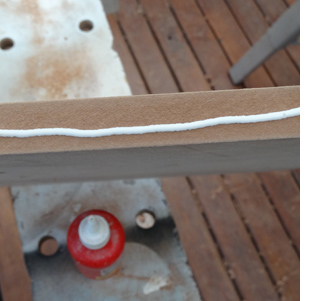
8. Sand the entire project with 120- and then 240-grit sandpaper until smooth. Spread a thin layer of wood glue over the cut edges to reduce absorbency and cut down on the amount of paint used. Let this dry.
Finishing
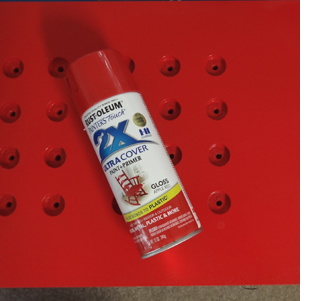
I sprayed my laptop tray with Rust-Oleum 2X in gloss apple red, but you can choose any one of the wide range of colours.
Only apply light, even coats of spray and let each coat dry before applying the next coat. I only needed to apply two coats.
GOOD TO KNOW
There can sometimes be a certain amount of tackiness after spraying. To overcome this, I wait until the paint is completely dry and give it a quick spray with furniture polish and buff.