
Wiring up a lampholder for new lamp and fit an on/off switch
It's so easy to make your own table lamp and you will find plenty of projects in our Craft Section. To finish off your new lamp you will need to add a lampholder for the globe, and perhaps an on/off switch as well.
YOU WILL NEED:
Lampholder and on/off switch
Wire strippers
Screwdriver
HERE'S HOW:
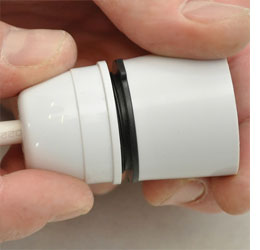
1. Unscrew the fitting to expose the separate components. The construction of metal and plastic ones is a little different as you will notice from the pictures.
2. Feed the top cover over the flex and push them along out of the way.
3. Note the length required for the wires to reach the terminals and then strip and prepare the flex.
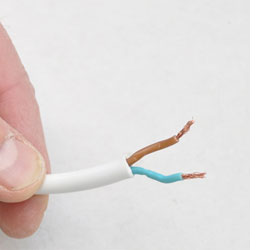
4. Using a pair of side cutters, cut back the outer sheath of the flex accordingly and trim off the excess.
5. Separate the conductors and strip the insulation of each back by about 5mm. Twist together the separate filaments of each.
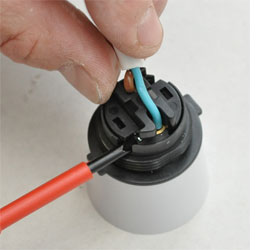
6. Connect the brown (live) to one terminal and secure with the retaining screw.
7. Connect the blue (neutral) to the other terminal and secure with the retaining screw.
8. Make sure that both are fed round the supports which prevent strain on the connections.
9. Double check your connections then slide the previously threaded components back down the flex and reassemble the fitting, taking care not to damage or pull the wires in the process. To finish of your new lamp you may want to add an on/off switch. These can be found at your local Builders Warehouse and cost around R10.

1. Unscrew the retaining screw on the new switch and remove the cover.
2. Inside you will see two terminals along one side of the switch, this is for splitting and attaching the brown (live) wire.
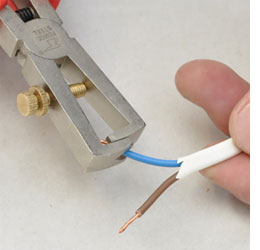
3. Prepare the flex by cutting where you want to insert into the terminals.
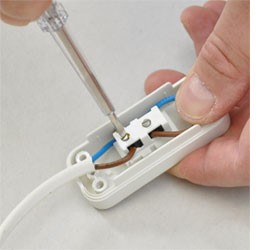
4. Strip and prepare both ends by cutting back the outer sheath and stripping about 5mm of insulation from the end of each conductor. Taking each end in turn, twist its separate filaments. The amount by which the sheath needs to be cut back, and the insulation of each conductor removed, will depend on the particular fitting.
5. Insert the ends of the brown live conductors into one of the switch terminals. Repeat this for the other brown live wire into the other terminal of the switch.
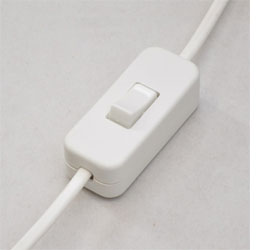
6. Double check your work to ensure that all conductors are fully and securely held with no exposed parts showing. Replace the cover and fasten the retaining screw.
diyfixit.co.uk