
Painting Interior Doors
It is not necessary to remove a door in order to paint it, although the advantage of laying it flat is obvious - no chance of paint runs. But the job is bound to take much longer since you will have to wait for the door to dry completely before painting the other side!
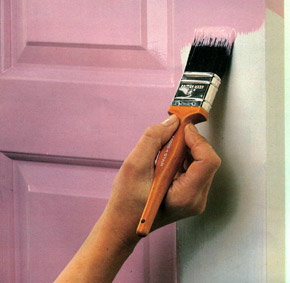
The easiest way to paint an interior door is to open the door and fix it in that position with a couple of wedges underneath. This leaves you with both hands free when painting. But don't forget to protect all floor coverings before you start painting.
Apart from making the necessary surface preparations, remove the handles and any keyhole and fingerplates and hooks from the door. If you try and work round these, you will end up with an unsightly build-up of paint around them and the chance of runs developing down the door.
Cover decorative hinges - such as those make of brass - with masking tape for protection. If you want to paint over the hinges, clean out the slots in the screw heads before the paint has dried.
The paint sequence is important here in order to achieve the best results:
Use a 50 mm brush for the larger areas and a 25 mm brush for the narrow edges and any mouldings.
Particularly with smaller areas, do not overload with paint or you will get runs down the door.
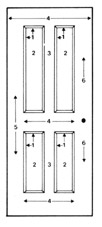
Start painting the panels, working from the top left panel to the bottom right; any mouldings on the panels should be painted first. If there is a centre stile (vertical support), paint this next, then the top, centre and bottom rails (cross supports). Follow this with the butt (hinge-side) and lock (handle-side) stiles. The doorframe is normally the last to be painted. But if you need to close the door as soon as possible, paint the closing edges of the frame first to give them time to dry.
Painting a flush door:
In many ways it is more difficult to get the perfect finish on a flush door since you are working over a much larger area than with a panelled door, where you can paint individual sections at a time. So the sequence here is just as important. Start at the top left-hand corner of the door and work across it, half at a time. Then paint the middle section of the door, again starting from the left, and finish with the bottom section.
There is a routine for applying the paint, which, once mastered, should become automatic:
Lay on the paint in the top left-hand corner section with vertical strokes, and then brush it out horizontally. Repeat this for the second half of the top section. Then brush in the top strip of the door lightly with vertical strokes and smooth out across the width of the door with horizontal strokes. Repeat this procedure for the middle and bottom sections.
Design Tips:
Clean out the keyhole and remove any dirt and grease. If you don't, the chances are that the brush will pick these up and spread them over the new coat.
Doors are normally painted with gloss or satin enamel - and whenever possible use the non-drip variety.