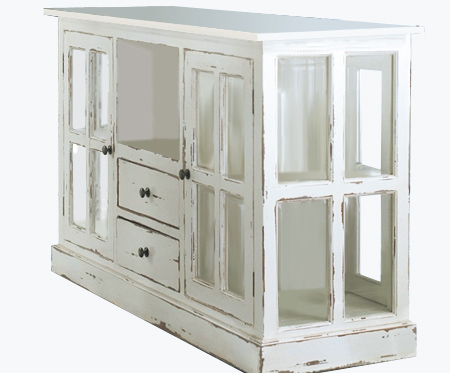
Vintage distressed display cabinet with glass panel doors
With its glass panel doors, this vintage distressed cabinet is not only useful for storage and display in a home, it also makes the perfect kitchen island in a rustic or cottage kitchen.
06/03/2020

Made using 16mm SupaWood, you will find everything you need for this project at your local Builders Warehouse.
YOU WILL NEED:
CUTTING LIST
QTY |
W |
L |
MATERIAL | ITEM | |||
A |
1 |
500 |
1500 |
16mm SupaWood | countertop | ||
B |
2 |
468 |
884 |
16mm SupaWood | sides | ||
C |
2 |
468 |
752 |
16mm SupaWood | centre supports | ||
D |
2 |
468 |
1436 |
16mm SupaWood | top/base | ||
E |
2 |
226 |
504 |
16mm SupaWood | small shelf | ||
F |
1 |
468 |
504 |
16mm SupaWood | top shelf | ||
G |
1 |
368 |
504 |
16mm SupaWood | shelf support | ||
H |
2 |
100 |
1500 |
16mm SupaWood | back/front apron | ||
J |
2 |
100 |
468 |
16mm SupaWood | side apron | ||
K |
2 |
50 |
1436 |
16mm SupaWood | base front | ||
L |
2 |
434 |
450 |
16mm SupaWood | shelves | ||
M |
4 |
446 |
748 |
16mm SupaWood | doors | ||
N |
4 |
174 |
500 |
16mm SupaWood | drawer front | ||
O |
8 |
174 |
202 |
12mm SupaWood | drawer side | ||
P |
4 |
174 |
500 |
12mm SupaWood | drawer back | ||
Q |
4 |
202 |
476 |
12mm SupaWood | drawer base |
5 x 60mm screws
24 glass panes (measure once panels cut out - make the glass slightly smaller)
8 decorative butt hinges + small screws
4 double-roller door catches + small screws
8 shelf pins
8 vintage brass or pewter knobs + screws
Plascon Polvin if distressing and finishing with antique wax / clear sealer
OR Plascon Double Velvet if you are not distressing
1000-grit sandpaper
TOOLS:
Drill/Driver + assorted bits
Countersink bit
Router and assorted bits
Jigsaw + clean-cut blade
Orbital sander + 120- and 240-grit sanding pads
Bosch PFS spray system - or paintbrush and foam roller
Tape measure and pencil
HERE'S HOW:
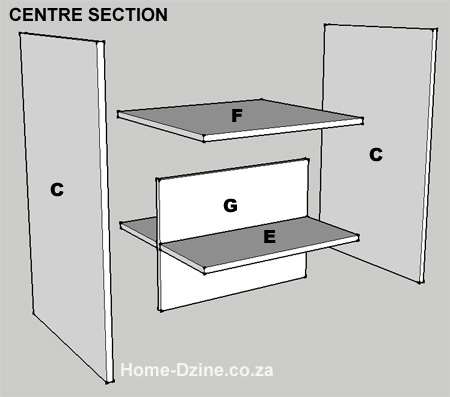
As shown in the diagram above start off by assembling the centre section. Note that all holes are pre-drilled using a 3mm wood bit at 50mm from the top, side of bottom edges.
1. Along the 504mm length, measure in 226mm from both sides and draw a line on the top and bottom of the top shelf [F]. Using this line as a guide, attach the top shelf to the shelf support [G] via pre-drilled and countersunk holes through the top shelf.
2. On both sides [C] measure up 176mm and 192mm and draw a line on both sides. Use this as a guide for mounting the shelves [E], first on one side as shown...
3. And then attaching the other side [C].
4. Completed centre section.


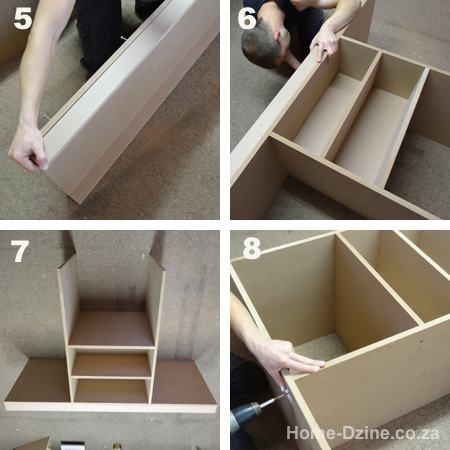
5. With countersunk pilot holes pre-drilled along the front edge of the base [D], and pilot holes pre-drilled in the base front and back [K], attach these sections together.
6. Measure in and mark at 449mm in from both short ends on both sides of the base, draw a line, and use this as a guide for securing the base [D] to the centre section.
7. Centre section with base added.
8. Add the top [A] using the same method.
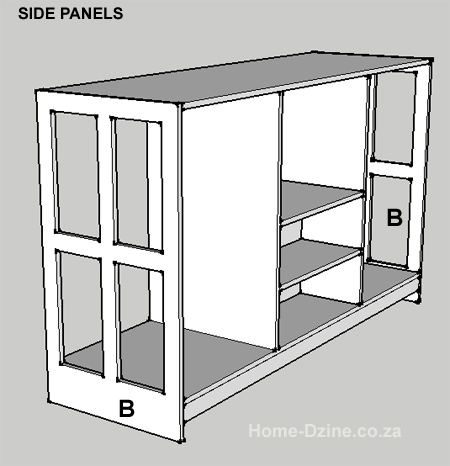
Cut out side panels for fitting glass
Before attaching the side panels cut out the openings with a jigsaw. See Step 12 below.
9. Attach the side panels [B] to the frame by aligning the top edge.
10. Completed frame with side panels.
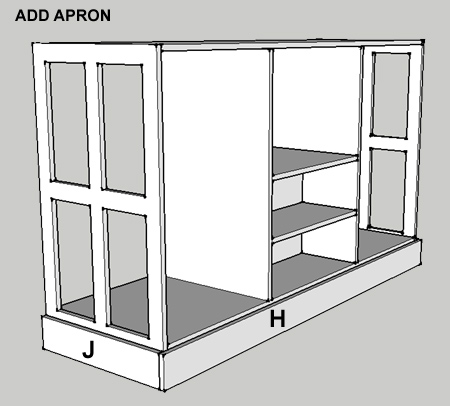
11. Add the front, back [H] and side aprons [J] to the base of the frame, as per diagram ADD APRON.
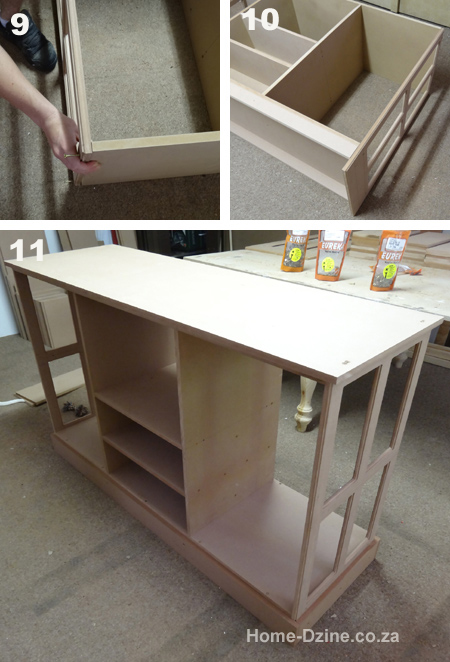
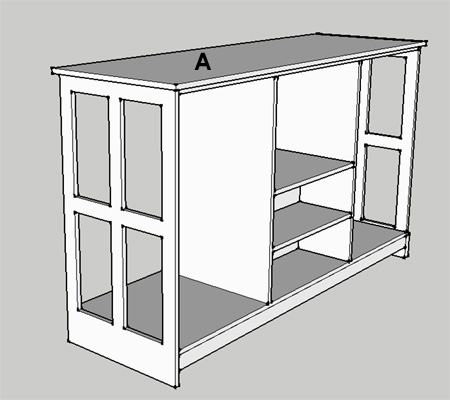
12. Allowing a 16mm border all round ,attach the countertop to the top of the unit. Pre-drill and countersink all holes through the top into the frame sections.
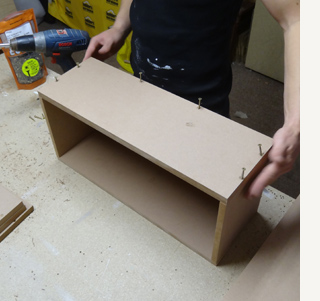
Assemble the drawers
Drill pilot holes and countersink to attach the front and back to the sides.
Test fit the drawers and sand if necessary before painting the drawer fronts.
Insert shelves
Drill holes in the sides for shelf pins for mounting the shelves [L]. Paint the shelves separately.
Painting
Before painting you need to sand down all the edges and make sure that everything is nice and flush. Any uneven edges can be sanded with 120-grit and then smoothed with 240-grit. Wipe clean to remove all traces of dust. I prefer to use a Bosch PFS spray system for painting all my furniture projects, but you can use a paintbrush and foam roller if you don't have a spray system - it just takes longer. Apply two coats of paint, allowing each coat to dry before applying the next coat. Sand with 1000-grit sandpaper before applying another two coats of paint and sanding again. At this stage you can decide whether to leave the unit as is, or to apply a distressed finish to the edges. You would do this using 120-grit sandpaper, either by hand or with a Dremel MultiMax. After sanding, you can apply two coats of clear sealer or antique wax.
Cutting out door panels for fitting glass
Before mounting the doors [M], measure and draw a line 50mm in from the front, back, top and bottom edges. Each opening measures 160 x 330mm. Cut out the openings with a jigsaw.
12. Rout the front of the cut panels with a beading bit, and the back of the cut panels with a rabbet bit. The beading bit provides a decorative finish on the front, while the rabbet bit cuts out a rebate for fitting the glass panels
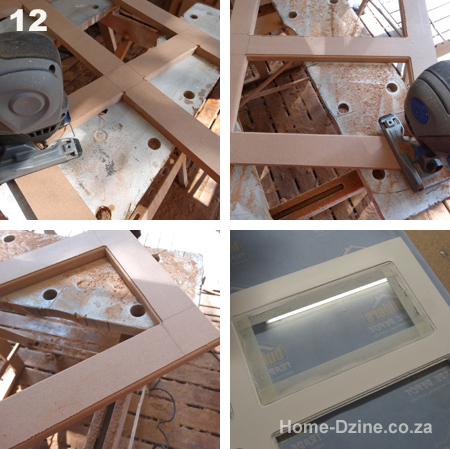
Adding the glass panels
After sanding and painting the doors, place the glass inside the rebated section at the back of each door. Place a strip of masking tape around the edge of the glass approximately 2mm in from the edge. Secure the glass using acrylic sealer and remove the masking tape before the sealer has time to set.
Finishing off
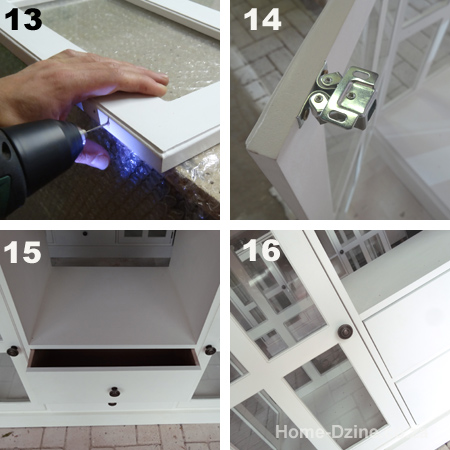
13. Add hinges to all the doors and fit the doors to the frame.
14. Attach double-roller catches - mounted at the top of each door.
15 & 16. Add handles or knobs to the doors and drawers.
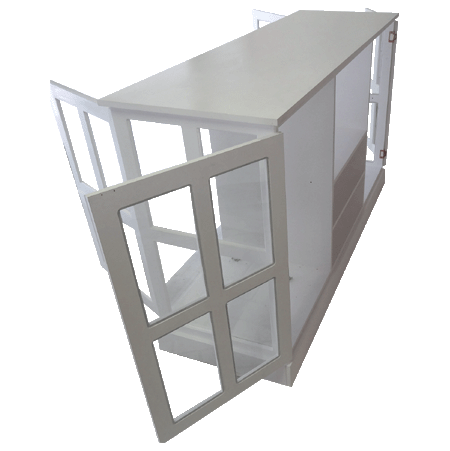
Vintage display cabinet with doors open to show hinge mountings.
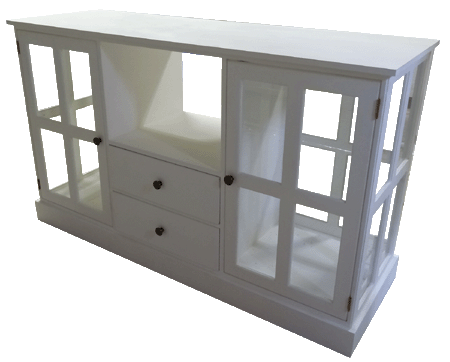
Completed vintage display cabinet. This particular unit has not been distressed, but you can add light, medium or heavy distressing to suit your particular style and taste.