
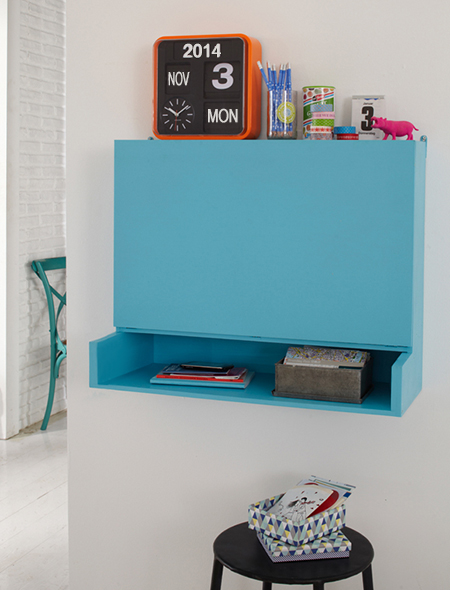
Drop-leaf desk for home office or child's study desk
This compact wall-mounted desk has a drop-down flap that serves as a worktop for a laptop that takes up very little space in a small home office or child's bedroom. When not in use the flap is easily closed to create a neat and tidy workspace.
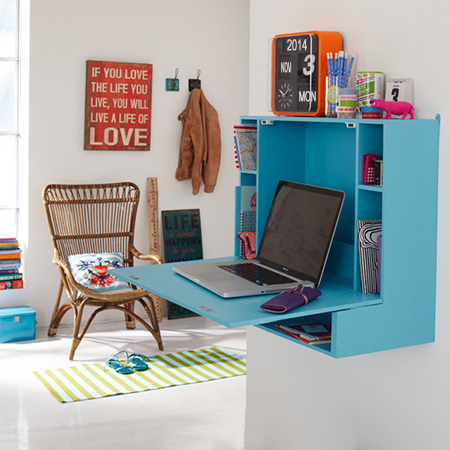
The cabinet is made using 12mm MDF which you won't find at your local Builders, but can source from board and timber suppliers. Plus, you can still have everything cut to size to make assembly quick and easy.
YOU WILL NEED:
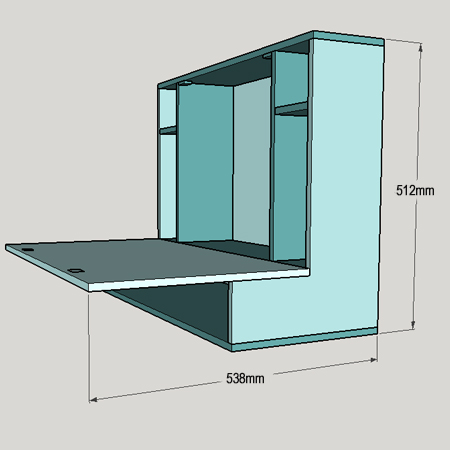
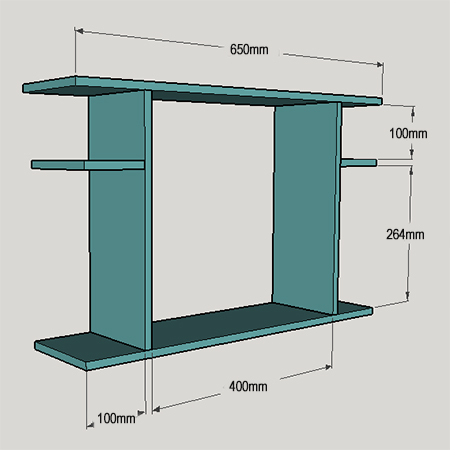
2 of 300 x 488mm 12mm MDF - sides
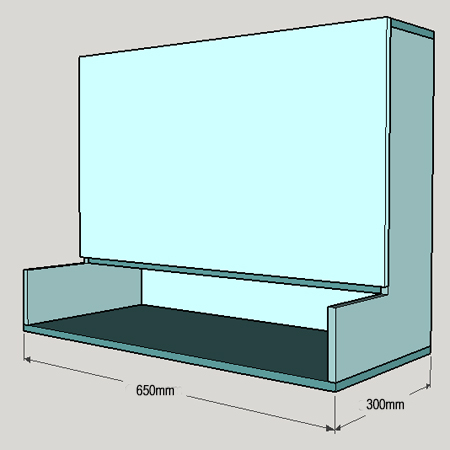
1 of 150 x 650mm 12mm MDF - top
1 of 300 x 650mm 12mm MDF - base
1 of 388 x 650mm 12mm MDF - flap / desktop
2 of 150 x 376mm 12mm MDF - shelf dividers
1 of 150 x 626mm 12mm MDF - large shelf
2 of 100 x 150mm 12mm MDF - small shelves
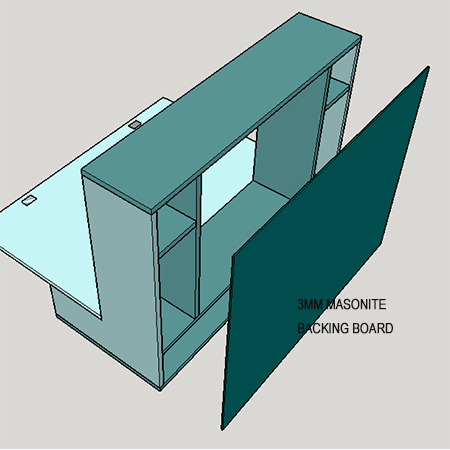
1 of 498 x 635mm 3mm masonite backing
4 raised keyhole brackets and 30mm screws
2 magnetic catches or double roller catches and 12mm screws
3 butt hinges and 12mm screws
Wood filler
4 x 30mm cut screws
TOOLS:
Drill / Driver plus assorted bits
Countersink bit
Orbital sander plus 120- and 240-grit sanding pads
Bosch Tacker, staple gun or hammer and panel pins
HERE'S HOW:
Assemble the centre shelf sections:
1. Measure in 100mm and 112mm from both sides on the
bottom shelf and use this as a guide for mounting the dividers. Drill
3mm countersunk pilot holes through the bottom shelf to secure with 30mm
screws.
2. Measure in 124mm and 136mm on the top shelf to align with the uprights. Drill 3mm countersunk pilot holes through the top and secure with 30mm screws
3. Measure down 100mm and 112mm on both dividers for mounting the small shelves. Drill 3mm countersunk pilot holes through the uprights and secure the small shelves with 30mm screws.
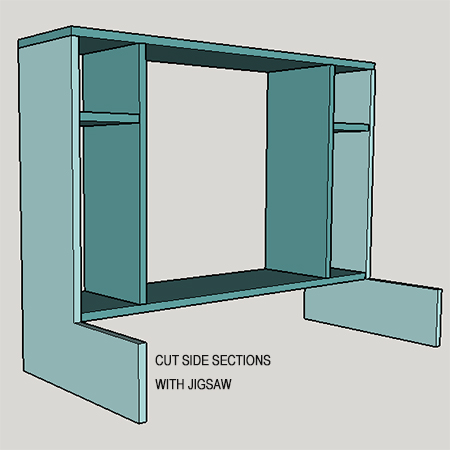
4. On the sides, cut away a 150mm wide x 388mm panel using a jigsaw. Align the top of the shelf with the top and drill 3mm countersunk pilot holes through the top to secure the sides with 30mm screws.
5. Measure down 100mm and 112mm on the outside of the sides and mount the small shelves.
6. Measure up 100mm and 112mm to mount the side panels to the bottom shelf.
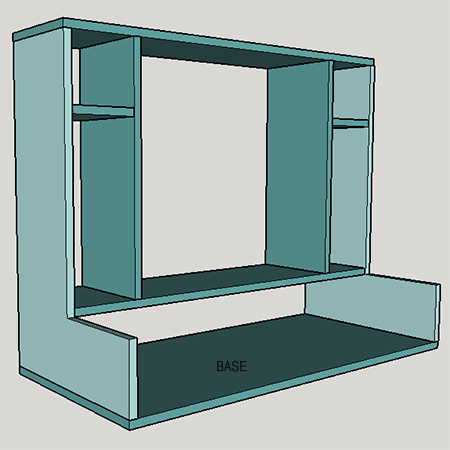
7. Pre-drill 3mm countersunk pilot hole through the base for mounting to the frame with 30mm screws.
GOOD TO KNOW
Before completing the assembly it is best to sand and paint the
cabinet and the door.
Attach the flap / desktop:
8. Rest the flap on the side arms to secure the butt
hinges in place. Use 12mm screws to attach the hinges, making sure to
leave a gap for the barrel (centre) of the hinge.
9. Mount magnetic or double roller catches inside the cabinet and on the door using 12mm screws.

GOOD TO KNOW
Double roller catches are the stronger and safer option if this desk
is to be used in a child's bedroom.
Finishing and mounting
10. Attach the painted backing board using a Bosch
Tacker, staple gun or hammer and panel pins.
11. Attach 4 raised keyhole brackets at the back where the sides and dividers are located. Transfer the measurements onto the wall for using nylon wall plugs (fischer) and screws to mount.
Note that this cabinet is intended for a laptop only and will not support a heavy weight.