
Build a Basic Dog House or Kennel
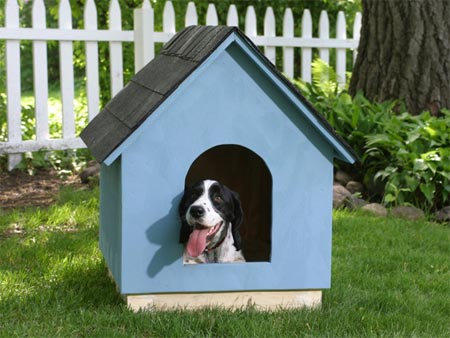
This project will take you through the steps to build a basic doghouse or kennel from a single sheet of marine plywood and some pine. Remember that your doghouse should be proportionate to your dog.
HERE'S HOW:
1. Use a straightedge and framing square to reproduce the diagram on the sheet of plywood. Note that on the layout, no pieces are touching each other so that the width of the saw blade cut ( the kerf) will not alter any dimensions.
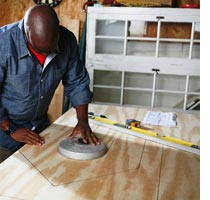
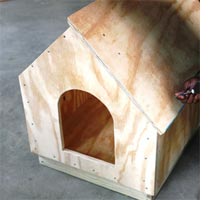
2. Make the doorway about 250 to 300mm wide and 150mm high. Leave a 80mm lip at the bottom of the hole to cover the base and bottom panel. The door height opening should be about 3/4 of the dog’s height. Large doors aren’t necessary as dogs prefer to duck to enter a doghouse — it makes them feel that they’re entering a cosy and protected space. Plus, it’s a good idea to have the entry as small as possible to help retain heat in the winter and keep out weather. Use any round shape to help you form the arched top of the entryway - a dinner plate or pot cover works fine.
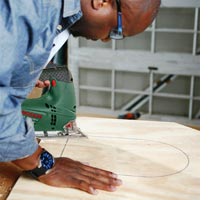
3. Cut all box parts from the plywood. Clamp the work piece firmly to your sawhorses before making any cuts. Use a sharp clean-cut blade to reduce chips and splintering. Work slowly and let the saw do the work to ensure straight, splinter-free cuts. It won’t matter if you decide to cut directly on the lines you’ve drawn, or on the inside or outside edge of each line. However, once you decide how you’ll make your cuts, be consistent to ensure that all the pieces fit together properly.
4. When cutting the roof panels, cut one long edge of each roof panel with the saw blade set at a 45-degree angle. This bevel cut will ensure a tight-fight at the roof peak. Set the shoe of your circular or jigsaw at 45-degrees, and always unplug the saw before making any adjustments. Return your saw blade to the 90-degree position before cutting each roof panel to length.
DIY Tip:
When cutting, make sure to watch the blade as you follow your cut line. Don’t rely on the cutting guide on the shoe of the saw or your cut will be off. After you finish this bevel cut, one side of each roof panel will be slightly wider than the other. The wider surface should be the 500mm dimension as indicated on the diagram, and is the upper side of each roof panel - forming the point of the 45-degree roof peak.
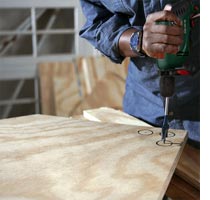
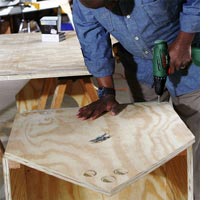
5. If your doghouse lacks adequate ventilation, the air may become hot and stifling during the summer, creating an uncomfortable environment for your pet. A few holes in the back panel near the peak will provide good cross ventilation. Drill three evenly-spaced holes with a 22mm spade bit. Place a piece of scrap wood directly under the hole locations to help reduce tear-out when you’re drilling through the plywood.
6. When you’re finished cutting out the pieces, sand all the edges with an orbital sander or sanding block and medium-grit sandpaper to remove any rough spots and splinters.
7. Assemble the base frame from the pine planks. The base elevates the floor of the doghouse a few centimetres above the ground. This creates a dead-air space underneath the floor of the house that helps insulate the floor, and also helps keeps the floor dry. Cut the pieces for the base according to the cut list.
8. Place the bottom panel on the base and make sure all edges are flush and that the base is square. Fasten the bottom to the base using wood screws, making sure the to sink the screw heads just below the surface.
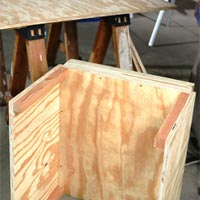
9. Cut the frame from 50 x 50mm pine and assemble the sides by fastening a 380mm vertical corner to each edge of the side panels, making sure the pieces are flush to the edge of the plywood and even with the top of the panel. This leaves a 25mm gap between the bottom of the corner framing and the bottom edge of the side.
Secure each piece of framing with 3 wood screws through the plywood into the framing. Set the side panels on the base, making sure the front/ back edges are flush with the front and back of base. Secure sides the base with wood screws every 120 - 150mm.
10. With the side panels attached to the base, place the assembly on one end. Put the back panel onto the assembly, making sure the bottom edges of the panels are flush. Secure the back panel to the vertical frame supports using wood screws driven every 120mm. Along the bottom edge, drive screws through the panel into the floor, making sure that the screw tips do not poke through the floor. Flip the doghouse over and repeat the procedure for the front panel.
11. Fasten the 330mm roof framing lengths to the inside edges of the rooflines of the front and back panels, flush with the edges. Position each framing piece halfway between the top (peak) and bottom of the angled roofline cut. Secure the framing with three wood screws driven through the plywood and into the framing.
12. Position the roof panels on the box, making sure that the front and back overhangs are even and that the joint of the panels at the roof peak is tight. Fasten the panels to roof framing using wood screws.
Finishing off
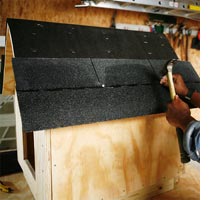
To begin roofing, first cover the entire roof with a single piece of heavy-duty plastic sheeting or pond liner. It’s an extra layer of protection that helps ensure the inside of your doghouse remains dry. Staple the plastic in place. Use a utility knife to trim the edges flush with the edges of the roof panels.
Using the vinyl floor tiles, start at the top of the roof and fold tiles in half over the centre join. Nail in place with short wood nails. The next row is fixed to the bottom edge of each side of the roof. Keep the front and bottom edges of the first row of tiles flush to the bottom and front edges of the roof panel, and nail it in place. Then add a layer that overlaps the bottom layer, repeating this to the top and add another folded row along the centre peak.
Stain or paint using a waterbased exterior stain or waterproofing paint. If you wish, hide the screw holes with wood filler before applying the finish. Before letting your dog inside, allow the finish to dry thoroughly - at least a day or two - to reduce the possibility of lingering fumes.