
Make a craft or hobby work station
Make your own craft or hobby work station with 16mm plywood or SupaWood that you will find at your local Builders Warehouse. SupaWood is the preferred choice if you plan the paint the craft or hobby station, as our local plywood is not very attractive.
thatsmyletter.blogspot.com
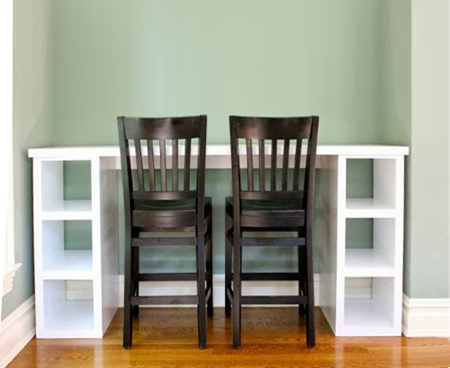
Jamie at that's my letter built a basic cubby style unit with a long counter on top to fit into a convenient space that is perfect for homework. The countertop is around 90cm high to accommodate the stools and has tons of surface area for homework and papers.
This design is ideal for a craft or hobby work centre and you can modify the height if you want to use lower stools or chairs. The shelves - cubbies - offer plenty of storage space for craft supplies, and there are plenty of creative ideas right here on Home-Dzine for adding additional components to make the perfect craft or hobby work centre. The craft or hobby work station starts with two shelf of cubby sections.
You can use 16mm timber or board to make these shelf units. For this project the dimensions for the shelf units are: 880mmH x 400mmW x 500mmD. If you want to build this exact unit, have all your timber or board cut to the following sizes at your local Builders Warehouse:
YOU WILL NEED:
1 of 550 x 1800mm 16mm supawood - countertop
2 of 400 x 500mm 16mm supawood - shelf unit top
4 of 500 x 880mm 16mm supawood - sides
6 of 500 x 386mm 16mm supawood - shelves/base
3 of 10 x 44 x 1800mm PAR pine - cut to fit
12 of plastic corner brackets with caps
30mm panel pins
Wood glue
Wood filler
TOOLS:
Drill/Driver + assorted bits
Countersink bit
Jigsaw and clean cut blade (or mitre saw, or handsaw)
Hammer
Nail punch
Tape measure and pencil
HERE'S HOW:
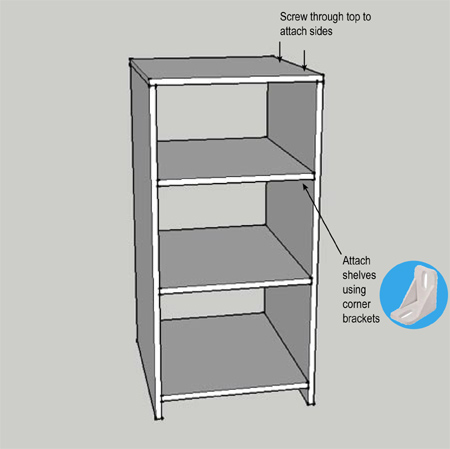
Assemble the two shelf sections as shown. Pre-drill 2mm pilot holes and countersink all holes. The bottom shelf or base is placed so that the top is 44mm from the bottom. This will allow for perfect lining up of the face front when added. The face fronts give a chunky look to the finished unit and also make the brackets less visible.
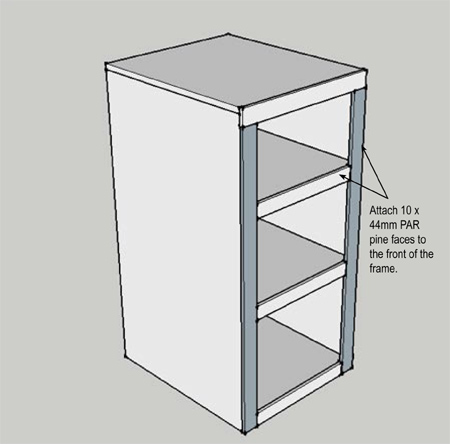
Attach the face fronts as shown above using wood glue and panel pins hammered in at a slight angle. It is important to angle the panel pins to ensure that they secure the frames properly and won't come loose later on. Use a nail punch to ensure that the pin heads are slightly below the surface of the timber or board. You can fill in any holes with wood filler.

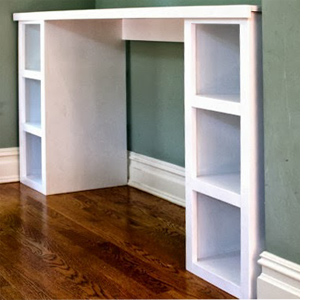
You will also attach a face front to the front edge of the countertop. The pic left shows the top upside-down. This is optional but it lends to the finished look of the work centre and gives it a more chunky look without having to use thicker timber or board. Use wood glue and panel pins to attach.
To finish off your new craft or hobby work centre you can stain/seal pine or plywood. Use Plascon One Coat and a foam roller to paint by hand, or a Bosch PFS spray gun if you prefer the easy way! If you are interested, the Joburg DIY Divas will show you how to make your own craft organiser that can be mounted on the wall above your new work station.