
DIY Shaker or cottage-style wardrobe
A free-standing wardrobe offers plenty of storage in a bedroom where built-in closets aren't an option. Not only can a free-standing wardrobe be moved around as needed, it also goes with you if you ever move.
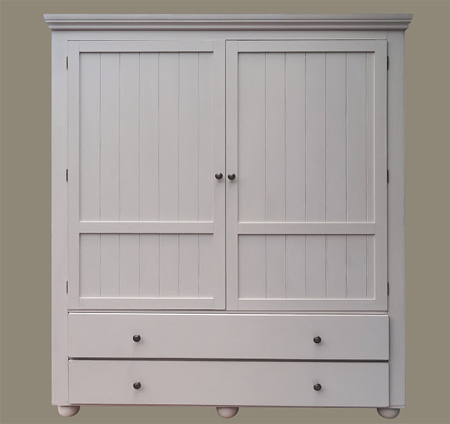
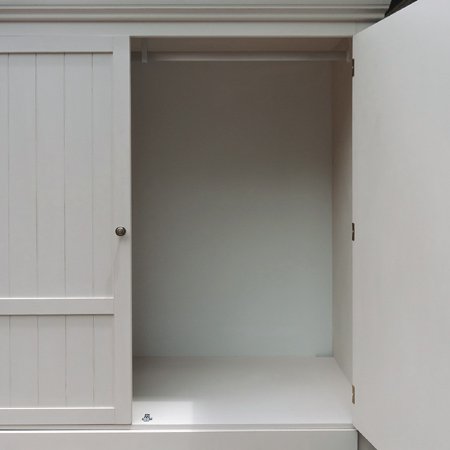
In this project we show you how to make a free-standing shaker or cottage wardrobe with beadboard doors.
YOU WILL NEED:
2 of 600 x 1500mm 16mm supawood - top/bottom
2 of 580 x 1768mm 16mm supawood - sides
1 of 600 x 1468mm 16mm supawood - top shelf
1 of 600 x 1362mm 16mm supawood - middle shelf
2 of 416 x 580mm 16mm supawood - shelf supports
2 of 676 x 1232mm 16mm supawood - doors
2 of 198 x 1356mm 16mm supawood - drawer fronts
2 of 572 x 1332mm 12mm supawood - drawer bases
2 of 198 x 1356mm 12mm supawood - drawer backs
4 of 198 x 572mm 12mm supawood - drawer drawer sides
2 of 20 x 69mm x 1768mm PAR pine - side frames
1 of 20 x 69mm x 1362mm PAR pine - top frame
4 x 50mm cut screws
4 x 75mm cut screws
No More Nails adhesive
Acrylic sealer
TOOLS:
Drill/Driver + assorted bits
Countersink bit
Jigsaw and clean-cut blade
Caulking gun
Tape measure and pencil
Buy everything you need for this project at your local Builders Warehouse.
HERE'S HOW:
1. Assemble the inner section
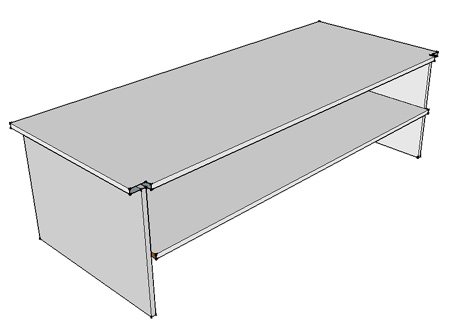
The top shelf measures 600 x 1468mm. To allow for fitting of the PAR pine sides on the front, an insert 20 x 53mm needs to be cut out with a jigsaw. Join the individual sections by pre-drilling 3.5mm pilot holes, countersinking all holes before using 4 x 50mm cut screws.
2. Attach outer frame (top, sides, base)
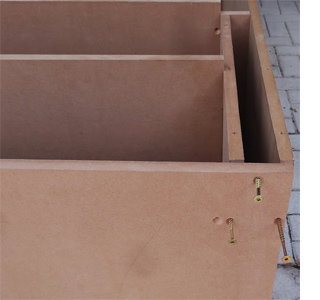
Attach the sides, top and bottom in that order. Pre-drill 3.5mm pilot holes and countersink all holes. Use 4 x 75mm screws to attach the sections.
GOOD TO KNOW
If you skip pre-drilling pilot holes you will end up with split board at all the joints.
3. Attach pine frame
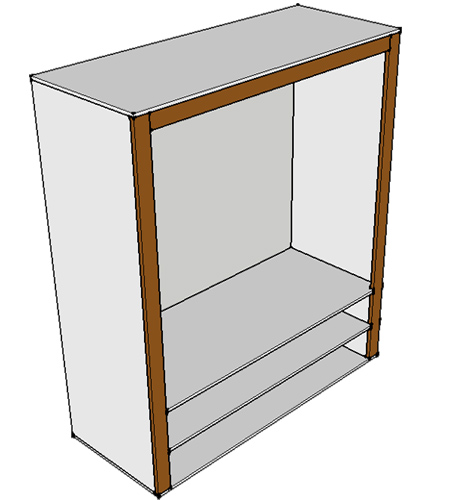
Attach the 20 x 69mm PAR pine side frames, again pre-drilling and countersinking before using 4.0 x 75mm cut screws. Mount the 20 x 69mm PAR pine top frame. You can attach to the PAR pine side frames using pocketholes or steel brackets mounted at the back.
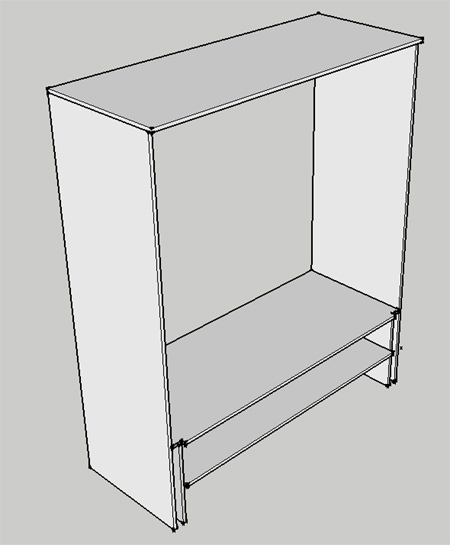
NOTE: The original design for this cottage wardrobe only had two long drawers, but 4 smaller drawers are a better option. The instructions here are for two long drawers and you will need to modify the plan slightly to change.
I just feel that over time the long top shelf may bow, especially when overloaded with clothes/shoes, and cause the drawers to stick when opened and closed. If you don't plan to use the inside top shelf (above the drawers), then the original design is OK.
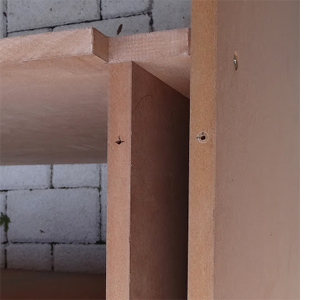
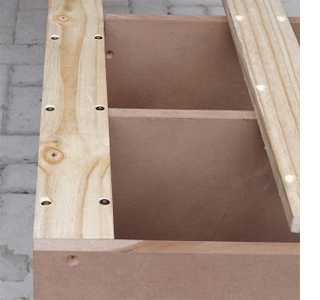
4. Cut and attach top moulding
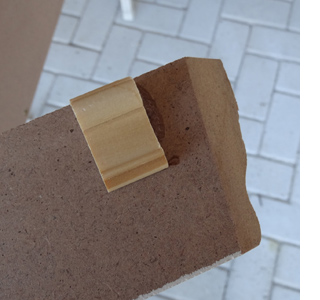
The supawood moulding at the top of the wardrobe is cut at a 10-degree angle and 45-degree bevel at each corner. The reason for this is that the moulding doesn't sit flat against the top of the cabinet, but is angled out. At the top of each strip of moulding, a section of pine moulding is attached using epoxy glue.
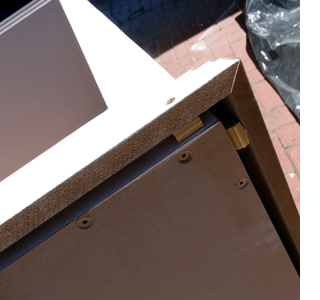
In this image [left] you can see how the pine moulding sits at the top behind the moulding, allowing a sloped angle.

The pine blocks also allow a convenient way to attach the moulding to the top of the cabinet. Pre-drill 3.5mm pilot holes, countersink and drill 4 x 75mm cut screws through the moulding, the pine block and into the cabinet top.
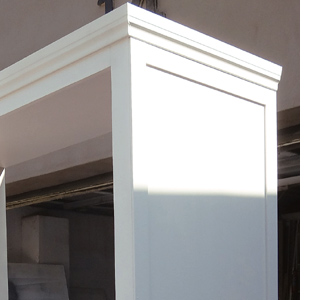
Any small gaps around the edges can be filled with acrylic sealer. The top moulding provides a decorative finish to the cottage wardrobe.
GOOD TO KNOW
Only apply a thin bead of acrylic sealer, using a caulking gun, and wipe away any excess immediately with a damp cloth.
5. Make and attach doors
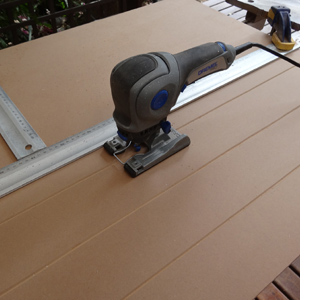
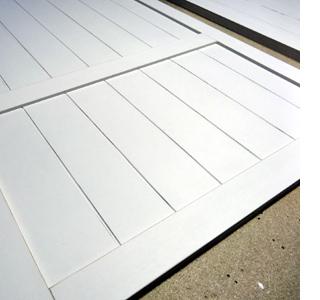
The doors are 16mm Supawood measuring 676 x 1232mm, and each door is framed with 3mm supawood strips 40mm wide. The strips are glued onto the door with No More Nails adhesive.
GOOD TO KNOW
It's easier to paint the door and strips separately with two coats of paint, glue the panels on and then apply two more coats.
The doors were attached to the frame using offset hinges. Due to unavailability of the stock we needed, the hinge panel needed to be cut down using a Dremel MultiTool and cutting disc.
6. Finishing
Antique brass knobs were attached to the doors.
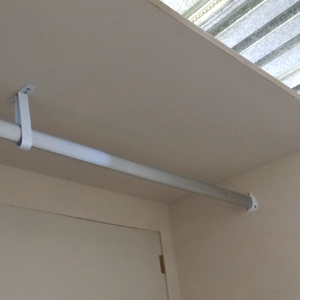
Inside the wardrobe a hanging rail was mounted, with a centre support bracket to accommodate a heavy load.
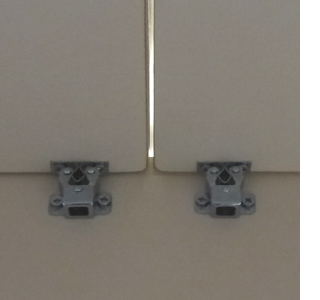
Double-roller catches were fitted to the top shelf for easy opening and closing of the doors.
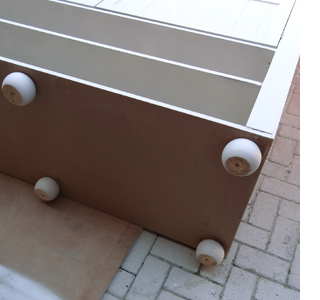
Large bun feet were glued and screwed to the base of the unit. Epoxy glue applied to the top of each bun foot ensures that the bun feet are securely attached and won't bend or budge if the cabinet is moved without being lifted. Finally, assemble, finish and fit the drawers.
Home-Dzine and Janice Anderssen are not responsible for errors and omissions relating to this project.