Make a wooden lantern for deck or patio
I have been wanting to make a wooden lantern for the garden for ages, especially after seeing the exorbitant prices they ask for ready made wood lanterns.
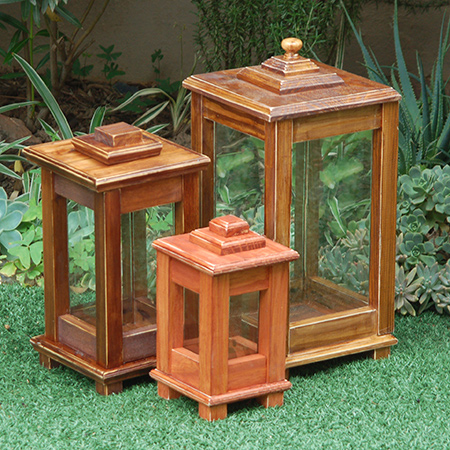
The design used to make the wooden lanterns is a simple one, and I used scrap pieces of pine that I had left over from previous projects. While I used a Kreg Pockethole Jig to join all the pieces, Alcolin waterproof glue works just as well for the smaller ones.
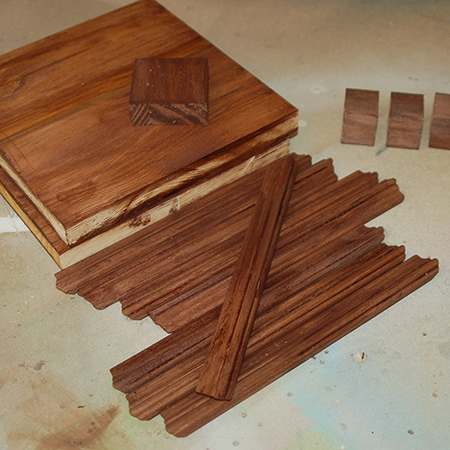
I also used my Triton router and router table to add decorative edges when making the large and small wood lanterns, but the medium lantern has pine moulding around the edge if you don't have a router.
YOU WILL NEED:
32 x 32mm pine for the uprights and feet
22 x 44mm pine for the cross sections
Laminated pine for the top
Pine moulding (*if you don't have a router)
Alcolin waterproof wood glue
Alcolin wood mate or silicone sealer
32mm coarse-thread pockethole screws
Glass, cut to fit
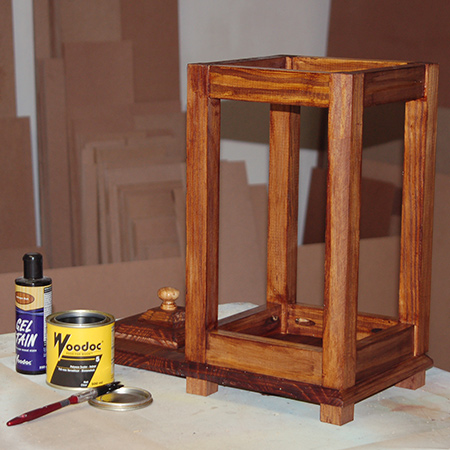
Woodoc Gel Stain and sponge/rags
Woodoc Exterior Sealer and paintbrush
Woodoc steel wool
TOOLS:
Drill / Driver plus assorted bits
Kreg Pockethole jig
Router*
Orbital sander plus 120- and 240-grit sanding pads
Tape measure and pencil
Find everything you need for this project at Builders Warehouse.
HERE'S HOW:
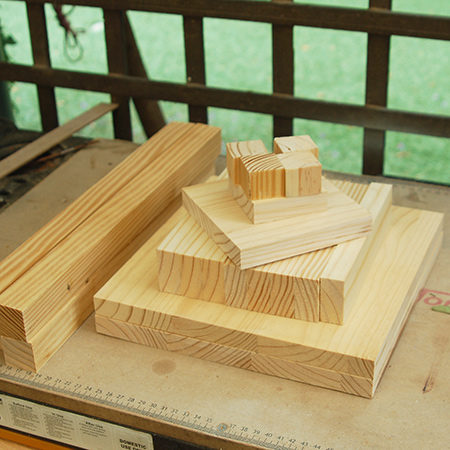
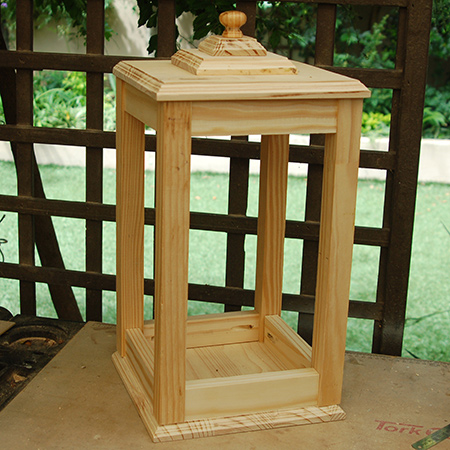
1. Start by cutting all the sections that you need to assemble your wooden lantern. Lightly sand the edges once cut. I used the following sizes:
Large lantern:
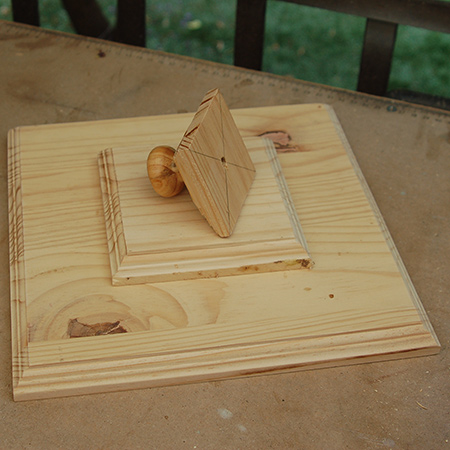
2 of 250 x 250mm pine | 130 x 130mm pine | 70 x 70mm pine - top/base
4 of 32 x 32 x 400mm pine - uprights
4 of 32 x 32 x 30mm pine - feet
8 of 44 x 180mm pine - cross pieces
Medium lantern:
2 of 200 x 200mm pine | 100 x 100mm pine | 60 x 60mm pine - top/base
4 of 32 x 32 x 300mm pine - uprights
4 of 32 x 32 x 30mm pine - feet
8 of 44 x 120mm pine - cross pieces
Small lantern:
2 of 160 x 160mm pine | 80 x 80mm pine | 50 x 50mm pine - top/base
4 of 32 x 32 x 200mm pine - uprights
4 of 32 x 32 x 30mm pine - feet
8 of 44 x 80mm pine - cross pieces
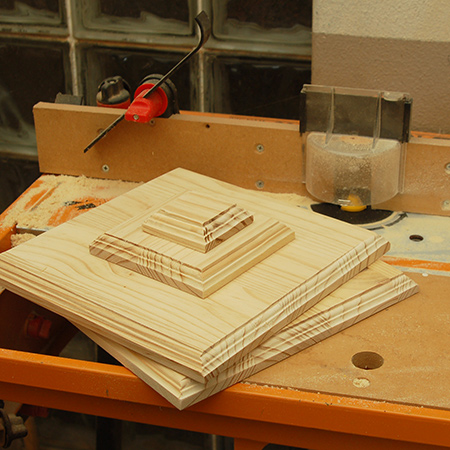
2. If you are using a router to add a decorative edge to the top and base sections, do this now. If you don't have a router and are adding pine moulding for the decorative edge, attach this once the lantern is assembled. I have a fantastic Triton router and router table that is super-easy to use and I love adding finishing touches to all my decor projects.
GOOD TO KNOW: In the instructions below I stained the pine sections and moulding strips (for the medium lantern) after assembly, but in hindsight it is far better to use Woodoc Gel Stain before you assemble.

3. For the large lantern I joined the cross sections to the uprights with pockethole screws. However, it is important to note that you can use wood glue for the medium and small lantern. Clamp the glued sections overnight.

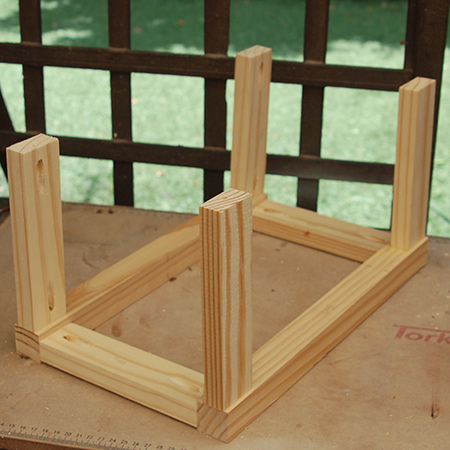
4. All the cross sections are joined to the uprights with wood glue and pockethole screws. Make a front and back frame in this way, as shown below.
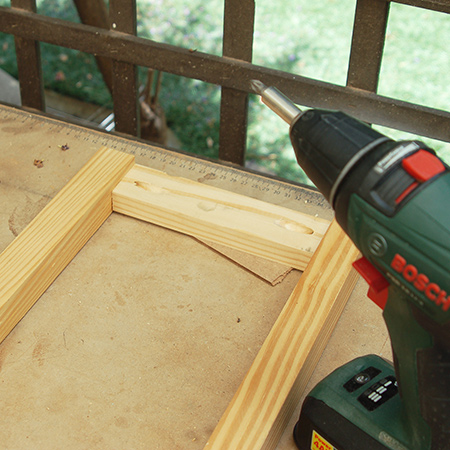
5. With the front and back frames assembled, you can add the side cross pieces in the same way.
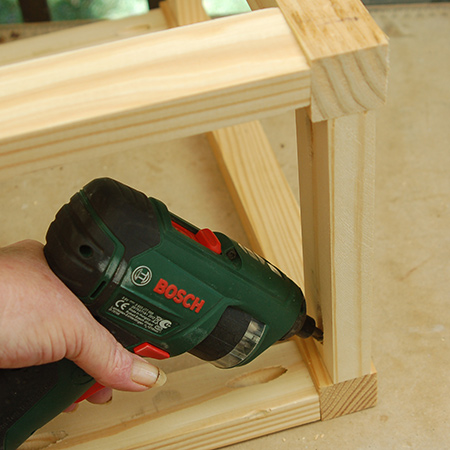
6. It was difficult to get my drill / driver into the frames to drive in the last screw, so I used my Bosch PSR cordless screwdriver. If you don't have a cordless screwdriver you can use a manual screwdriver.
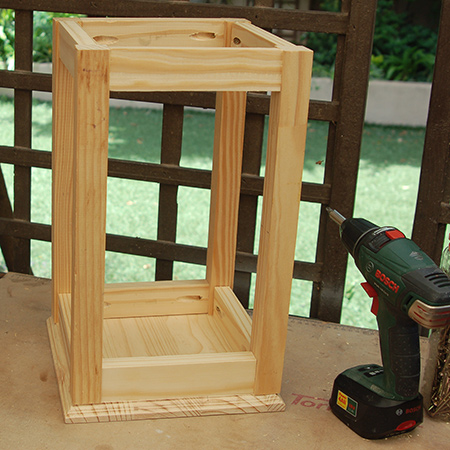
7. Assemble the top as desired. I added a pine knob to the large lantern. The sections were screwed and glued together.
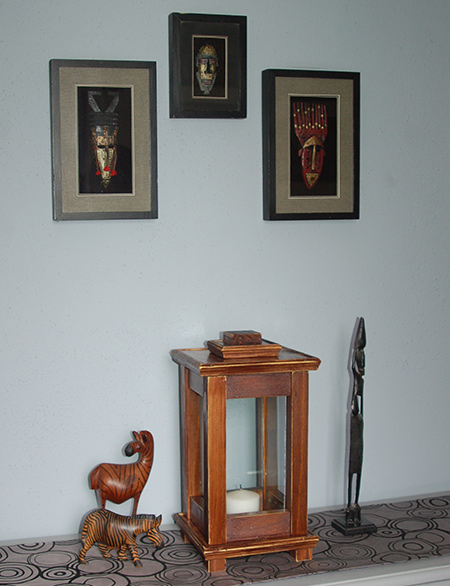
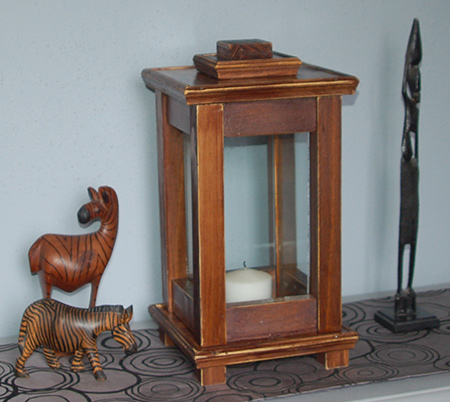
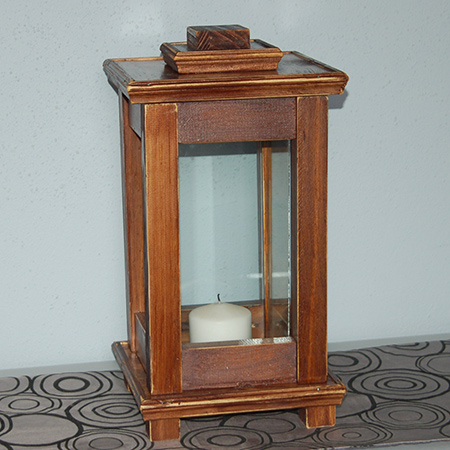
8. As mentioned above, it is better to stain the individual pieces before assembly. I stained and sealed everything after assembly using Woodoc Gel Stain and Woodoc Sealer. For the medium wooden lantern I used Woodoc 5 Interior matt sealer, as I intend to keep this one indoors! Purely for the purposes of this project each lantern was stained in a different tint: Large lantern - Antique Oak | Medium lantern - Imbuia | Small lantern - Cherrywood.
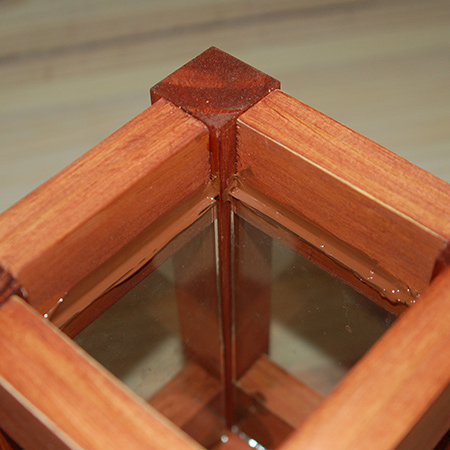
9. Once complete, pop into your local Builders Warehouse or glass supplier and have glass cut to fit the panels. Secure the glass pane at the top and bottom with Alcolin Wood Mate or Silicone Sealer.
GOOD TO KNOW: The glass panes should be around 2mm narrower than the width of the cross pieces for whatever size lantern you are making.
GOOD TO KNOW: If you plan to use the lanterns with candles, use a spade bit to drill holes in the lid for ventilation, and apply aluminium sheet to the underside of the lid - you can recycle cans for this.