
Handy Tool Storage Stool
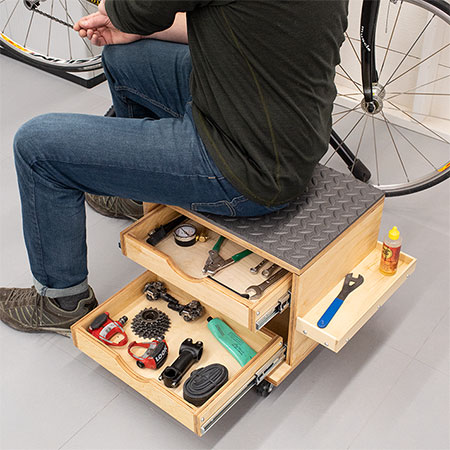
This handy tool storage stool is ideal for when you need to do projects in and around the home, and you can fill with any tools you need for the project at hand.
03/04/2019
This handy tool storage stool by build something is ideal for when you need to do projects in and around the home, and you can fill with tools you need for the project at hand.
The tool storage stool can be made using pine plywood - or shutterply that you can buy at your local Builders Warehouse. Assemble the tool storage stool and then top off with some rubber mats to add a bit of comfort.
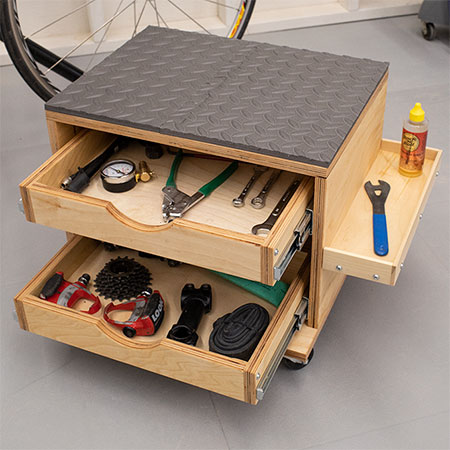
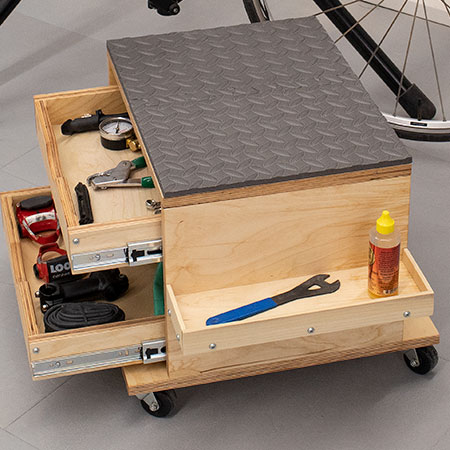
The stool is ideal for setting up wherever you have a project and can be filled with all the tools you need for a specific task. Or use the tool as a toolbox and keep all your essential DIY hand tools where you need them. The caster wheels allow you to easily move around as you work.
YOU WILL NEED:
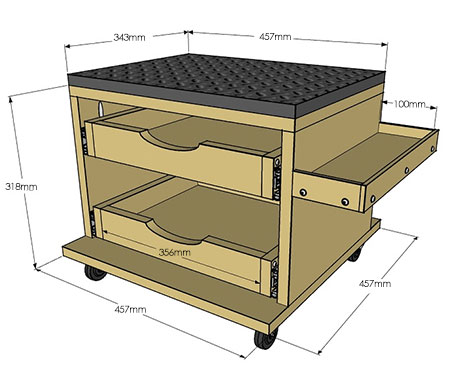
2 of 19 x 280 x 343mm plywood - side
1 of 19 x 280 x 419mm plywood - back
1 of 19 x 457 x 457mm plywood - bottom
1 of 19 x 343 x 457mm plywood - top
2 of Drawer Bottom, 19 x 280 x 356mm plywood - drawer bottom
2 of Drawer Front, 19 x 64 x 356mm plywood - drawer front
4 of Drawer Side, 19 x 64 x 318mm plywood - drawer side
2 of Drawer Back, 19 x 64 x 356mm plywood - drawer back
1 of Shelf, 19 x 102 x 330mm plywood - shelf
2 of Shelf Short Edge, 6 x 38 x 102mm pine - shelf short edge
1 of Shelf Long Edge, 6 x 38 x 343mm pine - shelf long edge
32mm Coarse-thread pocket-hole screws
Wood glue
4 of Swivel caster wheels and 16mm screws
Rubber mat (seat) and adhesive
300mm drawer sliders
TOOLS:
Kreg pocket-hole jig
Drill/Driver plus assorted bits
Jigsaw plus clean-cut jigsaw blade
Orbital sander plus 120- and 180-grit sanding pads
Workbench
Clamps
Tape measure and pencil
Not responsible for errors or omissions
HERE'S HOW:
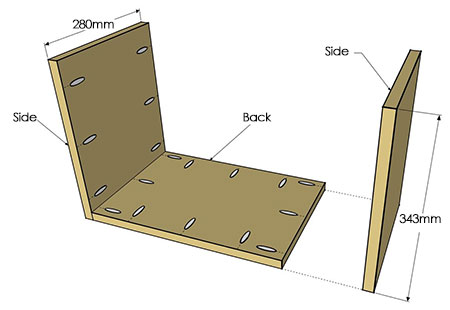
1. Attach the Sides to the Back using wood glue and pocket-hole screws, as shown above.
2. Apply wood glue to the lower edges of the Side/Back assembly and position on the Bottom, as shown below. The Bottom overhangs equally at the front and back.
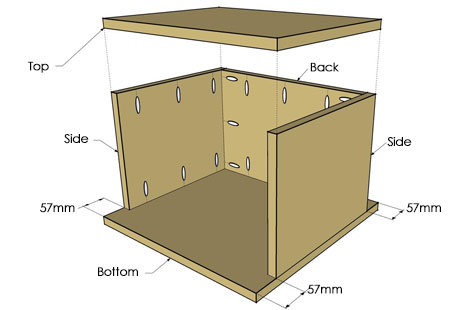
3. Attach the Back/Side assembly using screws.
4. Apply wood glue on the upper edges of the Side/Back assembly and place the Top so that it is flush on the three sides. Secure the Top with screws.
GOOD TO KNOW: Due to the tight space use a right-angle attachment for your drill, or use a cordless screwdriver with attachment.

5. Use a jigsaw to cut out an arched drawer-pull cutout on the top of each Drawer Front. Sand the cut edges smooth.
6. Secure [1] Drawer Front and [1] Drawer Back to the first Drawer Bottom using glue and screws, as shown above. Make sure the bottoms and ends of the Front and Back are flush with the Bottom.
7. Add the sides to the Drawer and secure with wood glue and screws. Add a single screw at the top corner of each Side, for additional strength. Repeat this process for the second Drawer.
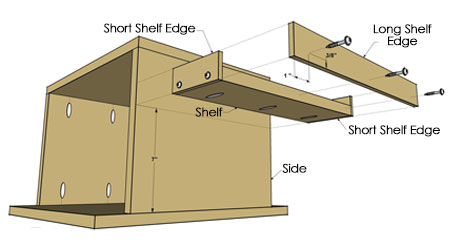
8. Apply wood glue to the ends of the Shelf and glue the Short Edges to the Shelf - see below.
GOOD TO KNOW: Clamp the Short Edges in place while the glue dries.
9. Apply glue along the edge of the Shelf that doesn’t have pocket holes, as well as on this same end of the Short Edges and clamp the Long Edge in place. Allow the glue to dry before sanding smooth.
GOOD TO KNOW: To strengthen the Edges and add an industrial look to the project, add a few screws, as shown below. Drill a pilot hole for each screw to prevent splitting.
10. Now you can attach the shelf assembly to the Side, at the height that best suits your needs, using screws.
Finishing
Give a once-over sanding to finish and then wipe clean before applying your choice of finish. If you are adding rubber tiles at the top, don't apply oil to this surface. Add rubber tiles using sprayable adhesive.
Mount the caster wheels on the base and install drawer slides to mount the drawers.