How to make a solar oven
Making your own solar oven is one way to cut down on electricity usage. Even a basic solar oven can be used to defrost and perform as a slow cooker. Here are instructions for a basic solar oven that won't cost much to make.
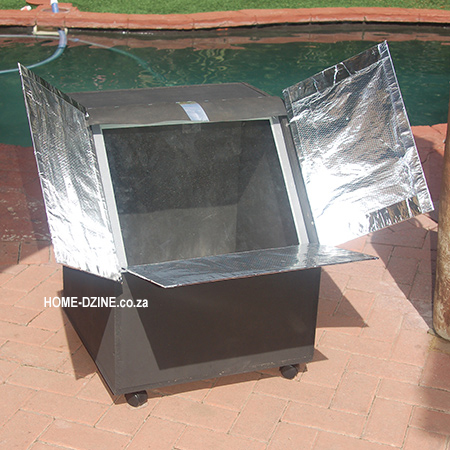
The principle behind any solar oven is to be able to generate enough heat, via solar energy, to heat up the inside chamber or oven. There are various ways of achieving this - the simplest and most affordable being to build reflective panels that direct sunlight into the chamber. You will also find full details for this project in EASY DIY magazine.
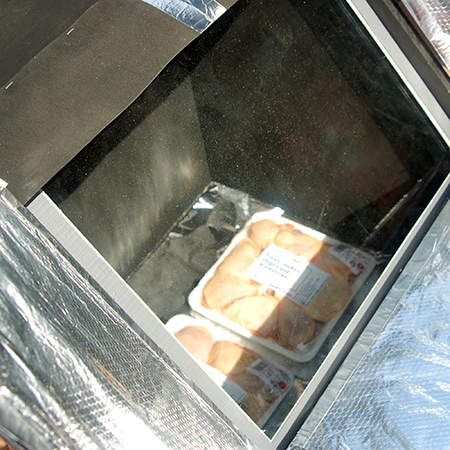
I have seen solar ovens constructed entirely out of tin foil, and ones that have an inner chamber clad with tin foil. But for the solar oven shown here, the inner chamber is a flat black to absorb more heat. I plan on using this solar oven to defrost frozen foods and also as a slow cooker. If you want a move intensive solar oven you can modify this basic design to have larger reflecting panels.
In order to keep the cost down I used 16mm BisonBord for the frame and 3mm Masonite for the reflective panels. The panels were covered with heavy-duty tin foil with aluminium roofing tape around the edges for added protection. However, I found the tin foil to be flimsy and if I make this project again I will wrap the panels with aluminium roofing tape and leave off the tin foil.
YOU WILL NEED:
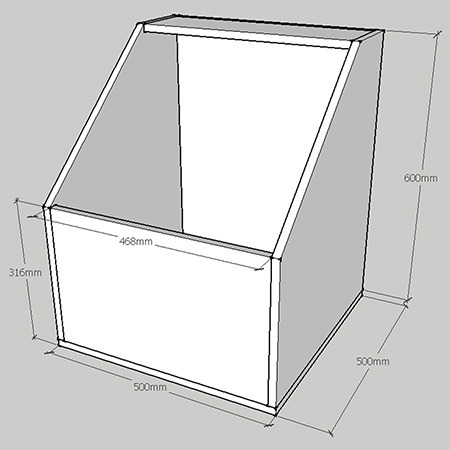
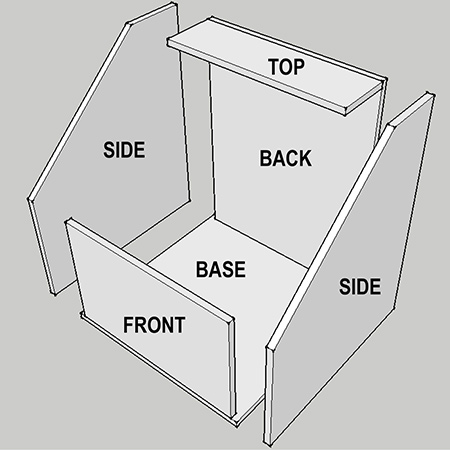
2 of 500 x 600mm BisonBord - sides
1 of 468 x 600mm BisonBord - back
1 x 500 x 500mm BisonBord - base
1 of 300 x 468mm BisonBord - front
1 of 150 x 468mm BisonBord - top
40mm screws
3mm Masonite cut to: 1 of 350 x 500mm and 2 of 350 x 450mm
Rust-Oleum High Temperature spray paint
4mm glass (cut to fit)
Duct tape
Length of quarter-round pine
Hammer and panel pins
Pattex No More Nails adhesive
Caster wheels [4] and 16mm screws
Medium-gauge wire
Heavy-duty tin foil - or aluminium roofing tape
TOOLS:
Drill / Driver plus assorted bits
Jigsaw
Wire cutters
Tape measure and pencil
You can buy 16mm BisonBord at your local Builders Warehouse - and have it cut to size.
HERE'S HOW:
1. For the sides measure up 300mm at the front and 150mm at the top - see below. Cut this with a jigsaw to give the shape as shown below.
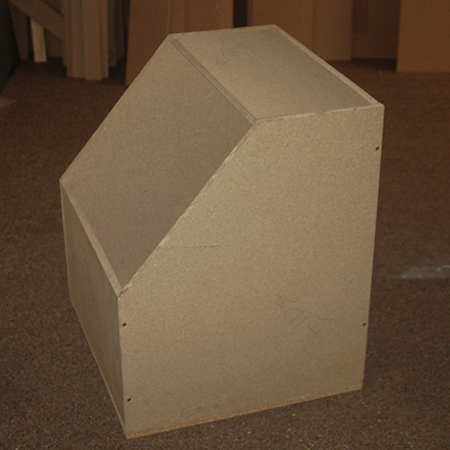
2. Assemble the box oven by securing the sides to the back and front. Place and secure the top and then attach the base.
Note: You will notice later on that I also cut two slots in the lid section. This allows for mounting quarter-rounds to hold the glass cover firmly in place.
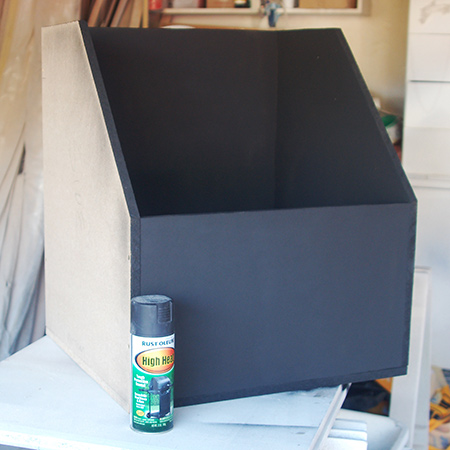
3. The entire box was sprayed with a coat of Rust-Oleum High Temperature spray paint. The lid is missing in the image shown, but this was also sprayed. I managed to do the entire box with one can of High Temperature spray paint.
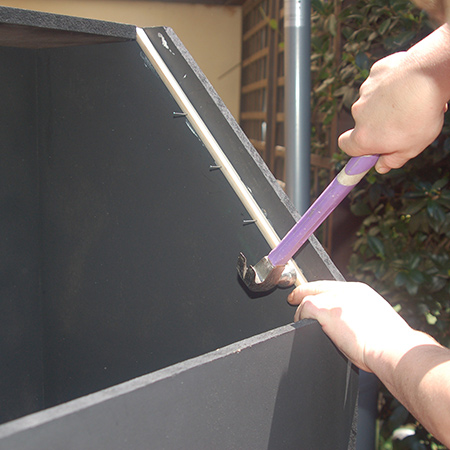
4. In this image you can see how the slots in the top allow for fitting the quarter-round rail down the sides. Attached with adhesive and panel pins. Both rails are cut at a 45-degree angle.
GOOD TO KNOW:
On each rail cut the bottom
angle, place against the side and use a pencil
to mark the cutting line for the top angle. You
want the rails to be perfectly flush.
5. Measure up and have the glass cut to fit. Measurements are not supplied as there will be differences here and there and it is far better to measure and then have the glass cut. Wrap the edges with duct tape to cover up sharp or rough edges
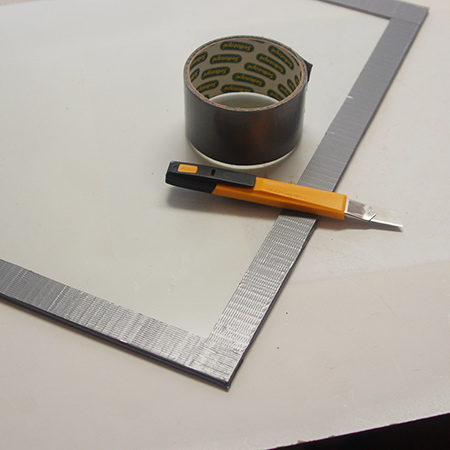

6. Cut lengths of wire to attach to the back of the panels, with an extra 6mm length for mounting into the side edges. Secure with duct tape along the length, top and bottom.
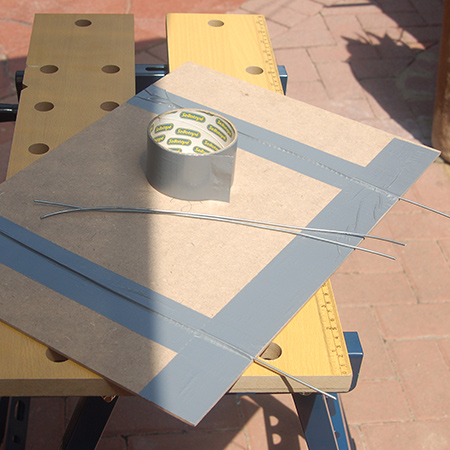
7. Wrap the panels with aluminium roofing tape.
GOOD TO KNOW:
I initially applied heavy-duty
tin foil but found this too flimsy. My
recommendation is to cover the entire panel with
aluminium roofing tape.
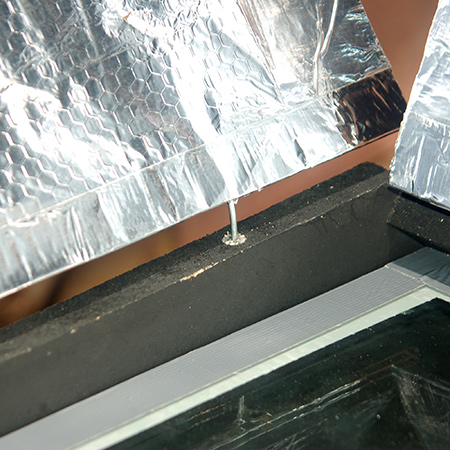
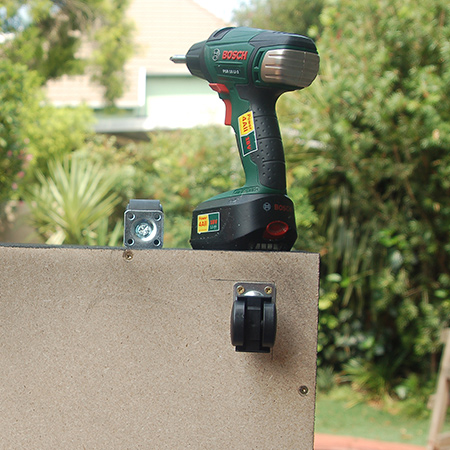
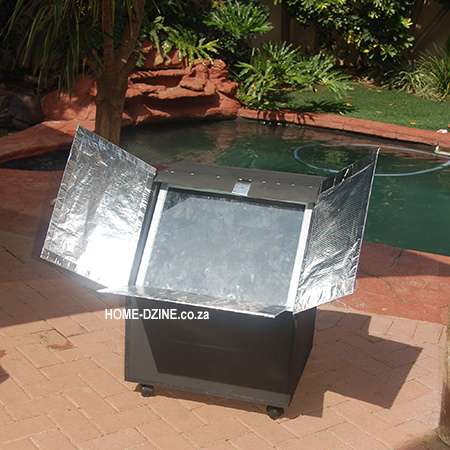
8. Caster wheels allow the solar oven to be moved around easily. For maximum temperatures you need to ensure that the solar oven constantly faces the sun.
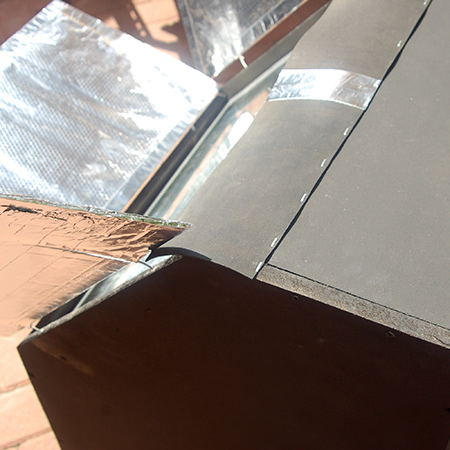
9. At the top of the box oven there was a substantial gap and I used a strip of rubber mat to cover this and ensure no heat loss. The rubber strip was stapled to the top of the box oven. Note: I purchased the rubber mat at a fabric store.