
Turn a Bought Door into a Fold-Fown Worktable
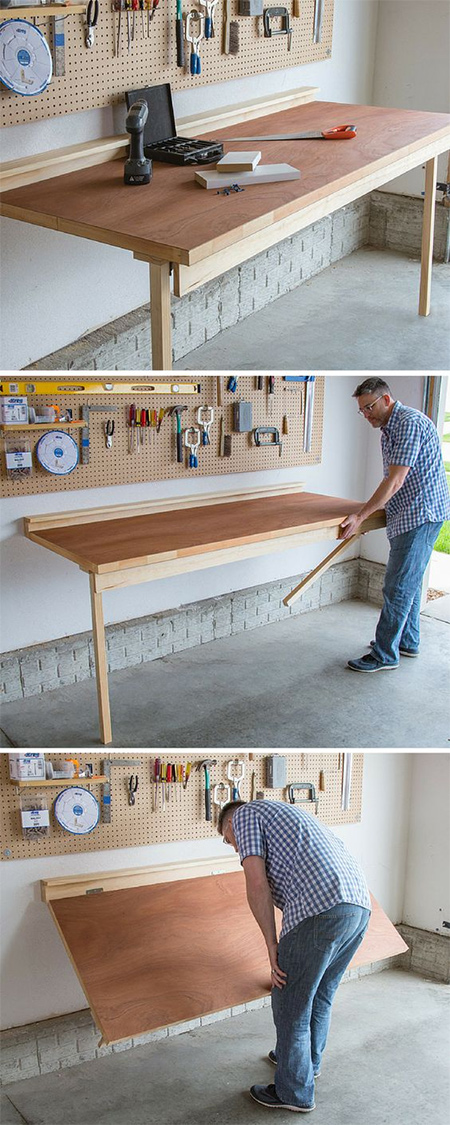
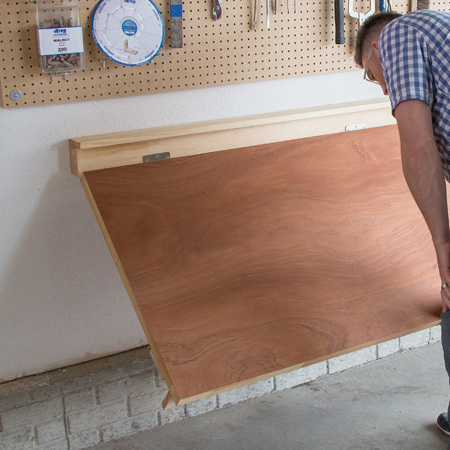
This fold-down worktable is perfect for the craft or DIY enthusiast who doesn't have a lot of space, such as in a spare bedroom, shed, or garage. When not needed, the worktable folds down flat against the wall.
pinterest.com/pin/558024210060171317/
YOU WILL NEED:
Hollow-core door
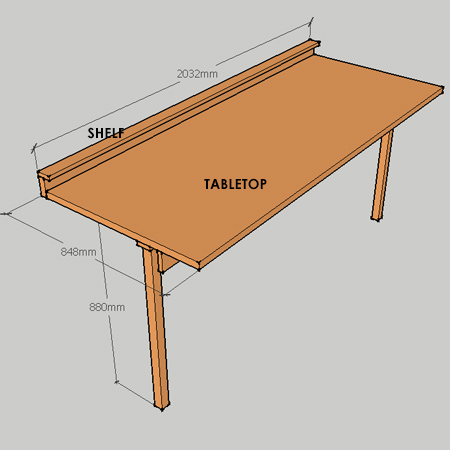
2 of 20 x 94 x 2032mm PAR pine - shelf / front rail
1 of 32 x 67 x 2032mm PAR pine - mounting cleat
2 of 20 x 67 x 100mm PAR pine - leg blocks (adjust this to accommodate the folding leg brackets)
2 of 44 x 44 x 860mm PAR pine - legs*
Pack of 4 x 30mm pockethole or wood screws
3 of butt hinges, 100mm and 16mm screws
2 of folding leg / flap brackets and 25mm screws
4 of Fischer wall plugs and 6 to 8 x 90mm long screws
TOOLS:
Spirit level
Drill / Driver
Kreg pockethole jig
Orbital sander
Tape measure and pencil
*Adjust height of legs for height of worktable.
You can buy hollow-core doors and all the supplies for this project at your local Builders Warehouse.
HERE'S HOW:
1. The bought hollow-core door is used as is, so you can put this aside for now.
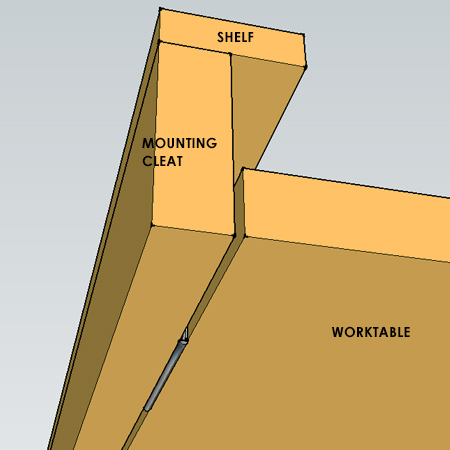
2. Cut a shelf and mounting cleat to the same length as the door from the 20 x 94mm and 32 x 67mm pine. Most standard hollow core doors are 2032mm in height, but double check the measurement on the door you have just in case - before you cut to length.
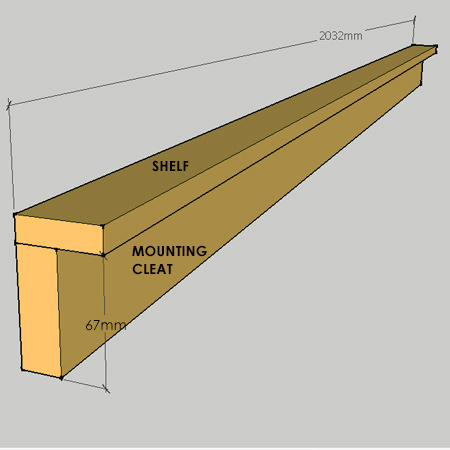
3. Drill three [3] pocketholes in the back face of the mounting cleat to secure the shelf on top of the mounting cleat. The back of the shelf is flush with the mounting cleat. If you don't own a pockethole jig, drill countersunk pilot holes through the shelf and secure to the mounting cleat.
4. On the front rail drill pocket holes in the back face of the front rail for mounting underneath the door / worktable. Secure to the underside with 30mm pockethole or wood screws. For those who don't own a pockethole jig - use steel angle braces and wood glue to secure the front rail, or dowel / biscuit joints.
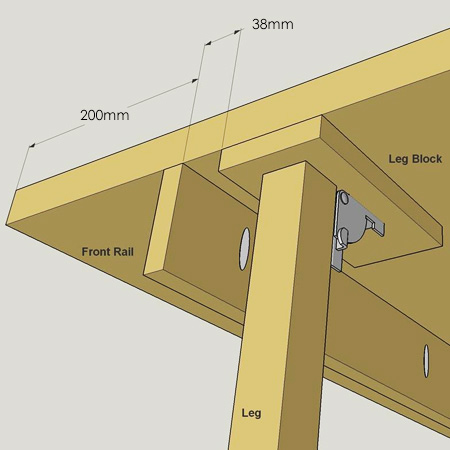
5. Cut two leg blocks and mount to the underside of the worktable using 30mm screws. Screw each leg onto the folding leg brackets, and then mount the brackets to the leg blocks with 30mm screws.
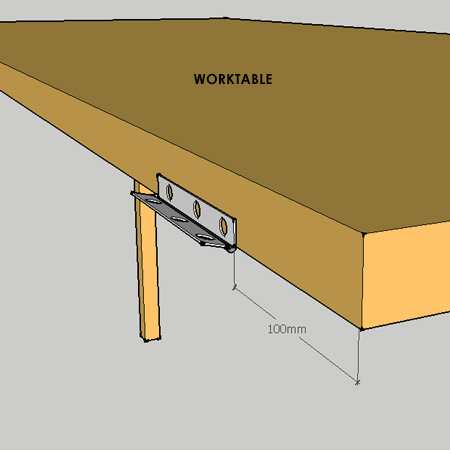
6. Attach the butt hinges to the back edge of the worktable (door). The hinges are placed 100mm in from the end and one in the centre. Place the barrel / pin of the hinge to hang over the bottom edge.
7. Secure the other side of the hinge onto the mounting cleat with 30mm screws.
8. To assemble the complete worktable first mark the location on a wall for attaching the mounting cleat. Measure up from the floor the combined height of the leg (860mm or adjusted height) plus leg block (20mm). Use a spirit level to mark a level line on the wall. Position the mounting cleat above this line. Use fisher SX10 wall plugs and screws to secure to the wall.