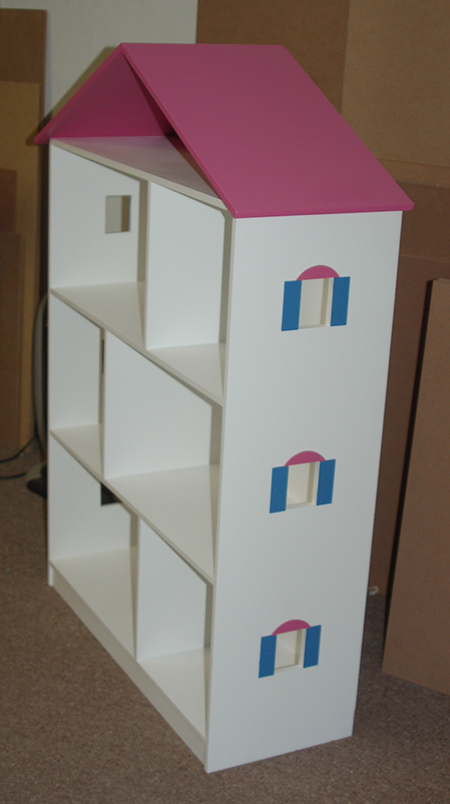
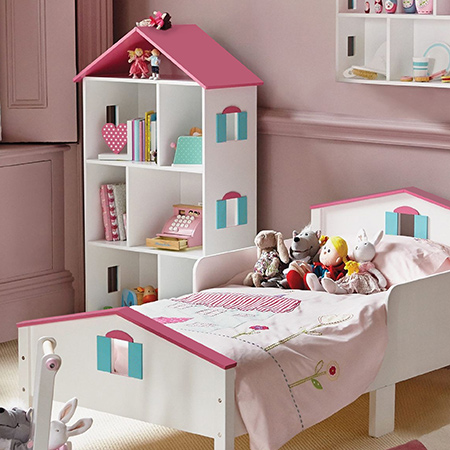
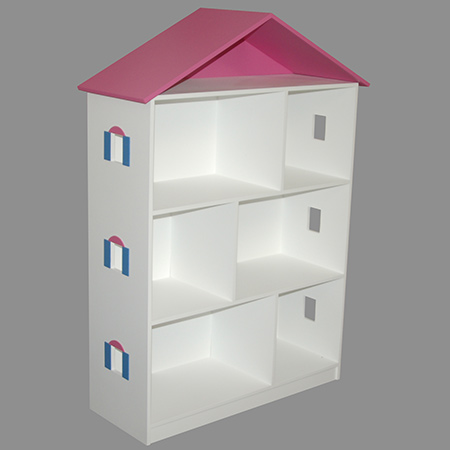
Make a dollhouse bookcase
Here's how to make a dollhouse bookcase for a little girl's bedroom and that offers plenty of storage space. It's made using 16mm SupaWood that you can buy - and have cut to size - at your local Builders Warehouse.
This DIY dollhouse bookcase is reasonably easy to make if you have some DIY savvy, and you will find everything you need for this project at your local Builders Warehouse. If you feel that you lack the skills necessary for this project, sign up for a www.DIY-Divas.co.za workshop and empower yourself with the knowledge to make simple projects like this one.
YOU WILL NEED:
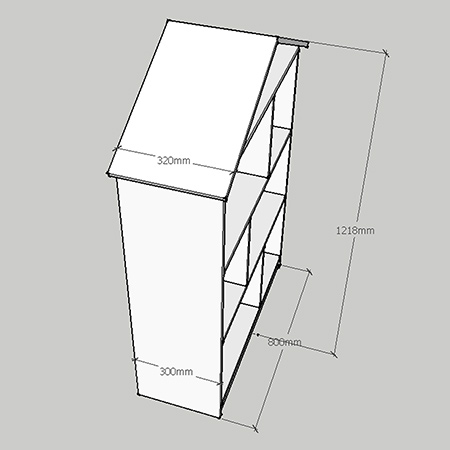
1 of 300 x 800mm 16mm SupaWood - top
2 of 300 x 984mm 16mm SupaWood - sides
3 of 300 x 768mm 16mm SupaWood - shelf
2 of 300 x 300mm 16mm SupaWood - dividers
1 of 286 x 300mm 16mm SupaWood - centre divider
1 of 52 x 768mm 16mm SupaWood - base apron
2 of 320 x 500mm 16mm SupaWood - roof panels
1 of 200x 800mm 16mm SupaWood - roof back
Masonite, white or 3mm supawood cut to 790 x 940mm for the back
Quarter sheet or masonite or hardboard for window frames
4 x 45mm screws
Wood filler
Prominent Paints Select in white and your choice of pink
Rust-Oleum 2X spray paint in satin Wildflower Blue
Pattex No More Nails adhesive
TOOLS:
Jigsaw and clean-cut blade
Workbench or saw horse
Orbital sander plus 120- and 240-grit sanding pads
Drill / Driver plus assorted bits
Countersink bit
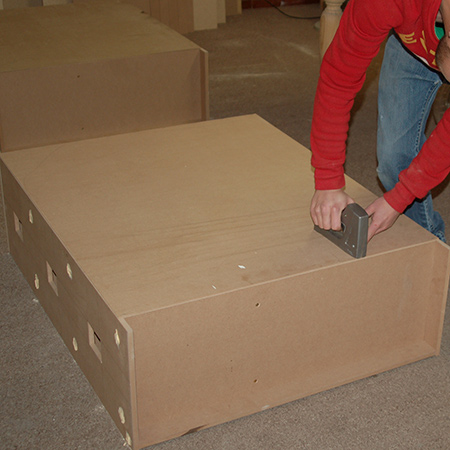
Bosch Tacker, staple gun and staples, or hammer and panel pins
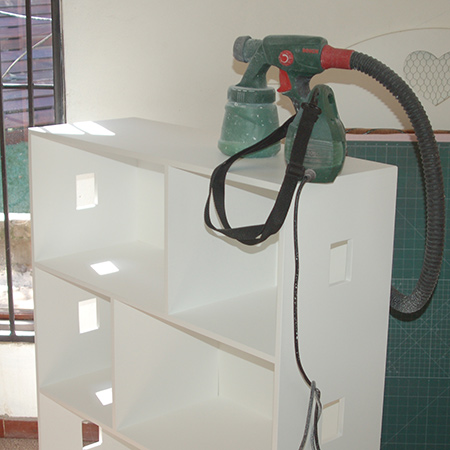
Bosch PSB2000 spray system
Tape measure and pencil
Once you have made the dollhouse bookcase as shown, you can add doors to close off the individual storage compartments.
HERE'S HOW:
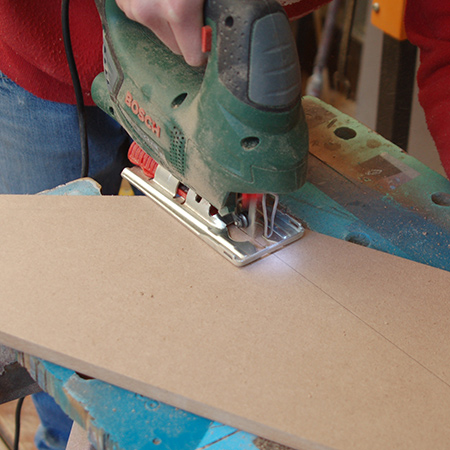
1. Measure the centre point on the roof back and draw diagonal lines to the corners. Cut out the triangular shape with a jigsaw.
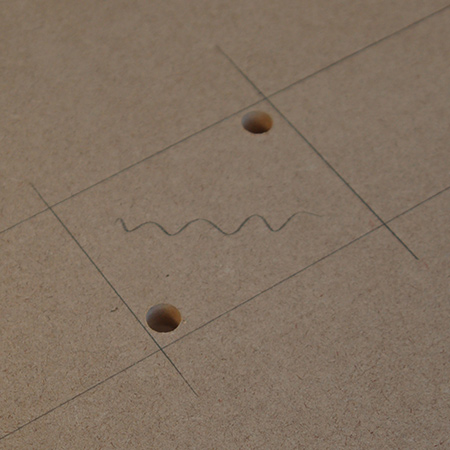
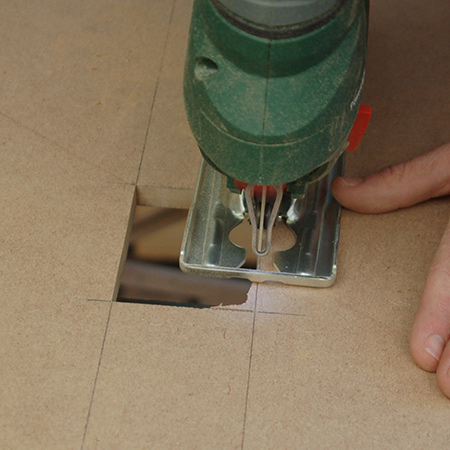
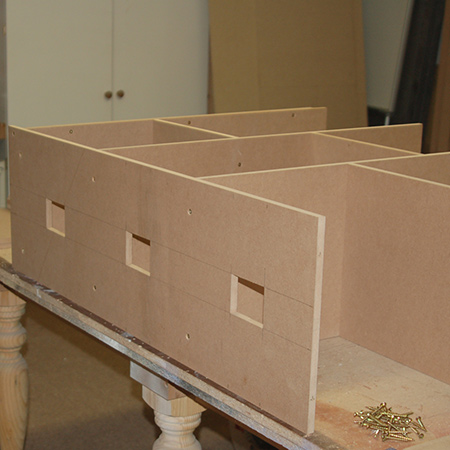
2. To cut out the windows on both sides, measure up and draw a horizontal line on the sides at 176mm, 256mm, 485mm, 565mm, 792mm and 872mm. Mark at 120mm in from both edges on the sides and draw a vertical line. Use a 10mm drill bit to make holes inside the marks for the windows and cut out.
GOOD TO KNOW
Cut the straight lines first and then go back to remove and make square corners.
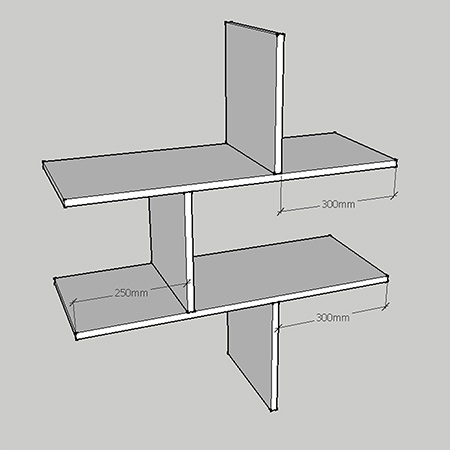
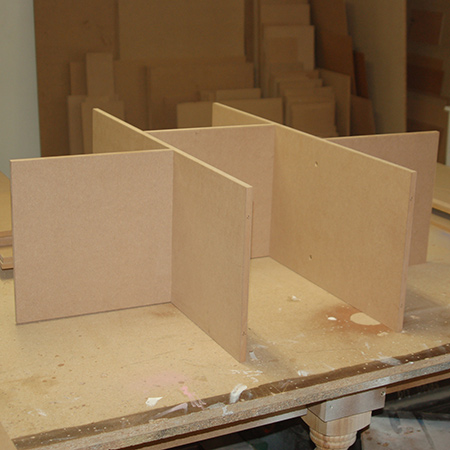
3. Assemble the shelves and dividers as shown in the diagram, working from the middle section. Pre-drill 3mm countersunk pilot holes through the shelves to attach the dividers. The holes can be filled in with wood filler and then sanded smooth. The bottom shelf is attached later on.
GOOD TO KNOW
We marked for the top and bottom sections at 300mm in, and the centre shelf at 250mm in, but you can adjust this as required.
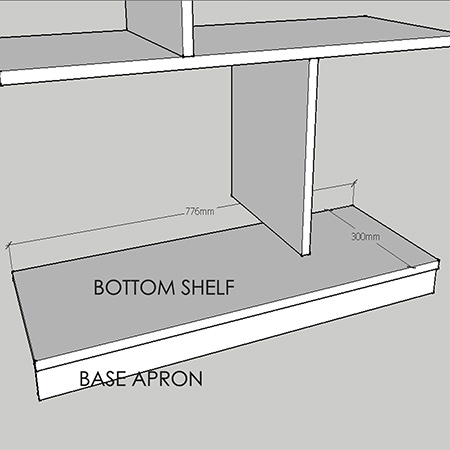
4. Secure by pre-drilling countersunk pilot holes through the top of the bottom shelf into the base apron.
5. Now attach the base assembly to the assembled shelf sections by pre-drilling countersunk pilot holes through the bottom shelf and into the bottom divider.
GOOD TO KNOW
The base apron is attached to the bottom shelf at 5mm in from the front edge of the shelf. This gives the base a nice finishing touch.
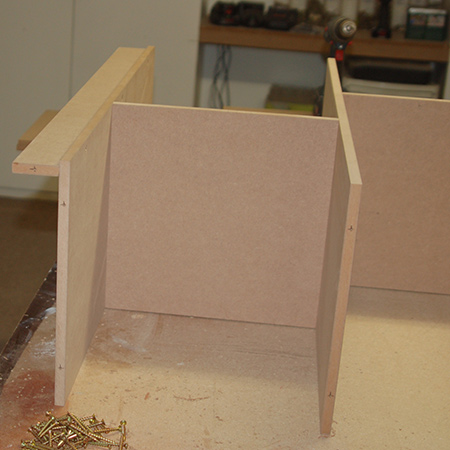
6. Attach the sides to the base and shelf sections by pre-drilling countersunk pilot holes through the side into the shelves.

7. To finish the main section, attach the top by pre-drilling countersunk pilot holes through the top into the sides.
IMPORTANT: Before attaching the top to the sides, drill three [3] countersunk pilot holes through the underside of the top in order to mount the roof section.
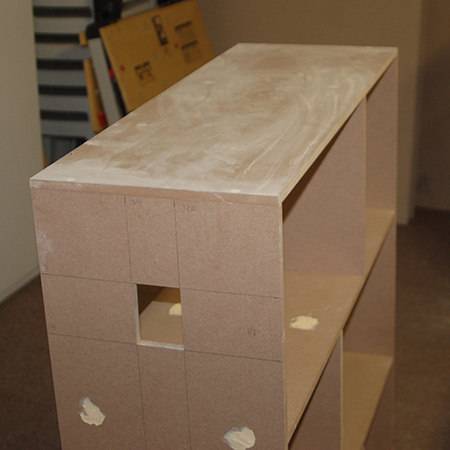
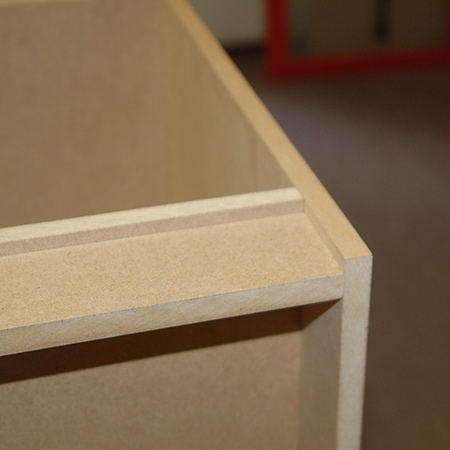
8. Fill all holes with wood filler, let dry and then sand smooth.

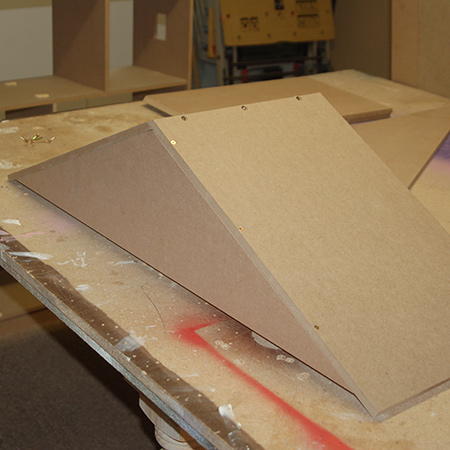
9. For the roof section has 31-degree angles cut along one edge of the roof panels. These are screwed together and then screwed onto the triangular roof panel.
GOOD TO KNOW
The roof section will be painted in a different colour, so do not attach this for the time being. It will only be attached once all the sections have been painted. However, you can fill all remaining holes with wood filler and let this dry before sanding these and the edges to prepare for painting.
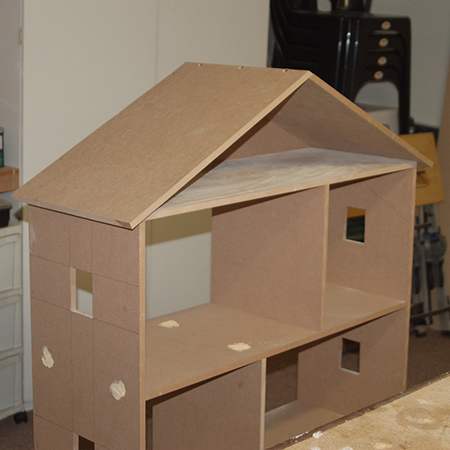
10. We used 3mm SupaWood for the backing board and this will be painted with the assembled project, but you could also use 3mm white masonite and add this once you are finished. The back is stapled in place - or use a hammer and panel pins.
Finishing
For a professional finish for the dollhouse bookcase we used a Bosch PFS 2000 spray system and Prominent Paints Select sheen paint. For the first coat, set on the lowest setting and only spray a light, even coat over the entire surface. Let this dry and then apply two more coats. Before carrying on, I lightly sand with an orbital sander and 240-grit sanding pads before applying the last coat.
The main cabinet was painted in white and the roof in a pink colour. The window frames are painted in a matching pink, with the sides in Rust-Oleum 2X spray paint in satin Wildflower Blue. Once sprayed, the window frames were attached with Pattex No More Nails adhesive.