Build a dog kennel
In this project we show you how to make a basic dog kennel that will keep your pet warm and dry during winter.
04/06/2018
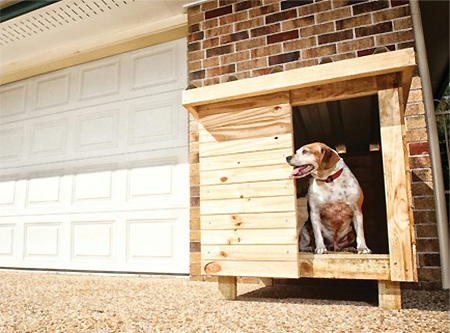
It might not be a fancy design, but this dog kennel will keep your dog warm and dry this winter, plus you can build it using PAR pine and materials that you will find at your local Builders Warehouse. If you need other My Dog Supplies, you can visit your nearest Builders or pet store.
YOU WILL NEED:
- 2 of 32 x 69 x 1000mm PAR pine - base
- 2 of 32 x 69 x 736mm PAR pine - base
- 4 of 32 x 69 x 170mm PAR pine - feet
- 2 of 32 x 69 x 700mm PAR pine - back uprights
- 2 of 32 x 69 x 800mm PAR pine - front uprights
- 1 of 32 x 69 x 731mm PAR pine - centre upright
- 2 of 32 x 69 x 662mm PAR pine - crosspieces
12 of 12 x 94 x 800mm PAR pine - cladding, base
8 of 12 x 94 x 824mm PAR pine (or tongue and groove) - cladding, back
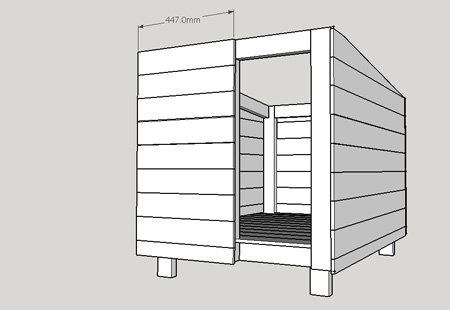
9 of 12 x 94 x 447mm PAR pine (or tongue and groove) - cladding, front
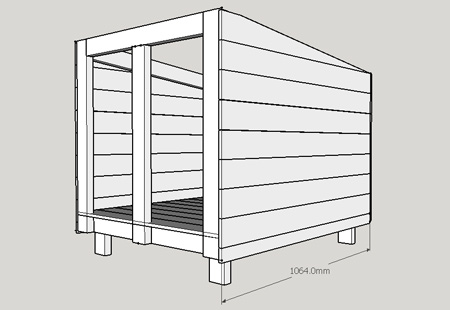
18 of 12 x 94 x 1064mm PAR pine (or tongue and groove) - cladding, sides
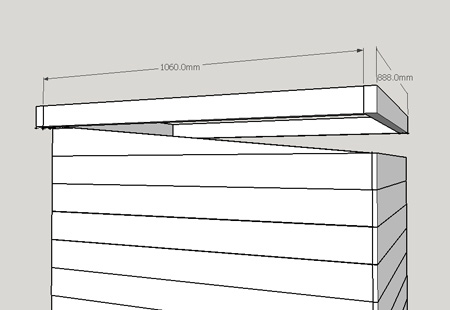
2 of 32 x 69 x 888mm PAR pine - roof frame
2 of 32 x 69 x 1060mm PAR pine - roof frame
1 of roof sheet (galvanised or fibreglass)
63mm galvanised roofing screws
50mm cut screws
TOOLS:
Drill / Driver plus assorted bits
Jigsaw or circular saw
Tape measure and pencil
Not responsible for errors or omissions
HERE'S HOW:
Follow the instructions below, or find a helpful video at the bottom of this page.
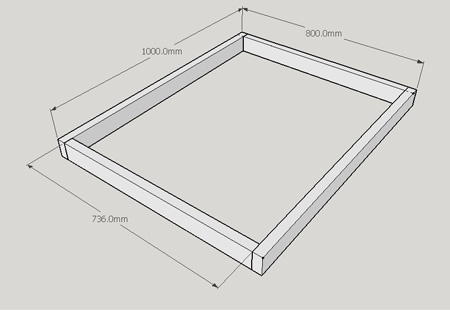
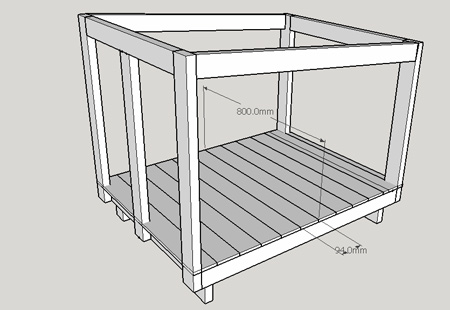
Base Frame
1. For the base cut [2] pieces of PAR pine to 1000mm in length and [2] pieces 736mm length. Screw the pieces together creating a rectangular frame with an overall dimension of 1000m x 800mm. Use 50mm cut screws to assemble, making sure that screw heads are flush with the surface. Countersink if necessary.
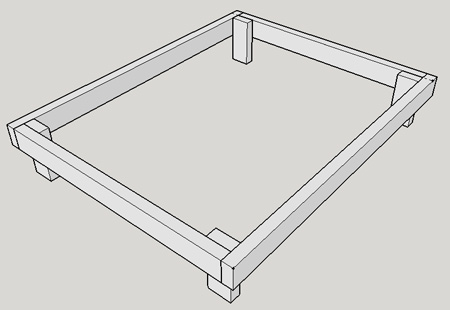
2. Screw the feet to the inside of the base frame using 50mm screws.
Top Frame
3. Cut two 700mm lengths and two 800mm lengths for the uprights, join them together with [2] 660mm crosspieces at the front and back, and [2] sides 1005mm in length - with a parallel 84-degree angle at the ends for the angled roof that slopes from front to back.
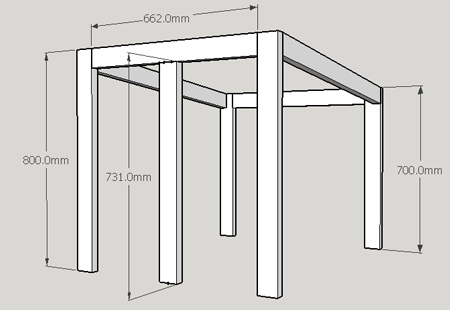
GOOD TO KNOW: If you battle to work out the 84-degree angle at the ends of the side, cut the piece longer, place it against the uprights and draw a line for the angle.
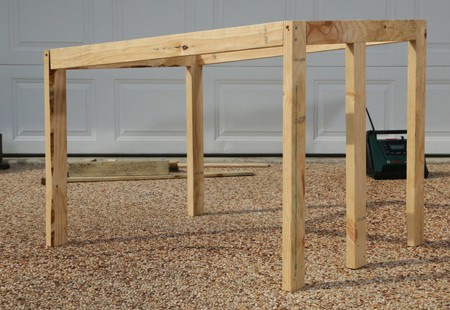
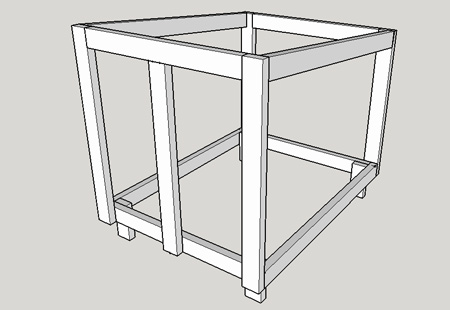
4. Join the top and bottom frames together using 50mm screws.
Cladding
5. Install the kennel floor, cutting the corner pieces to fit around the frame. Secure the planks to the base with , then secure in position with screws. Cut the timber cladding to size and secure it to the frame on all sides to create the walls, leaving an opening for the doorway.
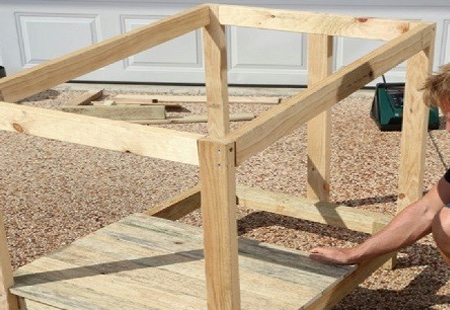
GOOD TO KNOW: Builders supply 12mm x 94mm pine planks in different lengths, and these are ideal for the floor of the kennel.
6. Add the cladding to the back section, with a 12mm overhang on either side. The bottom plank will need to be cut to fit. Secure to the frame with a nail gun and brad nails, or using a hammer and panel pins.
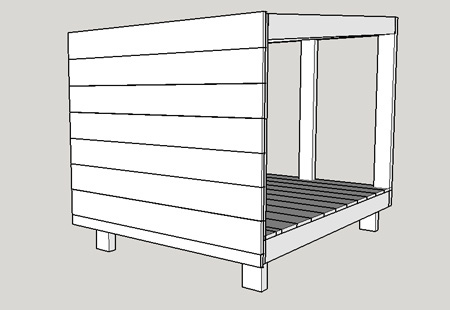
7. Secure the side planks in the same way. Again, the bottom plank is cut to fit, and the top plank can be cut to fit from offcuts.
8. Finish the cladding by adding the front planks.
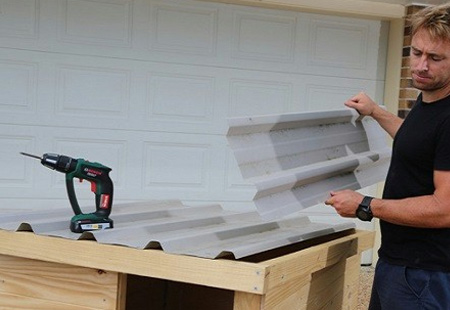
Roof Assembly
9. Assemble the roof frame.
10. Rest the back of the roof frame on the back of the kennel and lower the front to secure all around with 50mm screws.

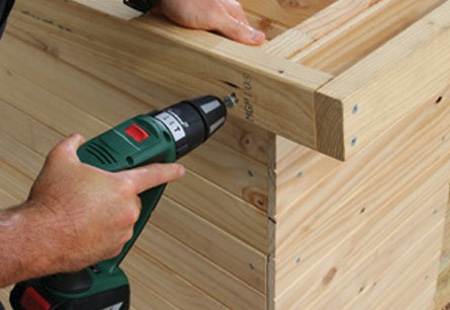
11. Now you can cut roof materials to fit and finish off the dog kennel.