Make a circular ottoman
This weekend the DIY Divas demonstrated how to make a circular, upholstered ottoman. Find instructions below to make your own circular ottoman.
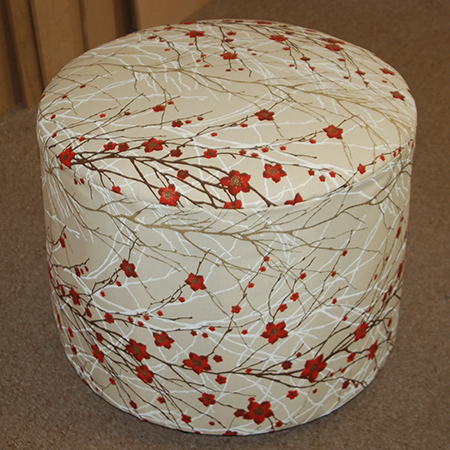
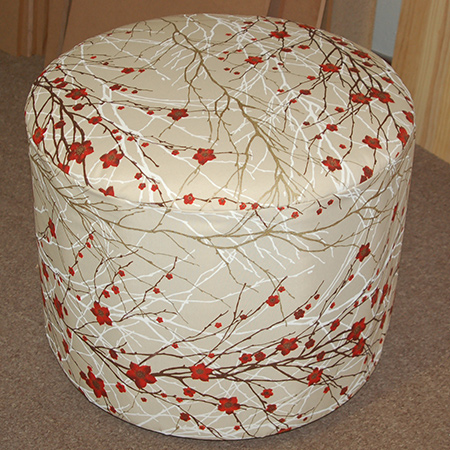
Nancy and Lindiwe made a circular upholstered ottoman at this weekend's DIY Divas workshop. Comfortable, sturdy and lightweight, you can easily make your own circular ottoman and upholster in your choice of fabric.
YOU WILL NEED:
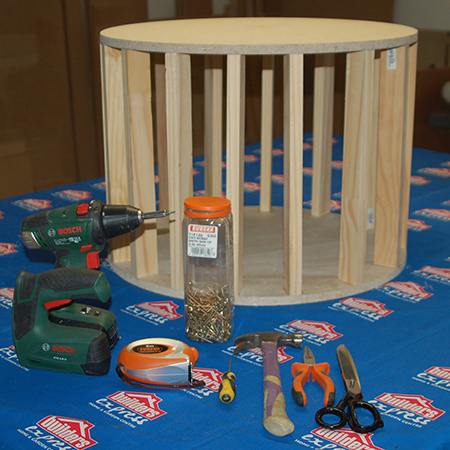
2 of 600mm diameter chipboard circles
16 of 22 x 44 x 400mm long supports
Plastic feet [4] and 50mm screws
Wood glue
Upholstery fabric (2000 x 550mm and 700mm dia)
Heavy-weight batting, 3 metres
3.5 x 40mm screws [32]
TOOLS:
Drill / Driver plus assorted bits
Bosch Tacker and staples
3mm screwdriver and long-nose pliers
Scissors and / or fabric cutter and self-healing mat
Hammer
Tape measure
Buy all the tools and supplies for this project at your local Builders.
HERE'S HOW:
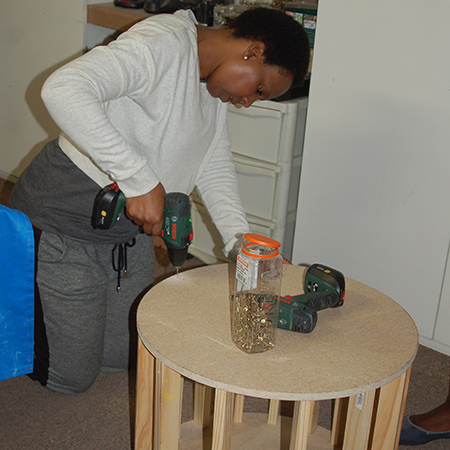
1. Prepare the frame for your ottoman by gluing the uprights to the frame and leave this overnight.
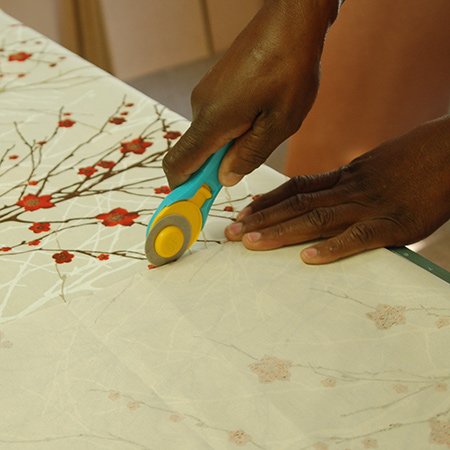
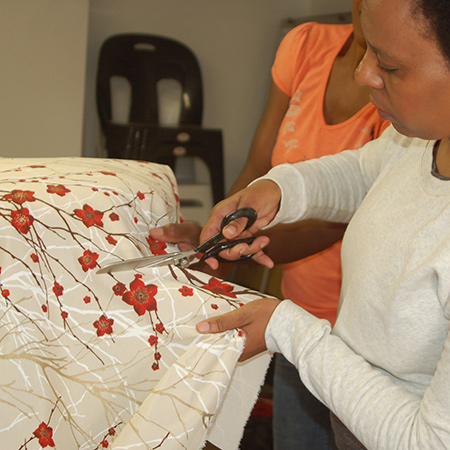
2. Cut all your fabric to the sizes above, or have the fabric store cut it for you. If you are lining up patterns, allow more fabric for adjusting the pattern.
GOOD TO KNOW
When cutting batting circles for the top - use a cut circle as a template. Cut one circle slightly larger, and one slightly smaller. This will give the top a nice rounded shape.
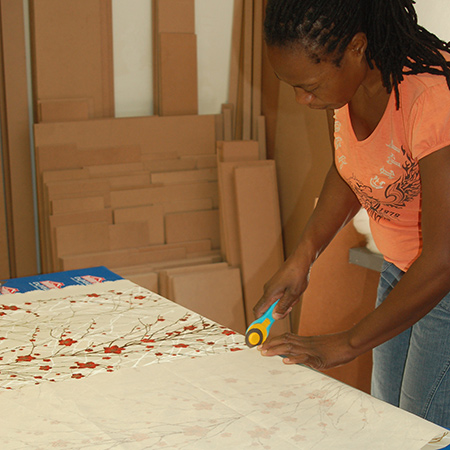
Olfa Cutters are amazing! When fabric is placed on top of a self-healing mat it's easy to cut straight lines and circles. Find a selection of Olfa Cutters and Knives at Builders and hardware stores.
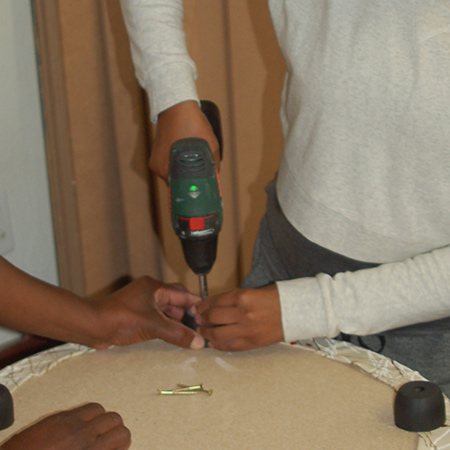
3. Drill 2mm countersunk pilot holes through the top and bottom pieces into the uprights. Drive in a 40mm screw.
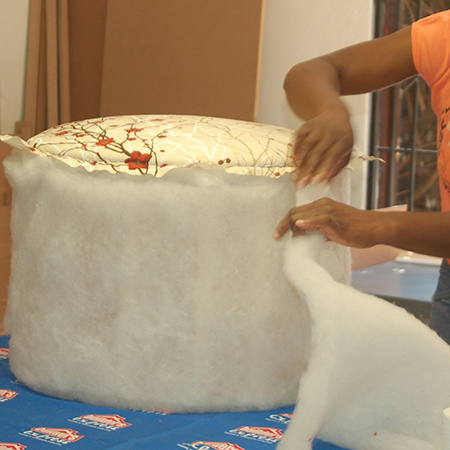
4. Place the [2] pieces of batten on top of the frame, with the larger piece at the top.

5. Place the fabric for the top over the batting.
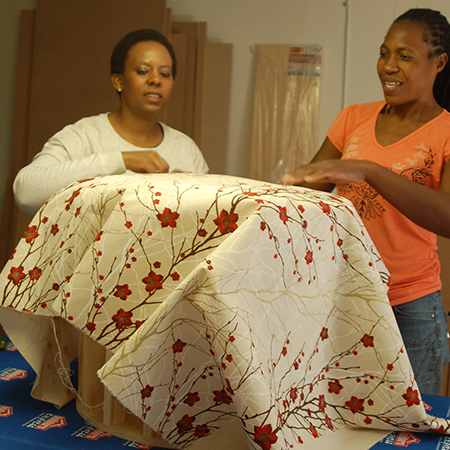
6.After arranging the fabric according to the pattern, if any, trim away excess fabric. You need to allow about 4 to 5cm around the edge.
7. Use the tacker to staple the fabric around the circumference of the ottoman. Make sure the staples go in close to the bottom edge of the chipboard. Work north-south / east-west and then staple the remaining areas.
GOOD TO KNOW
You may need to make small pleats to take in any excess fabric.
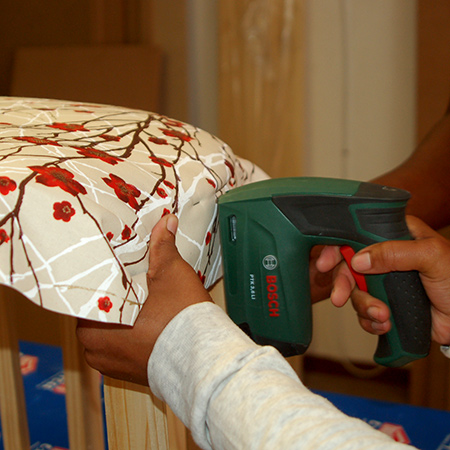
8. Place batting around the side of the ottoman. Staple at the end and around the top (into the uprights) to secure.
9. Place the fabric face down at the top edge of the side, with about 5cm overlapping the side, and staple to the top edge of the chipboard top piece. Do not start at the edge of the fabric, but rather leave a 10cm gap for folding under an end seam.
GOOD TO KNOW
Keep all the staples in a straight, even line, so that when you flip the fabric over (face up) you have an even line all the way around. It's always good to check as you work - flipping the fabric over to make sure everything lines up nicely.
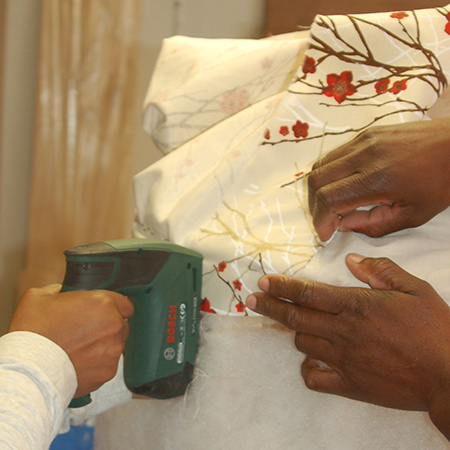
10. When you reach the opposite end of the fabric, fold both ends under and overlap the pieces before stapling at the top of bottom.
GOOD TO KNOW
Where the fabric overlaps on the side, close this with a few hand stitches.
11. Flip the fabric and pull down over the side and then fold and staple underneath. Again, you need to add a few pleats to keep the fabric taut.

12. Finally, attach the feet to your ottoman with 50mm screws. Be carefully not to over-tighten as this will strip the hole. As soon as the screw feels tight - stop.