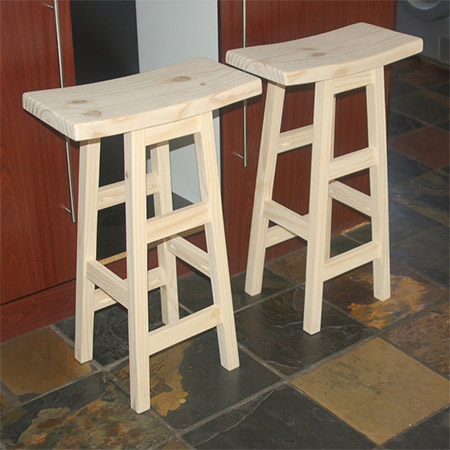
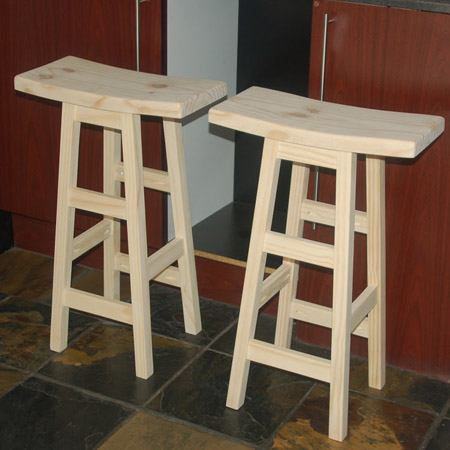
Make Bar Stools
These bar stools - with their curved top - are easy to make and you will find all the timber you need at your local Builders Warehouse or timber merchant.
24/02/2018
It's been some time since I featured the article on making a curved top using a planer and by turning your angle grinder into a sander by using flap discs. The original feature was for making a plant stand with a curved top, being the pilot run for making my own bar stools.
This feature is how I finally made the bar stools, using the same method but with a few refinements, and the base section of the stools differs slightly from that of the Plant Stand, with slight modifications to the size of the sides of the stool for more stability when used as stools.
YOU WILL NEED:
1 of 50 x 450 x 224mm untreated (rough) pine - seat
2 of 32 x 32 x 1800mm PAR pine cut to:
- 4 of 650mm – legs
2 of 22 x 44 x 1800mm PAR pine, cut to size as required
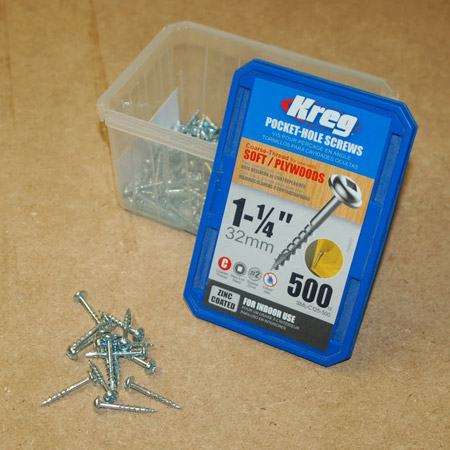
32mm coarse-thread pocket-hole screws
Wood glue
TOOLS:
Drill / Driver plus assorted bits
Bosch Planer
Angle Grinder with 120-grit flap disc
Mitre Saw
Kreg Pocket-Hole Jig
Orbital Sander plus 120-, 180- or 240-grit sanding pads
Tape measure and pencil
I bought all the pine for this project at Builders Warehouse.
HERE'S HOW:
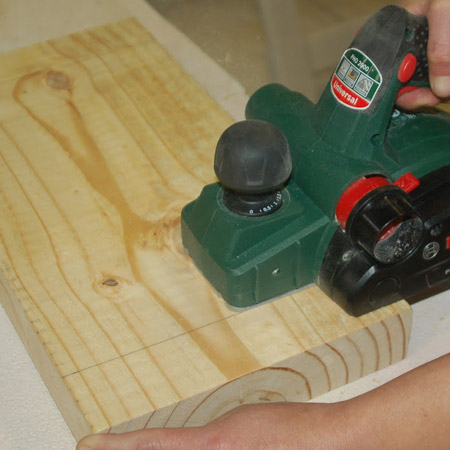
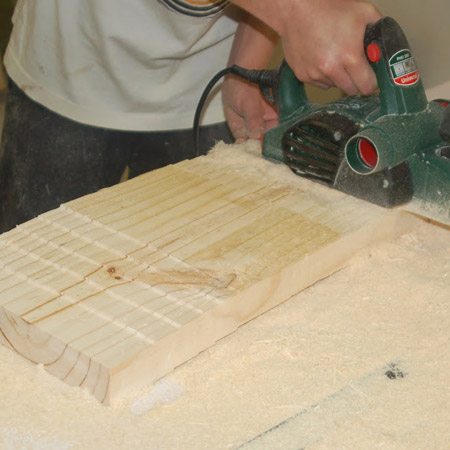
1. To make the curved seat you’re going to use a Planer. Set the cutting depth at 2mm and start 50mm in from the end on one side of the seat – working towards the centre – and then to the other side.
GOOD TO KNOW
Run the planer on full power before slowly guiding over the surface of the seat section.
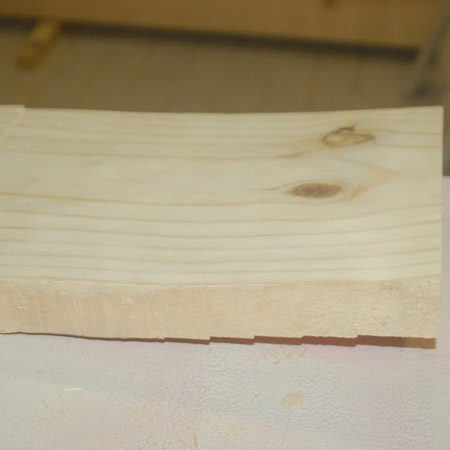
2. The idea is to remove material to give the top of the seat its curved shape, meaning that more material is removed in the centre, tapering towards the sides. Ideally, the material removed in the centre should be approximately 12mm in thickness - see image below.
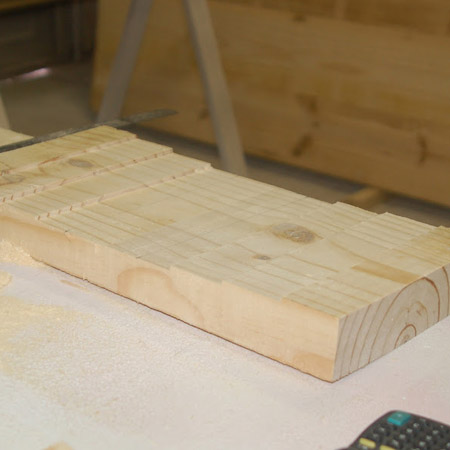
3. Repeat this process for the underside of the seat, but removing more material on the ends - see image below.
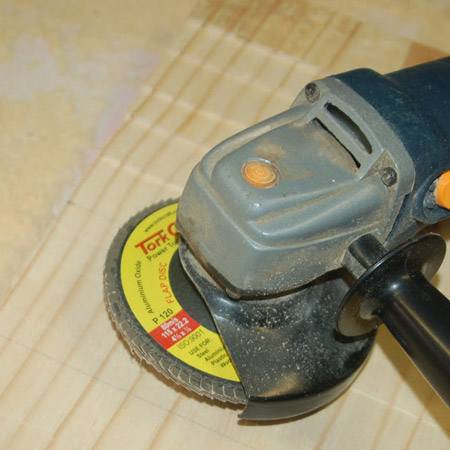
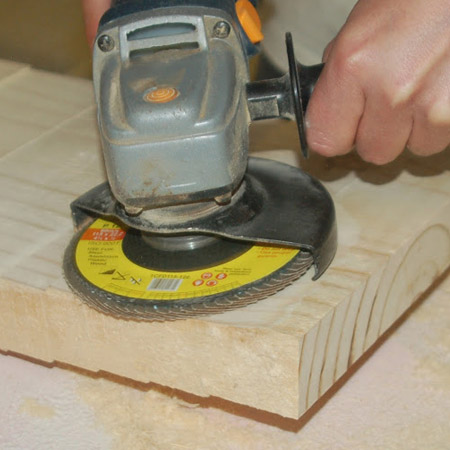
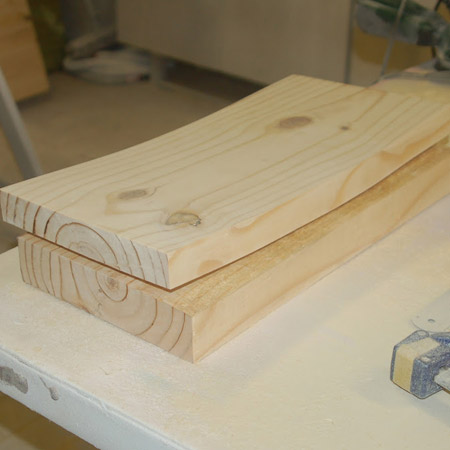
4. Now you’re going to turn your angle grinder into a sander by adding a 120-grit flap disc. You can buy Tork Craft Flap Discs at most larger hardware stores.
5. Lightly guide the flat disc over the planed ridges to smooth out on the top and bottom of the seat.
BELOW: How the top of the seat should look after using the planer.
6. Use an orbital sander and 120-grit sanding pads to round off all the sharp edges of the seat and then smooth over with 180- or 240-grit sanding pads.
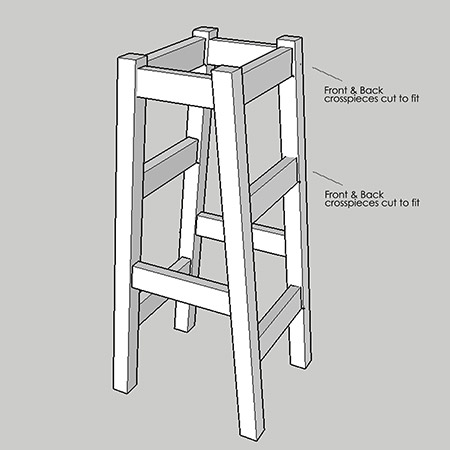
Now you're ready to start assembling the base for your bar stool. Due to the variation in the thickness of pine, it is better to cut the front and back edges (steps) to fit. That will guarantee a sturdy construction.
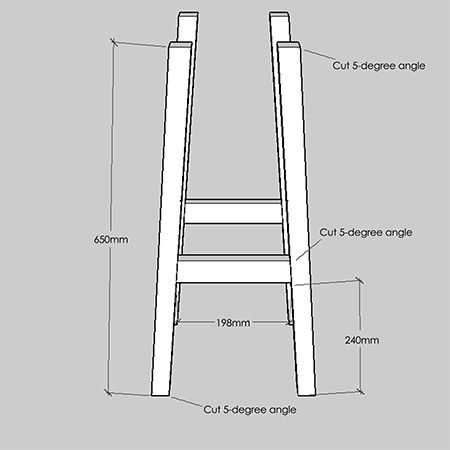
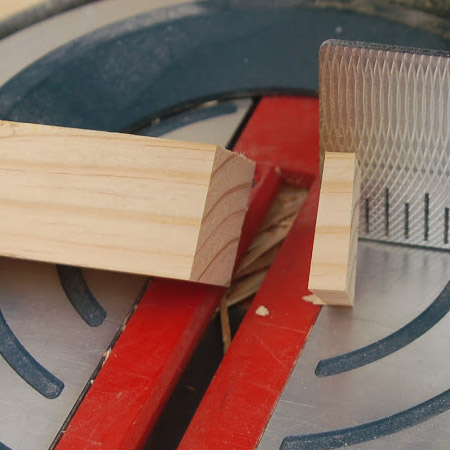
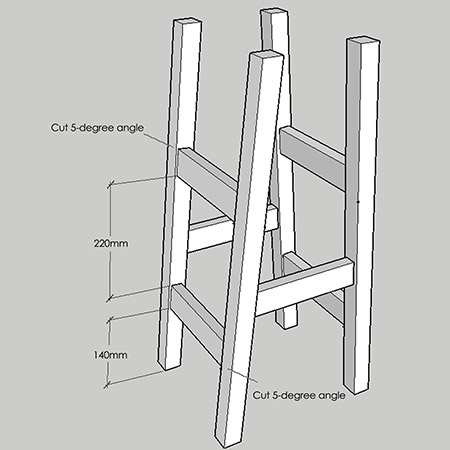
7. All four legs need to be cut at a 5-degree angle – from corner to corner - see image below. Set the plate on your mitre saw to 5-degrees and firmly hold each leg so that the corner is facing up.
8. Cut all the crosspieces for the stool frame to fit. All the crosspieces have a 5-degree cut at each end and a single pocket-hole at the both ends. The bottom crosspiece is approx. 206mm long on the bottom edge, the middle crosspiece is approx. 168mm long on the bottom edge, and the top crosspiece is approx. 136mm long on the bottom edge.
9. On all crosspieces, use a Kreg Pocket-hole Jig to drill a pocket-hole at the ends. Set your jig and bit for the correct cutting depth for the thickness of pine you are using for this project.
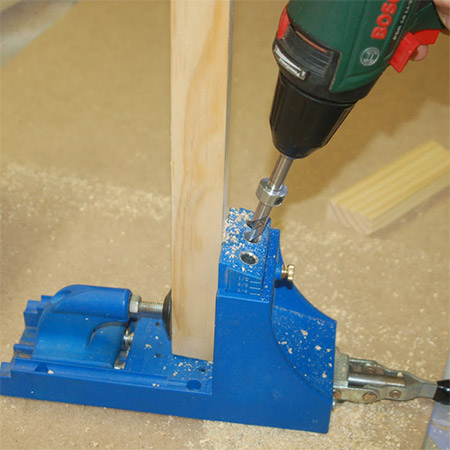
GOOD TO KNOW
We recommend that you use Kreg 32mm pocket-hole screws with a coarse-thread for soft wood.
10. Starting with the sides, place a 6mm spacer underneath the crosspieces to offset and centre these pieces within the legs. Secure with wood glue and 32mm screws.
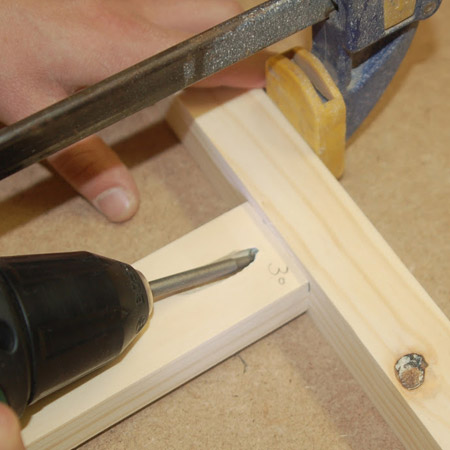
GOOD TO KNOW
Use quick clamps to hold the frame while you drive in screws.
11. Apply a bead of glue to the top of the frame. Place the frame onto the underside of the seat, making sure it is accurately positioned in the centre. Secure the frame to the seat with 32mm coarse-thread pocket-hole screws.

GOOD TO KNOW
The top crosspieces are added last and are mounted at least 10mm down from the top to allow for the curvature of the seat. Secure with wood glue and 32mm screws.
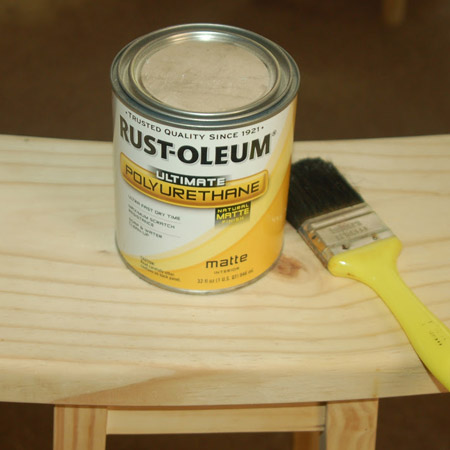
Finishing
Apply a finish to your bar stools will protect them from grime and stains. Use an interior sealer or varnish – clear or tinted – and apply according to the manufacturer’s recommended guidelines, or paint with acrylic or spray paint to complement your room décor. We used Rust-Oleum Ultimate Polyurethane in a natural matt finish.