
Whitewashing furniture and walls
Whitewashing brings out details. Although you can whitewash almost any wood item, whitewashing really shines on projects that feature carved details, turned legs, and interesting grains.
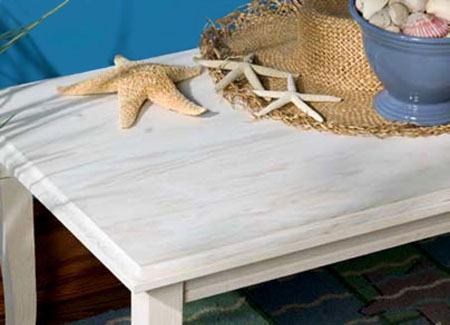
Whitewashing has been around for centuries. The semi-transparent mixture of paint and water produces a finish that’s clean and fresh without feeling too crisp and sterile. A great complement to cottage, coastal, and country decors, whitewashing can be applied to just about any surface with a wood grain: paneling, trim, doors, floors, and more.
YOU WILL NEED:
White emulsion
Bucket of water
Water-based sealer
Sandpaper
sandpaper block
dust mask
clean cloth
50mm paintbrush
mixing containers
HERE'S HOW:
Whitewashing brings out details. Although you can whitewash almost any wood item, whitewashing really shines on projects that feature carved details, turned legs, and interesting grains. Wood furniture can be new and unstained, or a painted flea market find. Whatever the condition of the piece you’re working on, thoroughly sand or strip the surface.
Whitewash can be applied over stained wood, but you also may be able to remove the stain colour with wood bleach before whitewashing. Pair whitewashed walls or furniture with light, bright colours for contrast. Pretty floral, print, and striped fabrics work well with the muted softness of this technique.
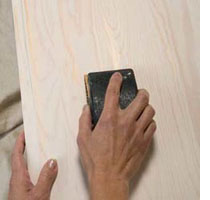
1. Prepare the surface
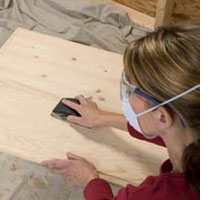
Lightly sand the entire surface to be whitewashed with 180-grit sandpaper and a sanding block. Wear a dust mask. Depending on the condition of the surface you’re working with, you may need to use a heavier-grit (120) sandpaper first. Some heavily painted surfaces may require chemical stripping. Clean the surface with a clean cloth to remove any dust or paint particles.
2. Brush on whitewash
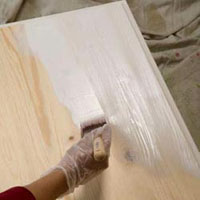
In a plastic container, mix two parts white paint and one part water. Brush on this whitewash with your paintbrush, making long strokes and following the wood grain. Work quickly and in small sections, because whitewash dries in a few minutes.
3. Remove some of the whitewash
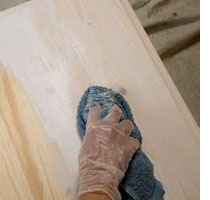
While the whitewash is still wet, wipe down the surface with a clean, lint-free rag to remove some of the finish and reveal more wood grain. When your rag no longer absorbs whitewash, switch to a new rag. Allow whitewash to dry. If desired, apply another coat of whitewash.
4. Distress the surface
After whitewash dries, lightly sand the surface and reveal more of the wood grain on flat surfaces as well as unpainted wood around raised details.
5. Seal the surface
Whitewashed surfaces need to be sealed after the technique is applied and sanded to make the surface easier to keep clean. Brush on two coats of clear, satin polyurethane (or slightly tinted polyurethane, if you prefer) with long, consistent brush strokes. Let dry. Rub lightly with a fine nylon abrasive pad between coats.