
Stencilling Walls
Stencilling has never before been so quick, so easy or so much fun. With high density foam rollers, you can complete stencil projects in one-tenth the time that traditional stencil brushing would take.
Using a stencil brush is still the best method if the cut outs in the stencil are very small or if the pattern requires intricate shading, but for stencil patterns that call for even paint application with little or no shading, rolling the paint on is the best technique to use. You'll be surprised at how easy it is to decorate walls, trim, furniture and fabrics with the roller-stencilling method.
The roller method is especially good for anyone just beginning to stencil because it produces excellent results with very little practice. There isn't the need to pounce or swirl as there is with a stencil brush, where you have to worry if the amount of paint on the brush is adequate or if you might ruin the stencil by being too rough on it! The roller method is perfect, too, for large projects such as overall wall treatments or room borders, because your progress is much faster than if you were brushing the paint into the stencil cut outs. So, check the list of supplies you'll need and get ready to roll! You'll be amazed at your speed in achieving beautiful results... every time.
YOU WILL NEED:
Stencil
Stencil or foam roller
Acrylic craft paint
Bostik adhesive spray
Palette
Plastic putty knife
Paper towels
Moist flat sponge
HERE'S HOW:
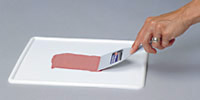
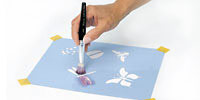
1. Assemble all your supplies where you plan to stencil. Drop a tablespoonful of paint at one end of the palette. Using a wide putty knife, draw a long, wide, very thin layer of paint down the length of the palette.
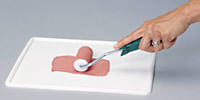
2. Roll the dry roller back and forth several times through the thin layer of paint, lightly coating the roller. This action will thoroughly coat the roller with paint and distribute it evenly into the foam. Do not overload the roller with paint. You will need another roller for each new colour.
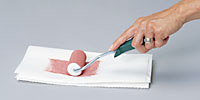
3. Make a pad of several layers of paper towels. Pass the roller over the towels several times to remove excess paint.
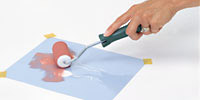
4. Lightly spray the underside of the stencil with repositionable stencil adhesive spray, following the directions on the can, or tape it in place. Move the roller back and forth across the stencil several times; gradually building up the paint until you achieve the colour depth and density you want.
5. Do not apply too much paint! Gently lift a corner of the stencil and check how the paint looks on the surface. (The stencil tends to distort the true appearance of the paint on the real surface below.) Decide if you have added enough or too much paint. (The same technique applies to using a stencil brush.)
Now you are ready to stencil your project using the same technique. Take care when moving the stencil to a new position that you do not smudge the paint on the last stencil you completed! You should be able to get several repeats of the stencil without having to reload the roller.
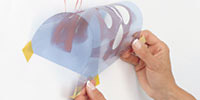
Remember to thoroughly clean your stencils and rollers after every project.
Design Tips:
Many first-time stencil users are inclined to apply too much paint! If you have too much paint on your roller, or you are pressing too hard as you roll back and forth, the paint will seep under the edge of the stencil openings causing unwanted paint puddles and a messy result. You'll be surprised at how little paint and
pressure is required, so practice on paper before beginning your project!
The paint on the roller may dry out, leaving the roller feeling sticky. Moisten it by rolling it back and forth over a damp sponge, then on the palette in an area where there is no paint. If your print is looking too faint and you think no paint is being transferred to the surface, you either need more paint, your roller needs to be moistened or you are not pressing hard enough.
It´s a good idea to keep your roller moist during stencilling projects. So, when you need to take some time to move a stencil to a new position, cover your roller with a damp cloth. If you won´t be using the roller for more than 10 minutes, cover it thoroughly with plastic wrap or put it in a plastic bag and twist the opening to keep the air out.