How to stencil a wall
Random stencilling involves applying stencil designs to portions of the wall to suggest a hand painted design. The cherry blossom design featured below consists of a sheet of component parts that you can arrange and combine to create designs that mimic the natural growth of cherry tree branches.
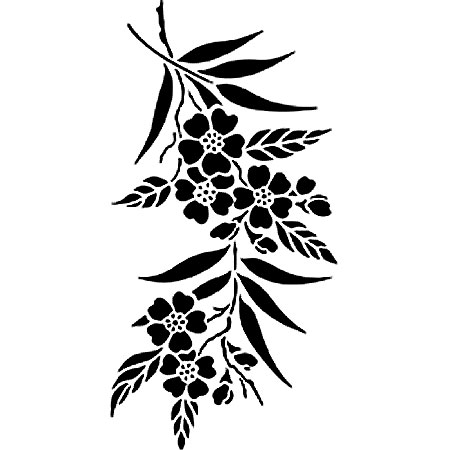
Cherry Blossom

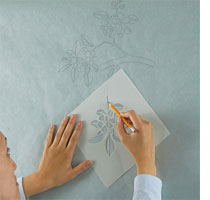
Working on tracing paper, practice assembling the various parts of the stencil to build a design that works in your room. This drawing will guide you when you move to the wall, but you'll still have creative freedom to change the position of the stencils since there are no guidelines drawn on the wall.
To emphasise the hand-painted effect, try applying the paint more lightly at the edges of the stencil for a faded effect or vary the tones of the blossoms and leaves to create interest. When shading, always start with the lightest colour and finish with the darkest. Mistakes can simply be painted out and redone.
YOU WILL NEED:
Drop cloth
Paint tray and paint roller
Scissors
Pencil
10cm tapered trim brush
Stencil brush
Small artist's brush
Prominent Paints - satin for base coat - S0510-B10G pale blue
Prominent Paints - satin for top coat -chocolate brown
Masking tape
Spray adhesive
Scrap cardboard
Lint-free cotton cloths or paper towels
Stir sticks
Cherry Blossom stencil (or make your own)
Roll of tracing paper
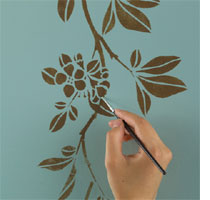
For the cherry blossom design you will use a cherry blossom stencil to add detail to freehand drawn and painted branches. Use a artist's paintbrush to apply chocolate brown branches.
HERE'S HOW:
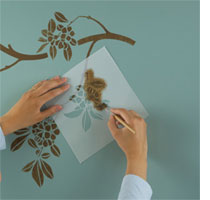
1. Begin with the larger branches coming from the ceiling or from behind a window and alternate blossoms and branches using smaller branch sections as the limb extends.
2. When you are comfortable building the design, dip the stencil brush into a small amount of chocolate brown paint and tap out onto a scrap board until the paint is evenly distributed on the bristle ends. For light areas or fading, wipe the brush first onto a paper towel or cotton cloth. Hold the stencil section in position or spray the back with adhesive and use a light circular tapping motion to fill in the stencil. Allow each application to dry slightly before adding to it. Once you have a number of branches started, you can move around while you are waiting for areas to dry.
3. When you approach the end of the branch, trace only part of the blossom or leaves, tapering off or fading the patterns. Isolate a blossom on one of the stencil parts by taping off the surrounding leaves. Scatter a couple of falling blossoms down the wall and repeat with a couple small leaves, as if they are falling to the floor. Continue this process until completed.
4. Use the pale blue base color and a small artist’s liner brush and define the area where the patterns overlapped. For example, retrace the edge of a leaf or petal that has overlapped a branch. This will keep the design from looking flat or muddy. Remove tape and allow to dry.
Print out the cherry blossom below and enlarge to the required size. Copy onto a piece of plastic or cardstock and cut out as your stencil.